Introduction
Let me introduce my self, Who is Fadhil? Fadhil Riyanto (real-name), is a self-taught system programmer (also backend programmer sometimes) which live in Indonesian, This is some short & dirty tutorial about computer science and litte about math.
I believe, this piece of information is a building block to become Signed-off-by: Fadhil Riyanto <fadhil.riyanto@intel.com>
mirrors: blog.fadhils.eu.org
Contributing
Found a mistake? You can freely DM me on telegram or just email me on
- me@fadev.org (primary, fast respond)
- fadhilriyanto@duck.com (gmail mirror)
- fadhil.riyanto@gnuweeb.org (alternative-1)
- xor@3xploit.dev (alternative-2)
helping translating
that is very welcomed, you can start inspecting my repos. any contribution is appreciated, even just fix a typo (believe me). the target language is mosly english language.
other intresting site
Language
Because I'm indonesian, some part of this website may written in indonesian. But I will try to translating it into english language.
Note
[EN] If you found a mistake, let me know. BIG thanks!
[ID] Jika kamu menemukan sesuatu yang sepertinya itu salah, bisa langsung kasih kabar ke saya. Terimakasih.
Footnote section
- Fadhil Journal & Notes © 2023 by Fadhil Riyanto is licensed under CC BY-SA 4.0


todo
- MAKE:
./server/php-fpm-config.mdbook - COMPLETION:
./database/postgresql_system_table - COMPLETION:
./database/postgresql_functions - MAKE:
./crypto/ca-certificates - MAKE: "freeRADIUS deploy"
System programming
GNU linker scripts journey
first, we need to know about sections, lets take a look, nice stuff
- https://mcyoung.xyz/2021/06/01/linker-script/#appendix
- https://docs.redhat.com/en/documentation/red_hat_enterprise_linux/4/html/red_hat_enterprise_linux_4_-_archived_documents/index#using_ld_the_gnu_linker
lets start with make very simple library
// gcc -c libcall.c

extern int random_me;

/* this is .text section */
int lib_call(const char* str) {
        (void)str;

        /* this is .bss */
        static int im_counting;
        im_counting++;
}
then, run nm libcall.o

as we can see, b (lowercase) means the bss section is not exported, while T (uppercase) means .text is exported. then, lets call lib_call function from run function (in other file), say the file is run.c which has contents
// gcc -c run.c
extern int  lib_call(const char* str);

void run(void) {
        /* this will be .data */
        static int data = 5;
        data = lib_call("im a .rodata");
}
again, we got this

the U uppercase is means, the lib_call is undefined. now how we can resolve it?
first, lets link run.o
> gcc run.o
/usr/bin/ld: /usr/lib/gcc/x86_64-pc-linux-gnu/15.1.1/../../../../lib/Scrt1.o: in function `_start':
(.text+0x1b): undefined reference to `main'
/usr/bin/ld: run.o: in function `run':
run.c:(.text+0xf): undefined reference to `lib_call'
collect2: error: ld returned 1 exit status
[ads] if you want automate it, use Makefile instead
CC = gcc

stage_1_libcall: libcall.c
	gcc -c libcall.c
	ar r libcall.a libcall.o


stage_2_run: run.c
	gcc -c run.c

stage_3: stage_1_libcall stage_2_run
	gcc run.o -L. -lcall -nostartfiles

clean:
	rm -f a.out
	rm -f libcall.a
	rm -f libcall.o
	rm -f run.o
back to linker, lets run make stage_3, and check for nm a.out. supraisingly, the lib_call is not undefined again. thanks for ld

objdump

ld
now, our task. how to rearrange this order. lets create our link.ld
ENTRY(run)
SECTIONS {
    .text : {
        *(.text);
        *(.text.*)
    }

    .bss : {
        *(.bss);
        *(.bss.*)
    }

    .data : {
        *(.data);
        *(.data.*)
    }

    .rodata : {
        *(.rodata);
        *(.rodata.*)
    }
}
v2:
ENTRY(run)

PHDRS {
    text PT_LOAD FLAGS(5); /* RX */
    data PT_LOAD FLAGS(6); /* RW */
}

SECTIONS {
    . = 0x10000;

    .text : {
        *(.text);
        *(.text.*)
    } :text

    .rodata : {
        *(.rodata);
        *(.rodata.*)
    } :text

    .data : {
        *(.data);
        *(.data.*)
    } :data

    .bss : {
        *(.bss);
        *(.bss.*)
        *(COMMON)
    } :data
}
GNU linker scripts 2
first, in this section I will fix all of inconsistency in ld-script.md
what is section
An object file is divided into sections containing different types of data. In the most common case, there are three sections: the text section, which holds instructions and read-only data; the data section, which holds initialized writable data; and the bss section, which holds uninitialized data. Some systems have other kinds of sections.
source: https://gcc.gnu.org/onlinedocs/gcc-8.3.0/gccint/Sections.html
my tldr is
- .data = static initialized variable
- .bss = static uninitialized variable
- .rodata = hold read only data
- .shstrtab = display all section text
- .symtab = symbol section
- .rel = relocation
Linker playground
/* extern.c */

int lib_call(const char *str) {
        (void)str;

        static int count;
        count++;
}
/* run.c */

extern int  lib_call(const char* str);

void run(void) {
        /* this will be .data */
        static int data = 5;

        data = lib_call("im a .rodata");
}
// startfiles.S

.extern run

.global main

main:
        call run
        xor    %eax,%eax
        ret
our linker script, named link.ld
ENTRY(run)

PHDRS {
        text PT_LOAD FLAGS(5); /* RX */
        data PT_LOAD FLAGS(6); /* RW */
}

SECTIONS {
        .text : {
                *(.text);
                *(.text.*)
        } : text

        .rodata : {
                *(.rodata);
                *(.rodata.*)
        }

        .data : {
                *(.data);
                *(.data.*)
        }

        .bss : {
                *(.bss);
                *(.bss.*)
        }
}
compile using
clang -c extern.car rc libextern.a extern.o
we get libextern.a, which statically libraries, link it with
clang run.o -L. -lextern -nostartfiles
or optionally, let's use makefile
mk_libextern: extern.c
	clang -c extern.c
	ar rc libextern.a extern.o

mk_run: run.c
	clang -c run.c

all: mk_libextern mk_run
	clang run.o -L. -lextern -nostartfiles

all_custom_ld: mk_libextern mk_run
	clang run.o -L. -lextern -nostartfiles -nostdlib -Wl,-T,link.ld -v

clean:
	rm -f a.out
	rm -f libextern.a
	rm -f extern.o
	rm -f run.o
testing time

why 0000000000000000 *UND* 0000000000000000 lib_call is undefined? because we dont link it with libextern, so linker need to do symbol resolution
here the final executable

Linker scripts are text files. https://sourceware.org/binutils/docs/ld/Script-Format.html, right. because of its text files, it has a rules
https://sourceware.org/binutils/docs/ld/Script-Format.html
there that I thing the roadmap
x86_64 playground
use this IF You want do some nice playground (that actually run'able). also

in this blog, each .text section from many *.o file, will be merged together. I'll proof it
create entrypoint
save this file as startup.S, this contain _start that will be our entry
see? its call main
// startup.S
.global _start
_start:
    call main
    mov $60, %rax
    mov %eax, %edi
    syscall
create our main
/* main.c */
int global_var = 42;

extern int lib_call(const char *str);

static inline long sys_write(int fd, const void *buf, unsigned long count) {
        long ret;
        __asm__ volatile("syscall"
                         : "=a"(ret)
                         : "a"(1), "D"(fd), "S"(buf), "d"(count)
                         : "rcx", "r11", "memory");
        return ret;
}

static inline __attribute__((noreturn)) void sys_exit(int status) {
        __asm__ volatile("syscall"
                         :
                         : "a"(60),
                           "D"(status)
                         : "rcx", "r11", "memory");
        __builtin_unreachable();
}

int main(void) {
        lib_call("a");
        sys_write(1, "hey\n", 4);
        while (1) {
        }
        return 0;
}
but where lib_call go off? let's create extern.c
the extern.o library
int lib_call(const char *str) {
        (void)str;

        static int count;
        count++;
}
linker
then, the linker.ld (this is the our experiment)
ENTRY(_start)

SECTIONS {
    . = 0x100000;

    .text : {
        *(.text*)
    }

    .rodata : {
        *(.rodata*)
    }

    .data : {
        *(.data*)
    }

    .bss : {
        *(.bss*) *(COMMON)
    }
}
makefile
mk_extern: extern.c
	clang -c extern.c -o extern.o

mk_main: main.c
	clang -c main.c -o main.o

mk_startup: startup.S
	clang -c startup.S -o startup.o

mk_all: mk_startup mk_main mk_extern
	clang -v -nostdlib -no-pie -T linker.ld startup.o main.o extern.o -o prog.elf

clean:
	rm -f main.o
	rm -f extern.o
	rm -f prog.elf
compile with make mk_all
binary analysis
let's decompile each object file with objdump -d -s .text <filename>, and here the result
extern.c
/**
 * this is objdump for extern.c
 */

fadhil_riyanto@integral2: 21:58:36 08/16/25 $ objdump -d -j .text ./extern.o

./extern.o:     file format elf64-x86-64


Disassembly of section .text:

0000000000000000 <lib_call>:
   0:	55                   	push   %rbp
   1:	48 89 e5             	mov    %rsp,%rbp
   4:	48 89 7d f0          	mov    %rdi,-0x10(%rbp)
   8:	8b 05 00 00 00 00    	mov    0x0(%rip),%eax        # e <lib_call+0xe>
   e:	83 c0 01             	add    $0x1,%eax
  11:	89 05 00 00 00 00    	mov    %eax,0x0(%rip)        # 17 <lib_call+0x17>
  17:	8b 45 fc             	mov    -0x4(%rbp),%eax
  1a:	5d                   	pop    %rbp
  1b:	c3                   	ret
main.c
/**
 * this is objdump for main.c
 */
fadhil_riyanto@integral2: 22:22:47 08/16/25 $ objdump -d -j .text ./main.o

./main.o:     file format elf64-x86-64


Disassembly of section .text:

0000000000000000 <main>:
   0:	55                   	push   %rbp
   1:	48 89 e5             	mov    %rsp,%rbp
   4:	48 83 ec 10          	sub    $0x10,%rsp
   8:	c7 45 fc 00 00 00 00 	movl   $0x0,-0x4(%rbp)
   f:	48 8d 3d 00 00 00 00 	lea    0x0(%rip),%rdi        # 16 <main+0x16>
  16:	e8 00 00 00 00       	call   1b <main+0x1b>
  1b:	bf 01 00 00 00       	mov    $0x1,%edi
  20:	48 8d 35 00 00 00 00 	lea    0x0(%rip),%rsi        # 27 <main+0x27>
  27:	ba 04 00 00 00       	mov    $0x4,%edx
  2c:	e8 0f 00 00 00       	call   40 <sys_write>
  31:	eb fe                	jmp    31 <main+0x31>
  33:	66 66 66 66 2e 0f 1f 	data16 data16 data16 cs nopw 0x0(%rax,%rax,1)
  3a:	84 00 00 00 00 00

0000000000000040 <sys_write>:
  40:	55                   	push   %rbp
  41:	48 89 e5             	mov    %rsp,%rbp
  44:	89 7d fc             	mov    %edi,-0x4(%rbp)
  47:	48 89 75 f0          	mov    %rsi,-0x10(%rbp)
  4b:	48 89 55 e8          	mov    %rdx,-0x18(%rbp)
  4f:	8b 7d fc             	mov    -0x4(%rbp),%edi
  52:	48 8b 75 f0          	mov    -0x10(%rbp),%rsi
  56:	48 8b 55 e8          	mov    -0x18(%rbp),%rdx
  5a:	b8 01 00 00 00       	mov    $0x1,%eax
  5f:	0f 05                	syscall
  61:	48 89 45 e0          	mov    %rax,-0x20(%rbp)
  65:	48 8b 45 e0          	mov    -0x20(%rbp),%rax
  69:	5d                   	pop    %rbp
  6a:	c3                   	ret
startup.S
/**
 * this is objdump for startup.S
 */
fadhil_riyanto@integral2: 22:23:17 08/16/25 $ objdump -d -j .text ./startup.o

./startup.o:     file format elf64-x86-64


Disassembly of section .text:

0000000000000000 <_start>:
   0:	e8 00 00 00 00       	call   5 <_start+0x5>
   5:	48 c7 c0 3c 00 00 00 	mov    $0x3c,%rax
   c:	89 c7                	mov    %eax,%edi
   e:	0f 05                	syscall
overall
fadhil_riyanto@integral2: 22:25:06 08/16/25 $ objdump -d -j .text prog.elf

prog.elf:     file format elf64-x86-64


Disassembly of section .text:

0000000000100000 <_start>:
  100000:	e8 0b 00 00 00       	call   100010 <main>
  100005:	48 c7 c0 3c 00 00 00 	mov    $0x3c,%rax
  10000c:	89 c7                	mov    %eax,%edi
  10000e:	0f 05                	syscall

0000000000100010 <main>:
  100010:	55                   	push   %rbp
  100011:	48 89 e5             	mov    %rsp,%rbp
  100014:	48 83 ec 10          	sub    $0x10,%rsp
  100018:	c7 45 fc 00 00 00 00 	movl   $0x0,-0x4(%rbp)
  10001f:	48 8d 3d 76 00 00 00 	lea    0x76(%rip),%rdi        # 10009c <lib_call+0x1c>
  100026:	e8 55 00 00 00       	call   100080 <lib_call>
  10002b:	bf 01 00 00 00       	mov    $0x1,%edi
  100030:	48 8d 35 67 00 00 00 	lea    0x67(%rip),%rsi        # 10009e <lib_call+0x1e>
  100037:	ba 04 00 00 00       	mov    $0x4,%edx
  10003c:	e8 0f 00 00 00       	call   100050 <sys_write>
  100041:	eb fe                	jmp    100041 <main+0x31>
  100043:	66 66 66 66 2e 0f 1f 	data16 data16 data16 cs nopw 0x0(%rax,%rax,1)
  10004a:	84 00 00 00 00 00

0000000000100050 <sys_write>:
  100050:	55                   	push   %rbp
  100051:	48 89 e5             	mov    %rsp,%rbp
  100054:	89 7d fc             	mov    %edi,-0x4(%rbp)
  100057:	48 89 75 f0          	mov    %rsi,-0x10(%rbp)
  10005b:	48 89 55 e8          	mov    %rdx,-0x18(%rbp)
  10005f:	8b 7d fc             	mov    -0x4(%rbp),%edi
  100062:	48 8b 75 f0          	mov    -0x10(%rbp),%rsi
  100066:	48 8b 55 e8          	mov    -0x18(%rbp),%rdx
  10006a:	b8 01 00 00 00       	mov    $0x1,%eax
  10006f:	0f 05                	syscall
  100071:	48 89 45 e0          	mov    %rax,-0x20(%rbp)
  100075:	48 8b 45 e0          	mov    -0x20(%rbp),%rax
  100079:	5d                   	pop    %rbp
  10007a:	c3                   	ret
  10007b:	0f 1f 44 00 00       	nopl   0x0(%rax,%rax,1)

0000000000100080 <lib_call>:
  100080:	55                   	push   %rbp
  100081:	48 89 e5             	mov    %rsp,%rbp
  100084:	48 89 7d f0          	mov    %rdi,-0x10(%rbp)
  100088:	8b 05 da 00 00 00    	mov    0xda(%rip),%eax        # 100168 <lib_call.count>
  10008e:	83 c0 01             	add    $0x1,%eax
  100091:	89 05 d1 00 00 00    	mov    %eax,0xd1(%rip)        # 100168 <lib_call.count>
  100097:	8b 45 fc             	mov    -0x4(%rbp),%eax
  10009a:	5d                   	pop    %rbp
  10009b:	c3                   	ret
this show us that .text is actually merged. but how it works?!
debug crash before runtime
thanks for https://stackoverflow.com/questions/7808769/how-to-debug-a-crash-before-main/30142423#30142423
let's break a thing!

this is normal program, the _start is on 0x10000000, let break it

as you can see, its start from 0x0, let run it

notes: the hey is previos attempt. nvm, now how debug it
run as usual GDB

here the entrypoint is 0x0
nm
nm is a abbr of name, in linux. this tool is used to inspect binary section
example

> nm libcall.o
0000000000000000 T lib_call
0000000000000000 b lib_call.im_counting
capital letter mean, the symbol is exported
How data movement changes a destination register
This snippets is from "Computer Systems A Programmer’s Perspective, by Randal E. Bryant and David R. O’Hallaron"
As described, there are two different conventions regarding whether and how data movement instruc- tions modify the upper bytes of a destination register. This distinction is illustrated by the following code sequence:
1 movabsq $0x0011223344556677, %rax %rax = 0011223344556677
2 movb $-1, %al %rax = 00112233445566FF
3 movw $-1, %ax %rax = 001122334455FFFF
4 movl $-1, %eax %rax = 00000000FFFFFFFF
5 movq $-1, %rax %rax = FFFFFFFFFFFFFFFF
In the following discussion, we use hexadecimal notation. In the example, the instruction on line 1 initializes register %rax to the pattern 0011223344556677. The remaining instructions have immediate value −1 as their source values. Recall that the hexadecimal representation of −1 is of the form FF. . .F, where the number of F’s is twice the number of bytes in the representation. The movb instruction (line 2) therefore sets the low-order byte of %rax to FF, while the movw instruction (line 3) sets the low-order 2 bytes to FFFF, with the remaining bytes unchanged. The movl instruction (line 4) sets the low-order 4 bytes to FFFFFFFF, but it also sets the high-order 4 bytes to 00000000. Finally, the movq instruction (line 5) sets the complete register to FFFFFFFFFFFFFFFF.
some useful links
General embedded ASM linked in C
this is program is succesfully compiled with as, but failed to run due to SIGSEGV.
this is will fail
.data
val:
    .byte 0xF6
    .byte 0xF6
    .byte 0xF6
    .byte 0xF6


.globl do_asm

do_asm:
    # movl 0x12345678, %eax
    # movl 0xAABBCCDD, %edx

    # # move edx 8 bit high into al (eax)
    # movb %dh, %al


    movq $9, %rax
    ret
this is will compile
.data
val:
    .byte 0xF6
    .byte 0xF6
    .byte 0xF6
    .byte 0xF6


.globl do_asm

.text
do_asm:
    # movl 0x12345678, %eax
    # movl 0xAABBCCDD, %edx

    # # move edx 8 bit high into al (eax)
    # movb %dh, %al


    movq $9, %rax
    ret
the difference only in .text section
Move sign & zero-extends a single byte
Disini saya akan membahas apa itu instruksi MOVSBL dan MOVZBL. pertama tama silahkan baca dulu disini
MOVSBL and MOVZBL
* MOVSBL sign-extends a single byte, and copies it into a
  double-word destination
* MOVZBL expands a single byte to 32 bits with 24 leading
  zeros, and copies it into a double-word destination
pertama tama, lihat kode asm ini.
.section .data
val:
    .byte 0xF6
    .byte 0xF6
    .byte 0xF6
    .byte 0xF6


.globl do_asm

.text
do_asm:
    movl $0x12345678, %eax
    movl $0xAABBCCDD, %edx

    # move edx 8 bit high into al (eax)
    movb %dh, %al

    # reset
    movl $0x12345678, %eax
    movl $0xAABBCCDD, %edx

    MOVSBL %dh, %eax

    # reset
    movl $0x12345678, %eax
    movl $0xAABBCCDD, %edx

    MOVZBL %dh, %eax


    movq $9, %rax
    ret
dan ini hasilnya, movb biasa (tanpa hapus bagian atas data, bagian atas tetep utuh)

ini hasil signed bagian atas

ini hasil ketika bagian atas kita zerokan

catatan
movb %dh, %al memindahkan rdx bagian high ke rax bagian bawah.
movabsq
simplenya, ini kepanjangan dari move absolute quad word (64 bit) contoh kecil

itu contoh initial moveabsq int 64 bit, lalu
 contoh move 1 bytes
 move 16 bit, 2 bytes word
 move 32 bit, 4 bytes, tapi disini keformat sebagai int32 wkwk
 full 64 bit move
x86_64 register (fiks technical grade)

analisis kenapa pakai movabsq, daripada movq
movq hanya bisa accept integer
analisis patch movq pakai 0xffffffff
ada asm

kita akan memaksa dari 0x7fffffff menjadi 0xffffffff untuk membuktikan bahwa harusnya movq error, dan digantikan oleh movabsq
initial dulu

lalu, next replace address 0x555555555119 dengan
set {unsigned char[8]}0x555555555119 = {0x48, 0xc7, 0xc0, 0xff, 0xff, 0xff, 0xff, 0x90}
confirmed berubah jadi 0xffffffff disini

saatnya kita lanjutkan, apakah error

ext4 unknown RO compact features
this error come from linux kernel
	/* Check that feature set is OK for a read-write mount */
	if (ext4_has_unknown_ext4_ro_compat_features(sb)) {
		ext4_msg(sb, KERN_ERR, "couldn't mount RDWR because of "
			 "unsupported optional features (%x)",
			 (le32_to_cpu(EXT4_SB(sb)->s_es->s_feature_ro_compat) &
				~EXT4_FEATURE_RO_COMPAT_SUPP));
		return 0;
	}
which EXT4_FEATURE_RO_COMPAT_SUPP
#define EXT4_FEATURE_RO_COMPAT_SUPP	(EXT4_FEATURE_RO_COMPAT_SPARSE_SUPER| \
					 EXT4_FEATURE_RO_COMPAT_LARGE_FILE| \
					 EXT4_FEATURE_RO_COMPAT_GDT_CSUM| \
					 EXT4_FEATURE_RO_COMPAT_DIR_NLINK | \
					 EXT4_FEATURE_RO_COMPAT_EXTRA_ISIZE | \
					 EXT4_FEATURE_RO_COMPAT_BTREE_DIR |\
					 EXT4_FEATURE_RO_COMPAT_HUGE_FILE |\
					 EXT4_FEATURE_RO_COMPAT_BIGALLOC |\
					 EXT4_FEATURE_RO_COMPAT_METADATA_CSUM|\
					 EXT4_FEATURE_RO_COMPAT_QUOTA |\
					 EXT4_FEATURE_RO_COMPAT_PROJECT |\
					 EXT4_FEATURE_RO_COMPAT_VERITY |\
					 EXT4_FEATURE_RO_COMPAT_ORPHAN_PRESENT)
#define EXT4_FEATURE_RO_COMPAT_GDT_CSUM 0x0010
https://git.kernel.org/pub/scm/linux/kernel/git/torvalds/linux.git/tree/fs/ext4/ext4.h#n2188
https://git.kernel.org/pub/scm/linux/kernel/git/torvalds/linux.git/tree/fs/ext4/ext4.h#n2024
qemu custom cpio HDA
skrip init custom linux
qemu-system-x86_64 \-kernel ./vmlinux \
                                                 -nographic \
                                                 --append "console=tty0 console=ttyS0 panic=1 root=/dev/sda rootfstype=ext2" \
                                                 -hda root.img \
                                                 -m 1024 \
                                                 -vga none \
                                                 -display none \
                                                 -serial mon:stdio \
                                                 -no-reboot \
                                                 -initrd vfs/root.cpio.gz
generate cpio
find . | cpio -o -H newc | gzip > root.cpio.gz
``
step TCP
TCP steps
- isi dulu sockaddr_storage, isi pakai inet_pton(); .so_family = AF_INET; sin_port = htons(port)
- syscall socket(AF_INET, SOCK_STREAM, 0);
- setsocksopt(fd, SO_REUSEADDR = 1)
- bind(fd, ss_addr (cast dulu ke sockaddr_in), len nya)
- listen()
penjelasan ttg kenapa pakai sockaddr_storage dipakai https://stackoverflow.com/questions/19528820/difference-between-sockaddr-and-sockaddr-storage
kenapa harus setsocksopt SO_REUSEADDR? karna jika tidak, TCP Masuk ke timewait state.
sekiranya itu aja sih step TCP ini. untuk UDP pakai aja dgram.
GDB attach
jadi ceritanya, ada bug yg kala di run di terminal, ia buggy, pas di run di gdb, dia gak error sama sekali
gw bingung dah, nah disini. ternyata ada trick nya
-
jalanin dulu programnya kek biasa di terminal, dah running kan
-
ambil pid nya pakai ps aux | grep xyz
-
setelah dapet pid nya, jalankan gdb dengan mode attach pid
pakai sudo gdb -p 12345
- program akan freeze sejenak, pencet
c,enter
nah, lakukan cara yg dipake buat reproduce bug nya, misal pakai nc buat nyepam tcp ke program. ok dapet bug nya
ni kalau kata orang internet, beberapa bug kek app multi thread agak susah di caught. pakai valgrind pun perlu flags2 khusus buat inspect sampai thread nya
hasil oprek socket programming, case socks5 server
bagian IETF SOCKS5 section 6
https://datatracker.ietf.org/doc/html/rfc1928#section-6
BND.ADDR haruslah berupa IPV4/IPV6 address, bukan domain :)
secara general, bentuk packet yg akan dikirim untuk versi IPV4 seperti ini
[0] [VER] => 0x5
[1] [REP] => 0x0
[2] [RSV] => 0x0
[3] [ATYP] => 0x1 atau 0x4
[4] [BND.ADDR] 0xac
[5] [BND.ADDR] 0x43
[6] [BND.ADDR] 0x93
[7] [BND.ADDR] 0x39
[8] [BND.PORT] 0x50
[9] [BND.PORT] 0x50
maka perhitungannya memory awal + 4 (karna 4 field dah dipakai), start dari sini, insert 4 oktet lagi ipv4 address, lalu insert 2 oktet uint8 sebagai port.
bagian BND.PORT itu unsigned int 16 bit. jadi harus digabung bitnya + diubah dari network order ke host order
fix ncurses kernel build
suppose
*** Unable to find the ncurses libraries or the
 *** required header files.
 *** 'make menuconfig' requires the ncurses libraries.
 ***
 *** Install ncurses (ncurses-devel) and try again.
 ***
make[2]: *** [/home/fadhil_riyanto/linux-kernel/busybox-1.37.0/scripts/kconfig/lxdialog/Makefile:15: scripts/kconfig/lxdialog/dochecklxdialog] Error 1
make[1]: *** [/home/fadhil_riyanto/linux-kernel/busybox-1.37.0/scripts/kconfig/Makefile:14: menuconfig] Error 2
make: *** [Makefile:444: menuconfig] Error 2
maka solusi
nano scripts/kconfig/lxdialog/Makefile
ubah
always := $(hostprogs-y) dochecklxdialog
PHP-SRC variadic params
the source code: https://github.com/php/php-src/blob/ba6c00505d4218ff9fe4feb060f636524acfb125/ext/standard/array.c#L1204
mayan ngebantu jg gw ngepahami variadic params di php. ref: https://www.zend.com/resources/php-extensions/basic-php-structures
selfnote :
ZEND_PARSE_PARAMETERS_START(num_required_args, num_max_args) Z_PARAM_VARIADIC('*' or '+', destptr, argc);
catatan:
- * nol atau lebih parameter
- + satu atau lebih parameter
nb: akan diupdate berkala
ref: https://wiki.php.net/rfc/fast_zpp
PHP-SRC minit()
https://github.com/php/php-src/blob/3704947696fe0ee93e025fa85621d297ac7a1e4d/main/main.c#L2009
Ketika module PHP diload ke zend engine, yang dipanggil adalah MINIT(), di step ini yg terjadi cuman memory alokasi di ZendMM, dan disini engga ada process atau thread yg dijalan, pure cuman initialisasi data
nah, yang mentrigger MINIT() adalah zend_startup_modules(), trus secara beurutan, ia jg manggil RINIT() via PHP_RINIT_FUNCTION()
struct nya
 zend_result (*request_startup_func)(INIT_FUNC_ARGS);
gcc compiler visibility
intresting buat diulik
class rectangle {
        int width, height;

        public:
                void set_value(int, int);
                int area();
};

void rectangle::set_value(int x, int y)
{
        width = x;
        height = y;
}


int rectangle::area()
{
        return width * height;
}
compile pakai
g++ -Wall -c -fPIC abc.ccg++ -o librec.so --shared abc.onm -C librec.so
akan ada
000000000000110e T rectangle::area()
00000000000010ea T rectangle::set_value(int, int)
nah, disitu kalau di compile pakai -fvisibility=hidden
ntar pas di cek pakai
nm -CD librec.so
bakalan gak ada. nah ini ada kaitannya sama
__attribute__ ((visibility ("hidden")))
tambahan: https://groups.google.com/g/ode-users/c/T3qiy-4dviQ
load effective address
computes a memory address using the same arithmetic that a MOV instruction uses. But unlike the MOV instruction, the LEA instruction just stores the computed address in its target register, instead of loading the contents of that address and storing it.
Consider your first LEA instruction:
tldr nya: mov bisa mengkalkulasi operasi aritmetika dari alamat memori, trus ngambil isinya kalau lea, ia cuman mengkalkulasi alamatnya, hasil itung2an nya disimpan ke operand2
lea -0x18(%ebp), %ebx
tambahan catatan
mov (op1, op2, op3), dest
equal (pseudo): mov op1 + op2 * op3, dest
and lea op1(op2), dest
equal lea op2 + op1, dest (address of op2 + op1, store result into dest)
bahasan tentang rip https://stackoverflow.com/questions/54745872/how-do-rip-relative-variable-references-like-rip-a-in-x86-64-gas-intel-sy
AT&T asm prelude
push eax equal with: mov [esp], eax sub esp, 4
pop eax get values out of stack equal with
add rsp, 4 mov eax, [esp]
printf format specifier
general
%[flags][width][.precision][length]specifier
flag
| Flag | Description |
|---|---|
- | Left-justify: The result is left-aligned within the specified field width. By default, it is right-aligned. |
+ | Sign: The result of a signed conversion will always begin with a sign (+ or -). By default, only negative values have a sign. |
(space) | Space: If the first character of a signed conversion is not a sign, a space is prepended. This is ignored if the + flag is present. |
# | Alternate Form: For o, the output is prefixed with 0. For x and X, it's prefixed with 0x and 0X respectively. For a, A, e, E, f, F, g, and G, the output will always contain a decimal point. |
0 | Zero-padding: For numeric types, the output is padded with leading zeros instead of spaces to fill the field width. This is ignored if the - flag is present. |
width
The width sub-specifier sets the minimum number of characters to be printed.
| Width | Description |
|---|---|
number | A non-negative integer specifying the minimum number of characters to print. If the printed value is shorter, it is padded with spaces (or zeros if the 0 flag is used). |
* | The width is not specified in the format string itself, but as an additional integer argument preceding the argument to be formatted. |
precision
| Precision | Description |
|---|---|
.number | For integer specifiers (d, i, u, o, x, X), it specifies the minimum number of digits to be written. For e, E, and f, it is the number of digits to appear after the decimal point. For g and G, it's the maximum number of significant digits. For s, it's the maximum number of characters to be printed. |
.* | The precision is not specified in the format string itself, but as an additional integer argument preceding the argument to be formatted. |
length
| Modifier | For Integer Specifiers (d, i, u, o, x, X) | For Floating-Point Specifiers (f, e, g, a) |
|---|---|---|
h | short int or unsigned short int | - |
hh | signed char or unsigned char | - |
l | long int or unsigned long int | - |
ll | long long int or unsigned long long int | - |
L | - | long double |
j | intmax_t or uintmax_t | - |
z | size_t or the corresponding signed type | - |
t | ptrdiff_t or the corresponding unsigned type | - |
specifier
| Specifier | Data Type | Output Format |
|---|---|---|
%c | char | A single character. |
%s | char* | A string of characters. |
%d or %i | int | Signed decimal integer. |
%u | unsigned int | Unsigned decimal integer. |
%o | unsigned int | Unsigned octal integer. |
%x | unsigned int | Unsigned hexadecimal integer (lowercase letters). |
%X | unsigned int | Unsigned hexadecimal integer (uppercase letters). |
%f | double | Decimal floating-point number. |
%F | double | Decimal floating-point number (uppercase 'INF' and 'NAN'). |
%e | double | Scientific notation (lowercase 'e'). |
%E | double | Scientific notation (uppercase 'E'). |
%g | double | Uses the shorter of %f or %e. |
%G | double | Uses the shorter of %F or %E. |
%a | double | Hexadecimal floating-point number (lowercase 'p'). |
%A | double | Hexadecimal floating-point number (uppercase 'P'). |
%p | void* | Pointer address. |
%n | int* | The number of characters written so far is stored in the integer pointed to by the argument. Nothing is printed. |
%% | None | A literal '%' character is printed. |
predefined macros
links: https://gcc.gnu.org/onlinedocs/cpp/Standard-Predefined-Macros.html clang spesific: https://clang.llvm.org/docs/LanguageExtensions.html
vt-hexdump
/* SPDX-License-Identifier: GPL-2.0-only */
/*
 * Copyright (C) Fadhil Riyanto <fadhil.riyanto@gnuweeb.org>
 *
 * this version is inspired by Ammar Faizi's versions
 * ref: https://gist.githubusercontent.com/ammarfaizi2/e88a21171358b5092a3df412eeb80b2f/raw/59141b48f59b70b1e96208716c45b1703c56daa7/vt_hexdump.h
 */

#include <complex.h>
#include <stddef.h>
#include <stdint.h>
#include <stdio.h>
#include <string.h>

#ifndef VT_HEXDUMP_COLOR
#define VT_HEXDUMP_COLOR(fmt, vt_hexdump_hex)                                   \
        char current_hex = (char)vt_hexdump_hex;                                \
                                                                                \
        if (current_hex == 0x7F) {                                              \
                printf("\033[1;31m" fmt "\033[0m", vt_hexdump_hex);             \
        } else if (current_hex == 0xFF) {                                       \
                printf("\033[1;34m" fmt "\033[0m", vt_hexdump_hex);             \
        } else if (current_hex == 0x00) {                                       \
                printf("\033[1;37m" fmt "\033[0m", vt_hexdump_hex);             \
        } else {                                                                \
                printf("\033[1;32m" fmt "\033[0m", vt_hexdump_hex);             \
        }                                                                       \

#endif /* VT_HEXDUMP_COLOR */

#define VT_TITLE(PTR, SIZE)                                                     \
        size_t t_ptr_size = SIZE;                                                 \
        unsigned char *t_realptr = (unsigned char*)PTR;                           \
        printf("================= VT_HEXDUMP =================\n");             \
        printf("file\t\t: %s:%d\n", __FILE__, __LINE__);                        \
        printf("func\t\t: %s\n", __FUNCTION__);                                 \
        printf("addr\t\t: 0x%016lx\n", t_realptr);                                \
        printf("dump_size\t: %ld\n\n", t_ptr_size);

#ifndef HEXDUMP
#define HEXDUMP(PTR, SIZE)                                                      \
        size_t ptr_size = SIZE;                                                 \
        unsigned char *realptr = (unsigned char*)PTR;                           \
        unsigned int initial_counter = 0;                                       \
                                                                                \
        int n_loop = (ptr_size / 16) + 1;                                       \
        if (ptr_size % 16 == 0) {                                               \
                n_loop = n_loop - 1;                                            \
        }                                                                       \
                                                                                \
        for (int x = 0; x < 75; x++) {                                          \
                if (x >= 40) {                                                  \
                        printf("16 BYTES WIDE\n");                              \
                        break;                                                  \
                } else {                                                        \
                        printf(" ");                                            \
                }                                                               \
        }                                                                       \
                                                                                \
        for (int x = 0; x < 75; x++) {                                          \
                if (x >= 21 && x <= 73) {                                       \
                        printf("_");                                            \
                } else {                                                        \
                        printf(" ");                                            \
                }                                                               \
        }                                                                       \
        printf("\n");                                                           \
                                                                                \
        for (int i = 0; i < n_loop; i++) {                                      \
                printf("|0x%016lx|", (uintptr_t)(realptr));                     \
                                                                                \
                for (int i = 0; i < 16; i++) {                                  \
                        if (i % 4 == 0 && i != 0) {                             \
                                printf("  ");                                   \
                        }                                                       \
                        if (i != 15) {                                          \
                                if (initial_counter <= ptr_size) {              \
                                        VT_HEXDUMP_COLOR(" %02x", realptr[i]);  \
                                }                                               \
                        } else {                                                \
                                printf(" %02x ", realptr[i]);                   \
                        }                                                       \
                }                                                               \
                                                                                \
                printf(" | ");                                                  \
                for (int i = 0; i < 16; i++) {                                  \
                        if (initial_counter <= ptr_size - 1) {                  \
                                if (realptr[i] >= 32 && realptr[i] <= 126) {    \
                                        printf("%c", realptr[i]);               \
                                } else {                                        \
                                        printf(".", realptr[i]);                \
                                }                                               \
                        } else {                                                \
                                printf(".");                                    \
                        }                                                       \
                        initial_counter = initial_counter + 1;                  \
                }                                                               \
                printf(" | ");                                                  \
                                                                                \
                printf("\n");                                                   \
                realptr = realptr + 16;                                         \
        }
#endif

#ifndef VT_HEXDUMP
#define VT_HEXDUMP(PTR, SIZE)                                                   \
        VT_TITLE(PTR, SIZE);                                                             \
        HEXDUMP(PTR, SIZE);
#endif

ELF64 text only
ELF Types
There are three main types for ELF files.
- An executable file contains code and data suitable for execution. It specifies the memory layout of the process.
- A relocatable file contains code and data suitable for linking with other relocatable and shared object files.
- A shared object file (a.k.a. shared library) contains code and data suitable for the link editor ld at link time and the dynamic linker at run time. The dynamic linker may be called ld.so.1, libc.so.1 or ld-linux.so.1, depending on the implementation.
The most useful part of ELF lies in its section structure. With the right tools and techniques, programmers can manipulate the execution of executables with great flexibility.
source: https://ftp.math.utah.edu/u/ma/hohn/linux/misc/elf/node2.html
big fat ELF docs: https://docs.oracle.com/cd/E19683-01/816-1386/6m7qcoblh/index.html, big thanks to oracle!
ELF64
what is ELF64? ELF64 is Executable and Linkable Format for unix system (mostly), lets look the structure of elf64_hdr
this struct located at beginning of object file, the main usage is locate all other parts of object file. the header (such *.o file contains ELF struct)

preface
this is how ELF file look-like

typedef struct elf64_hdr {
  unsigned char	e_ident[EI_NIDENT];	/* ELF "magic number" */
  Elf64_Half e_type;
  Elf64_Half e_machine;
  Elf64_Word e_version;
  Elf64_Addr e_entry;		/* Entry point virtual address */
  Elf64_Off e_phoff;		/* Program header table file offset */
  Elf64_Off e_shoff;		/* Section header table file offset */
  Elf64_Word e_flags;
  Elf64_Half e_ehsize;
  Elf64_Half e_phentsize;
  Elf64_Half e_phnum;
  Elf64_Half e_shentsize;
  Elf64_Half e_shnum;
  Elf64_Half e_shstrndx;
} Elf64_Ehdr;
the ELF file is always start by this bytes 7f 45 4c 46, which DEL E L F

The first 16 bytes link is a magic number, 7f make sure the text editor, this is not a normal file, this is binary, preventing to open the file. 45 4c 46 is a ELF signature
ELFCLASS
This footage shown program compiled by normal gcc (my machine is 64 bit), vs compiled by -m32

ELF file structure
elf64_hdr: elf headerelf64_shdr: elf section headerelf64_phdr: elf program header
elf64_hdr
the definition
typedef struct elf64_hdr {
  unsigned char e_ident[EI_NIDENT]; /* Magic number and other info */
  Elf64_Half    e_type;      /* Object file type */
  Elf64_Half    e_machine;   /* Architecture */
  Elf64_Word    e_version;   /* Object file version */
  Elf64_Addr    e_entry;     /* Entry point virtual address */
  Elf64_Off     e_phoff;     /* Program header table file offset */
  Elf64_Off     e_shoff;     /* Section header table file offset */
  Elf64_Word    e_flags;     /* Processor-specific flags */
  Elf64_Half    e_ehsize;    /* ELF header size in bytes */
  Elf64_Half    e_phentsize; /* Program header table entry size */
  Elf64_Half    e_phnum;     /* Program header table entry count */
  Elf64_Half    e_shentsize; /* Section header table entry size */
  Elf64_Half    e_shnum;     /* Section header table entry count */
  Elf64_Half    e_shstrndx;  /* Section names string table index */
} Elf64_Ehdr;
link go to the definition
- e_ident: Magic number and other info
- e_type: Object file type
- e_machine: Architecture
- e_version: Object file version
- e_entry: Entry point virtual address
- e_phoff: Program header table file offset
- e_shoff: Section header table file offset
- e_flags: Processor-specific flags
- e_ehsize: ELF header size in bytes
- e_phentsize: Program header table entry size
- e_phnum: Program header table entry count
- e_shentsize: Section header table entry size
- e_shnum: Section header table entry count
- e_shstrndx: Section names string table index
the value (enum like)
e_ident
- INDEX:
[0, 1, 2, 3]
  #define EI_MAG0         0               /* File identification byte 0 index */
  #define ELFMAG0         0x7f            /* Magic number byte 0 */

  #define EI_MAG1         1               /* File identification byte 1 index */
  #define ELFMAG1         'E'             /* Magic number byte 1 */

  #define EI_MAG2         2               /* File identification byte 2 index */
  #define ELFMAG2         'L'             /* Magic number byte 2 */

  #define EI_MAG3         3               /* File identification byte 3 index */
  #define ELFMAG3         'F'             /* Magic number byte 3 */
- INDEX:
[4]
#define ELFCLASSNONE    0               /* Invalid class */
#define ELFCLASS32      1               /* 32-bit objects */
#define ELFCLASS64      2               /* 64-bit objects */
#define ELFCLASSNUM     3
- INDEX:
[5]
#define ELFDATANONE     0               /* Invalid data encoding */
#define ELFDATA2LSB     1               /* 2's complement, little endian */
#define ELFDATA2MSB     2               /* 2's complement, big endian */
#define ELFDATANUM      3
- INDEX:
[6]
#define EI_VERSION      6               /* File version byte index */
                                        /* Value must be EV_CURRENT */
- INDEX:
[7]
#define ELFOSABI_NONE           0       /* UNIX System V ABI */
#define ELFOSABI_SYSV           0       /* Alias.  */
#define ELFOSABI_HPUX           1       /* HP-UX */
#define ELFOSABI_NETBSD         2       /* NetBSD.  */
#define ELFOSABI_GNU            3       /* Object uses GNU ELF extensions.  */
#define ELFOSABI_LINUX          ELFOSABI_GNU /* Compatibility alias.  */
#define ELFOSABI_SOLARIS        6       /* Sun Solaris.  */
#define ELFOSABI_AIX            7       /* IBM AIX.  */
#define ELFOSABI_IRIX           8       /* SGI Irix.  */
#define ELFOSABI_FREEBSD        9       /* FreeBSD.  */
#define ELFOSABI_TRU64          10      /* Compaq TRU64 UNIX.  */
#define ELFOSABI_MODESTO        11      /* Novell Modesto.  */
#define ELFOSABI_OPENBSD        12      /* OpenBSD.  */
#define ELFOSABI_ARM_AEABI      64      /* ARM EABI */
#define ELFOSABI_ARM            97      /* ARM */
#define ELFOSABI_STANDALONE     255     /* Standalone (embedded) application */
- INDEX:
[8]
#define EI_ABIVERSION 8 /* ABI version */
- INDEX:
[9]
#define EI_PAD 9 /* Byte index of padding bytes */
e_type
#define ET_NONE         0               /* No file type */
#define ET_REL          1               /* Relocatable file */
#define ET_EXEC         2               /* Executable file */
#define ET_DYN          3               /* Shared object file */
#define ET_CORE         4               /* Core file */
#define ET_NUM          5               /* Number of defined types */
#define ET_LOOS         0xfe00          /* OS-specific range start */
#define ET_HIOS         0xfeff          /* OS-specific range end */
#define ET_LOPROC       0xff00          /* Processor-specific range start */
#define ET_HIPROC       0xffff          /* Processor-specific range end */
e_machine
#define EM_NONE    0  /* No machine */
#define EM_M32     1  /* AT&T WE 32100 */
#define EM_SPARC   2  /* SUN SPARC */
#define EM_386     3  /* Intel 80386 */
#define EM_68K     4  /* Motorola m68k family */
#define EM_88K     5  /* Motorola m88k family */
#define EM_IAMCU   6  /* Intel MCU */
#define EM_860     7  /* Intel 80860 */
#define EM_MIPS    8  /* MIPS R3000 big-endian */
#define EM_S370    9  /* IBM System/370 */
#define EM_MIPS_RS3_LE  10  /* MIPS R3000 little-endian */
        /* reserved 11-14 */
#define EM_PARISC 15  /* HPPA */
        /* reserved 16 */
#define EM_VPP500 17  /* Fujitsu VPP500 */
#define EM_SPARC32PLUS  18  /* Sun's "v8plus" */
#define EM_960    19  /* Intel 80960 */
#define EM_PPC    20  /* PowerPC */
#define EM_PPC64  21  /* PowerPC 64-bit */
#define EM_S390   22  /* IBM S390 */
#define EM_SPU    23  /* IBM SPU/SPC */
        /* reserved 24-35 */
#define EM_V800   36  /* NEC V800 series */
#define EM_FR20   37  /* Fujitsu FR20 */
#define EM_RH32   38  /* TRW RH-32 */
#define EM_RCE    39  /* Motorola RCE */
#define EM_ARM    40  /* ARM */
#define EM_FAKE_ALPHA 41  /* Digital Alpha */
#define EM_SH   42  /* Hitachi SH */
#define EM_SPARCV9  43  /* SPARC v9 64-bit */
#define EM_TRICORE  44  /* Siemens Tricore */
#define EM_ARC    45  /* Argonaut RISC Core */
#define EM_H8_300 46  /* Hitachi H8/300 */
#define EM_H8_300H  47  /* Hitachi H8/300H */
#define EM_H8S    48  /* Hitachi H8S */
#define EM_H8_500 49  /* Hitachi H8/500 */
#define EM_IA_64  50  /* Intel Merced */
#define EM_MIPS_X 51  /* Stanford MIPS-X */
#define EM_COLDFIRE 52  /* Motorola Coldfire */
#define EM_68HC12 53  /* Motorola M68HC12 */
#define EM_MMA    54  /* Fujitsu MMA Multimedia Accelerator */
#define EM_PCP    55  /* Siemens PCP */
#define EM_NCPU   56  /* Sony nCPU embedded RISC */
#define EM_NDR1   57  /* Denso NDR1 microprocessor */
#define EM_STARCORE 58  /* Motorola Start*Core processor */
#define EM_ME16   59  /* Toyota ME16 processor */
#define EM_ST100  60  /* STMicroelectronic ST100 processor */
#define EM_TINYJ  61  /* Advanced Logic Corp. Tinyj emb.fam */
#define EM_X86_64 62  /* AMD x86-64 architecture */
#define EM_PDSP   63  /* Sony DSP Processor */
#define EM_PDP10  64  /* Digital PDP-10 */
#define EM_PDP11  65  /* Digital PDP-11 */
#define EM_FX66   66  /* Siemens FX66 microcontroller */
#define EM_ST9PLUS  67  /* STMicroelectronics ST9+ 8/16 mc */
#define EM_ST7    68  /* STmicroelectronics ST7 8 bit mc */
#define EM_68HC16 69  /* Motorola MC68HC16 microcontroller */
#define EM_68HC11 70  /* Motorola MC68HC11 microcontroller */
#define EM_68HC08 71  /* Motorola MC68HC08 microcontroller */
#define EM_68HC05 72  /* Motorola MC68HC05 microcontroller */
#define EM_SVX    73  /* Silicon Graphics SVx */
#define EM_ST19   74  /* STMicroelectronics ST19 8 bit mc */
#define EM_VAX    75  /* Digital VAX */
#define EM_CRIS   76  /* Axis Communications 32-bit emb.proc */
#define EM_JAVELIN  77  /* Infineon Technologies 32-bit emb.proc */
#define EM_FIREPATH 78  /* Element 14 64-bit DSP Processor */
#define EM_ZSP    79  /* LSI Logic 16-bit DSP Processor */
#define EM_MMIX   80  /* Donald Knuth's educational 64-bit proc */
#define EM_HUANY  81  /* Harvard University machine-independent object files */
#define EM_PRISM  82  /* SiTera Prism */
#define EM_AVR    83  /* Atmel AVR 8-bit microcontroller */
#define EM_FR30   84  /* Fujitsu FR30 */
#define EM_D10V   85  /* Mitsubishi D10V */
#define EM_D30V   86  /* Mitsubishi D30V */
#define EM_V850   87  /* NEC v850 */
#define EM_M32R   88  /* Mitsubishi M32R */
#define EM_MN10300  89  /* Matsushita MN10300 */
#define EM_MN10200  90  /* Matsushita MN10200 */
#define EM_PJ   91  /* picoJava */
#define EM_OPENRISC 92  /* OpenRISC 32-bit embedded processor */
#define EM_ARC_COMPACT  93  /* ARC International ARCompact */
#define EM_XTENSA 94  /* Tensilica Xtensa Architecture */
#define EM_VIDEOCORE  95  /* Alphamosaic VideoCore */
#define EM_TMM_GPP  96  /* Thompson Multimedia General Purpose Proc */
#define EM_NS32K  97  /* National Semi. 32000 */
#define EM_TPC    98  /* Tenor Network TPC */
#define EM_SNP1K  99  /* Trebia SNP 1000 */
#define EM_ST200  100 /* STMicroelectronics ST200 */
#define EM_IP2K   101 /* Ubicom IP2xxx */
#define EM_MAX    102 /* MAX processor */
#define EM_CR   103 /* National Semi. CompactRISC */
#define EM_F2MC16 104 /* Fujitsu F2MC16 */
#define EM_MSP430 105 /* Texas Instruments msp430 */
#define EM_BLACKFIN 106 /* Analog Devices Blackfin DSP */
#define EM_SE_C33 107 /* Seiko Epson S1C33 family */
#define EM_SEP    108 /* Sharp embedded microprocessor */
#define EM_ARCA   109 /* Arca RISC */
#define EM_UNICORE  110 /* PKU-Unity & MPRC Peking Uni. mc series */
#define EM_EXCESS 111 /* eXcess configurable cpu */
#define EM_DXP    112 /* Icera Semi. Deep Execution Processor */
#define EM_ALTERA_NIOS2 113 /* Altera Nios II */
#define EM_CRX    114 /* National Semi. CompactRISC CRX */
#define EM_XGATE  115 /* Motorola XGATE */
#define EM_C166   116 /* Infineon C16x/XC16x */
#define EM_M16C   117 /* Renesas M16C */
#define EM_DSPIC30F 118 /* Microchip Technology dsPIC30F */
#define EM_CE   119 /* Freescale Communication Engine RISC */
#define EM_M32C   120 /* Renesas M32C */
        /* reserved 121-130 */
#define EM_TSK3000  131 /* Altium TSK3000 */
#define EM_RS08   132 /* Freescale RS08 */
#define EM_SHARC  133 /* Analog Devices SHARC family */
#define EM_ECOG2  134 /* Cyan Technology eCOG2 */
#define EM_SCORE7 135 /* Sunplus S+core7 RISC */
#define EM_DSP24  136 /* New Japan Radio (NJR) 24-bit DSP */
#define EM_VIDEOCORE3 137 /* Broadcom VideoCore III */
#define EM_LATTICEMICO32 138  /* RISC for Lattice FPGA */
#define EM_SE_C17 139 /* Seiko Epson C17 */
#define EM_TI_C6000 140 /* Texas Instruments TMS320C6000 DSP */
#define EM_TI_C2000 141 /* Texas Instruments TMS320C2000 DSP */
#define EM_TI_C5500 142 /* Texas Instruments TMS320C55x DSP */
#define EM_TI_ARP32 143 /* Texas Instruments App. Specific RISC */
#define EM_TI_PRU 144 /* Texas Instruments Prog. Realtime Unit */
        /* reserved 145-159 */
#define EM_MMDSP_PLUS 160 /* STMicroelectronics 64bit VLIW DSP */
#define EM_CYPRESS_M8C  161 /* Cypress M8C */
#define EM_R32C   162 /* Renesas R32C */
#define EM_TRIMEDIA 163 /* NXP Semi. TriMedia */
#define EM_QDSP6  164 /* QUALCOMM DSP6 */
#define EM_8051   165 /* Intel 8051 and variants */
#define EM_STXP7X 166 /* STMicroelectronics STxP7x */
#define EM_NDS32  167 /* Andes Tech. compact code emb. RISC */
#define EM_ECOG1X 168 /* Cyan Technology eCOG1X */
#define EM_MAXQ30 169 /* Dallas Semi. MAXQ30 mc */
#define EM_XIMO16 170 /* New Japan Radio (NJR) 16-bit DSP */
#define EM_MANIK  171 /* M2000 Reconfigurable RISC */
#define EM_CRAYNV2  172 /* Cray NV2 vector architecture */
#define EM_RX   173 /* Renesas RX */
#define EM_METAG  174 /* Imagination Tech. META */
#define EM_MCST_ELBRUS  175 /* MCST Elbrus */
#define EM_ECOG16 176 /* Cyan Technology eCOG16 */
#define EM_CR16   177 /* National Semi. CompactRISC CR16 */
#define EM_ETPU   178 /* Freescale Extended Time Processing Unit */
#define EM_SLE9X  179 /* Infineon Tech. SLE9X */
#define EM_L10M   180 /* Intel L10M */
#define EM_K10M   181 /* Intel K10M */
        /* reserved 182 */
#define EM_AARCH64  183 /* ARM AARCH64 */
        /* reserved 184 */
#define EM_AVR32  185 /* Amtel 32-bit microprocessor */
#define EM_STM8   186 /* STMicroelectronics STM8 */
#define EM_TILE64 187 /* Tilera TILE64 */
#define EM_TILEPRO  188 /* Tilera TILEPro */
#define EM_MICROBLAZE 189 /* Xilinx MicroBlaze */
#define EM_CUDA   190 /* NVIDIA CUDA */
#define EM_TILEGX 191 /* Tilera TILE-Gx */
#define EM_CLOUDSHIELD  192 /* CloudShield */
#define EM_COREA_1ST  193 /* KIPO-KAIST Core-A 1st gen. */
#define EM_COREA_2ND  194 /* KIPO-KAIST Core-A 2nd gen. */
#define EM_ARCV2  195 /* Synopsys ARCv2 ISA.  */
#define EM_OPEN8  196 /* Open8 RISC */
#define EM_RL78   197 /* Renesas RL78 */
#define EM_VIDEOCORE5 198 /* Broadcom VideoCore V */
#define EM_78KOR  199 /* Renesas 78KOR */
#define EM_56800EX  200 /* Freescale 56800EX DSC */
#define EM_BA1    201 /* Beyond BA1 */
#define EM_BA2    202 /* Beyond BA2 */
#define EM_XCORE  203 /* XMOS xCORE */
#define EM_MCHP_PIC 204 /* Microchip 8-bit PIC(r) */
#define EM_INTELGT  205 /* Intel Graphics Technology */
        /* reserved 206-209 */
#define EM_KM32   210 /* KM211 KM32 */
#define EM_KMX32  211 /* KM211 KMX32 */
#define EM_EMX16  212 /* KM211 KMX16 */
#define EM_EMX8   213 /* KM211 KMX8 */
#define EM_KVARC  214 /* KM211 KVARC */
#define EM_CDP    215 /* Paneve CDP */
#define EM_COGE   216 /* Cognitive Smart Memory Processor */
#define EM_COOL   217 /* Bluechip CoolEngine */
#define EM_NORC   218 /* Nanoradio Optimized RISC */
#define EM_CSR_KALIMBA  219 /* CSR Kalimba */
#define EM_Z80    220 /* Zilog Z80 */
#define EM_VISIUM 221 /* Controls and Data Services VISIUMcore */
#define EM_FT32   222 /* FTDI Chip FT32 */
#define EM_MOXIE  223 /* Moxie processor */
#define EM_AMDGPU 224 /* AMD GPU */
        /* reserved 225-242 */
#define EM_RISCV  243 /* RISC-V */

#define EM_BPF    247 /* Linux BPF -- in-kernel virtual machine */
#define EM_CSKY   252     /* C-SKY */
#define EM_LOONGARCH  258 /* LoongArch */

#define EM_NUM    259

/* Old spellings/synonyms.  */

#define EM_ARC_A5 EM_ARC_COMPACT

/* If it is necessary to assign new unofficial EM_* values, please
   pick large random numbers (0x8523, 0xa7f2, etc.) to minimize the
   chances of collision with official or non-GNU unofficial values.  */

#define EM_ALPHA  0x9026
e_version
#define EV_NONE         0               /* Invalid ELF version */
#define EV_CURRENT      1               /* Current version */
#define EV_NUM          2
elf64_shdr
All data stores in a sections in an Elf object file. Sections identified by index in the section header table.
typedef struct
{
  Elf64_Word    sh_name;                /* Section name (string tbl index) */
  Elf64_Word    sh_type;                /* Section type */
  Elf64_Xword   sh_flags;               /* Section flags */
  Elf64_Addr    sh_addr;                /* Section virtual addr at execution */
  Elf64_Off     sh_offset;              /* Section file offset */
  Elf64_Xword   sh_size;                /* Section size in bytes */
  Elf64_Word    sh_link;                /* Link to another section */
  Elf64_Word    sh_info;                /* Additional section information */
  Elf64_Xword   sh_addralign;           /* Section alignment */
  Elf64_Xword   sh_entsize;             /* Entry size if section holds table */
} Elf64_Shdr;
POSIX getopt_long
optarg
-
:for required arguments, for examplef:expands to-f abc- no
:treated only as args, example-v
-
::treated as optional args
usage
read man 3 getopt
tldr
lets construct array of option struct
definition:
struct option {
	const char *name;				// param name
	int         has_arg;			// set 1 or 0 (no)
	int        *flag;				// always 0
	int         val;				// whatever, 1 byte, used for switch block identification in future
};
example:
static struct option long_options[] = {
    {"file", 1, 0, 'f'},
    {"elf", 1, 0, 'e'},
    NULL
};
example
static int parse_options(int argc, char *argv[], struct gwdown_ctx *ctx)
{
	int ret = 0;

	while (1) {
		int c;

		c = getopt_long(argc, argv, "hvo:t:rVM", long_options, NULL);
		if (c == -1)
			break;

		switch (c) {
		case 'h':
			help(argv[0]);
			ret = 255;
			goto out;
		case 'v':
			printf("gwdown 0.1\n");
			ret = 255;
			goto out;
		case 'o':
			ctx->output = optarg;
			break;
		case 't':
			ctx->num_threads = (uint16_t)atoi(optarg);
			break;
		case 'r':
			ctx->resume = true;
			break;
		case 'V':
			ctx->verbose = true;
			break;
		case 'M':
			ctx->use_mmap = true;
			break;
		default:
			printf("Error: Unknown option '%s'\n\n", argv[optind]);
			help(argv[0]);
			ret = -EINVAL;
			goto out;
		}
	}

	if (ctx->num_threads > 512) {
		printf("Error: Too many threads, max allowed thread is 512\n\n");
		ret = -EINVAL;
		goto out;
	}

	if (optind < argc) {
		ctx->url = strdup(argv[optind]);
		if (!ctx->url)
			ret = -ENOMEM;
	} else {
		printf("Error: Missing url argument\n\n");
		help(argv[0]);
		ret = -EINVAL;
	}

	if (ctx->resume) {
		printf("Error: The resume feature is currently not supproted\n");
		printf("       It's still just a draft feature\n\n");
		ret = -EOPNOTSUPP;
	}

out:
	return ret;
}
as you can see, optarg is magically return current character based on switch case cond
POSIX getopt (only)
its parse command line like this
no args params
this option did not receive any arguments, so the optarg value is will be null
./prog -v, use optstring something like this v

optional params
./prog -p=8000 -l=127.0.0.1, use optsting p::l::
this is wrong example

this is good example

required params
./prog -p 8000 -l 0.0.0.0 use optstring p:l:
unknown option handling
the handling is very easy, getopt() return ? when undefined rule is provided, then you can use optopt as a handler
useful links
linux virtual memory map
Documentation/x86/x86_64/mm.txt
<previous description obsolete, deleted>

Virtual memory map with 4 level page tables:

0000000000000000 - 00007fffffffffff (=47 bits) user space, different per mm
hole caused by [47:63] sign extension
ffff800000000000 - ffff87ffffffffff (=43 bits) guard hole, reserved for hypervisor
ffff880000000000 - ffffc7ffffffffff (=64 TB) direct mapping of all phys. memory
ffffc80000000000 - ffffc8ffffffffff (=40 bits) hole
ffffc90000000000 - ffffe8ffffffffff (=45 bits) vmalloc/ioremap space
ffffe90000000000 - ffffe9ffffffffff (=40 bits) hole
ffffea0000000000 - ffffeaffffffffff (=40 bits) virtual memory map (1TB)
... unused hole ...
ffffec0000000000 - fffffbffffffffff (=44 bits) kasan shadow memory (16TB)
... unused hole ...
ffffff0000000000 - ffffff7fffffffff (=39 bits) %esp fixup stacks
... unused hole ...
ffffffef00000000 - fffffffeffffffff (=64 GB) EFI region mapping space
... unused hole ...
ffffffff80000000 - ffffffff9fffffff (=512 MB)  kernel text mapping, from phys 0
ffffffffa0000000 - ffffffffff5fffff (=1526 MB) module mapping space (variable)
ffffffffff600000 - ffffffffffdfffff (=8 MB) vsyscalls
ffffffffffe00000 - ffffffffffffffff (=2 MB) unused hole

Virtual memory map with 5 level page tables:

0000000000000000 - 00ffffffffffffff (=56 bits) user space, different per mm
hole caused by [56:63] sign extension
ff00000000000000 - ff0fffffffffffff (=52 bits) guard hole, reserved for hypervisor
ff10000000000000 - ff8fffffffffffff (=55 bits) direct mapping of all phys. memory
ff90000000000000 - ff91ffffffffffff (=49 bits) hole
ff92000000000000 - ffd1ffffffffffff (=54 bits) vmalloc/ioremap space
ffd2000000000000 - ffd3ffffffffffff (=49 bits) hole
ffd4000000000000 - ffd5ffffffffffff (=49 bits) virtual memory map (512TB)
... unused hole ...
ffd8000000000000 - fff7ffffffffffff (=53 bits) kasan shadow memory (8PB)
... unused hole ...
ffffff0000000000 - ffffff7fffffffff (=39 bits) %esp fixup stacks
... unused hole ...
ffffffef00000000 - fffffffeffffffff (=64 GB) EFI region mapping space
... unused hole ...
ffffffff80000000 - ffffffff9fffffff (=512 MB)  kernel text mapping, from phys 0
ffffffffa0000000 - ffffffffff5fffff (=1526 MB) module mapping space
ffffffffff600000 - ffffffffffdfffff (=8 MB) vsyscalls
ffffffffffe00000 - ffffffffffffffff (=2 MB) unused hole

Architecture defines a 64-bit virtual address. Implementations can support
less. Currently supported are 48- and 57-bit virtual addresses. Bits 63
through to the most-significant implemented bit are set to either all ones
or all zero. This causes hole between user space and kernel addresses.

The direct mapping covers all memory in the system up to the highest
memory address (this means in some cases it can also include PCI memory
holes).

vmalloc space is lazily synchronized into the different PML4/PML5 pages of
the processes using the page fault handler, with init_top_pgt as
reference.

Current X86-64 implementations support up to 46 bits of address space (64 TB),
which is our current limit. This expands into MBZ space in the page tables.

We map EFI runtime services in the 'efi_pgd' PGD in a 64Gb large virtual
memory window (this size is arbitrary, it can be raised later if needed).
The mappings are not part of any other kernel PGD and are only available
during EFI runtime calls.

The module mapping space size changes based on the CONFIG requirements for the
following fixmap section.

Note that if CONFIG_RANDOMIZE_MEMORY is enabled, the direct mapping of all
physical memory, vmalloc/ioremap space and virtual memory map are randomized.
Their order is preserved but their base will be offset early at boot time.

-Andi Kleen, Jul 2004
linux x86_64 memory map
========================================================================================================================
    Start addr    |   Offset   |     End addr     |  Size   | VM area description
========================================================================================================================
                  |            |                  |         |
 0000000000000000 |    0       | 00fffffffffff000 |  ~64 PB | user-space virtual memory, different per mm
 00fffffffffff000 |  ~64    PB | 00ffffffffffffff |    4 kB | ... guard hole
__________________|____________|__________________|_________|___________________________________________________________
                  |            |                  |         |
 0100000000000000 |  +64    PB | 7fffffffffffffff |   ~8 EB | ... huge, almost 63 bits wide hole of non-canonical
                  |            |                  |         |     virtual memory addresses up to the -8EB TB
                  |            |                  |         |     starting offset of kernel mappings.
                  |            |                  |         |
                  |            |                  |         | LAM relaxes canonicallity check allowing to create aliases
                  |            |                  |         | for userspace memory here.
__________________|____________|__________________|_________|___________________________________________________________
                                                            |
                                                            | Kernel-space virtual memory, shared between all processes:
____________________________________________________________|___________________________________________________________
 8000000000000000 |   -8    EB | feffffffffffffff |   ~8 EB | ... huge, almost 63 bits wide hole of non-canonical
                  |            |                  |         |     virtual memory addresses up to the -64 PB
                  |            |                  |         |     starting offset of kernel mappings.
                  |            |                  |         |
                  |            |                  |         | LAM_SUP relaxes canonicallity check allowing to create
                  |            |                  |         | aliases for kernel memory here.
____________________________________________________________|___________________________________________________________
                  |            |                  |         |
 ff00000000000000 |  -64    PB | ff0fffffffffffff |    4 PB | ... guard hole, also reserved for hypervisor
 ff10000000000000 |  -60    PB | ff10ffffffffffff | 0.25 PB | LDT remap for PTI
 ff11000000000000 |  -59.75 PB | ff90ffffffffffff |   32 PB | direct mapping of all physical memory (page_offset_base)
 ff91000000000000 |  -27.75 PB | ff9fffffffffffff | 3.75 PB | ... unused hole
 ffa0000000000000 |  -24    PB | ffd1ffffffffffff | 12.5 PB | vmalloc/ioremap space (vmalloc_base)
 ffd2000000000000 |  -11.5  PB | ffd3ffffffffffff |  0.5 PB | ... unused hole
 ffd4000000000000 |  -11    PB | ffd5ffffffffffff |  0.5 PB | virtual memory map (vmemmap_base)
 ffd6000000000000 |  -10.5  PB | ffdeffffffffffff | 2.25 PB | ... unused hole
 ffdf000000000000 |   -8.25 PB | fffffbffffffffff |   ~8 PB | KASAN shadow memory
__________________|____________|__________________|_________|____________________________________________________________
                                                            |
                                                            | Identical layout to the 47-bit one from here on:
____________________________________________________________|____________________________________________________________
                  |            |                  |         |
 fffffc0000000000 |   -4    TB | fffffdffffffffff |    2 TB | ... unused hole
                  |            |                  |         | vaddr_end for KASLR
 fffffe0000000000 |   -2    TB | fffffe7fffffffff |  0.5 TB | cpu_entry_area mapping
 fffffe8000000000 |   -1.5  TB | fffffeffffffffff |  0.5 TB | ... unused hole
 ffffff0000000000 |   -1    TB | ffffff7fffffffff |  0.5 TB | %esp fixup stacks
 ffffff8000000000 | -512    GB | ffffffeeffffffff |  444 GB | ... unused hole
 ffffffef00000000 |  -68    GB | fffffffeffffffff |   64 GB | EFI region mapping space
 ffffffff00000000 |   -4    GB | ffffffff7fffffff |    2 GB | ... unused hole
 ffffffff80000000 |   -2    GB | ffffffff9fffffff |  512 MB | kernel text mapping, mapped to physical address 0
 ffffffff80000000 |-2048    MB |                  |         |
 ffffffffa0000000 |-1536    MB | fffffffffeffffff | 1520 MB | module mapping space
 ffffffffff000000 |  -16    MB |                  |         |
    FIXADDR_START | ~-11    MB | ffffffffff5fffff | ~0.5 MB | kernel-internal fixmap range, variable size and offset
 ffffffffff600000 |  -10    MB | ffffffffff600fff |    4 kB | legacy vsyscall ABI
 ffffffffffe00000 |   -2    MB | ffffffffffffffff |    2 MB | ... unused hole
__________________|____________|__________________|_________|___________________________________________________________
machine dependent type
this is why dangerous use default C type

unsigned long is 8 byte wide (on x64), but 32 bit wide (on x86 arch).
I/O format of integer types
The following macros are defined in inttypes.h. Each expands to a character string literal containing a conversion specifier which can be modified by a length modifier that can be used in the format argument of a formatted input/output function when converting the corresponding integer type. These macros have the general form of PRI (character string literals for the fprintf() and fwprintf() family of functions) or SCN (character string literals for the fscanf() and fwscanf() family of functions), followed by the conversion specifier, followed by a name corresponding to a similar type name in <inttypes.h>. In these names, the suffix number represents the width of the type. For example, PRIdFAST32 can be used in a format string to print the value of an integer of type int_fast32_t.
Decimal notation
| PRId8 | PRId16 | PRId32 | PRId64 |
|---|---|---|---|
| PRIdLEAST8 | PRIdLEAST16 | PRIdLEAST32 | PRIdLEAST64 |
| PRIdFAST8 | PRIdFAST16 | PRIdFAST32 | PRIdFAST64 |
| PRIdMAX | |||
| PRIdPTR | |||
| PRIi8 | PRIi16 | PRIi32 | PRIi64 |
| PRIiLEAST8 | PRIiLEAST16 | PRIiLEAST32 | PRIiLEAST64 |
| PRIiFAST8 | PRIiFAST16 | PRIiFAST32 | PRIiFAST64 |
| PRIiMAX | |||
| PRIiPTR |
example:
#define _ISOC99_SOURCE
#include <inttypes.h>
#include <stdio.h>
int main(void)
{

int8_t i =  40;
printf("Demonstrating the use of the following macros:\n");
printf("Using PRId8, the printed value of 40 "
"is  %" PRId8"\n", i);
printf("Using PRIiFAST8, the printed value of 40 "
"is  %" PRIiFAST8"\n", i);
printf("Using PRIoLEAST8, the printed value of 40 "
"is  %" PRIoLEAST8 "\n", i);
return 0;
}


Output:

Demonstrating the use of the following macros:
Using PRId8, the printed value of 40 is  40
Using PRIiFAST8, the printed value of 40 is  40
Using PRIoLEAST8, the printed value of 40 is  50
types war
recently, I face a spesific issue in order choosing best types for my program. my goal is choose best need for my C datatype
there has some header exists
stdint.hsys/types.h
difference from location presefective
/usr/lib/clang/20/include/stdint.h/usr/include/sys/types.h
see? stdint.h is more compiler oriented, and sys/types.h is more system oriented, that right, sys/types.h is POSIX. It's fundamentally about defining types used by system calls and other OS-level interfaces.
sys/types.h
Purpose: To define data types used in system-level programming. These types are often opaque and their actual size can vary between different systems (e.g., a 32-bit vs. a 64-bit system), but they provide a portable way to interface with the OS kernel.
Origin: System V and BSD systems, later standardized by POSIX.
Use sys/types.h when you are writing code that makes POSIX-compliant system calls (open, read, fork, stat, etc.).
Note
there is no format specifier header.
stdint.h
This header is part of the ISO C99 standard and later. It is focused on providing programmers with explicit control over the size of integer data types.
Purpose: To define integer types of a specific, fixed width and to provide macros for printing and scanning these types with the printf and scanf family of functions.
Note
use inttypes.h for formatting, see spesific topic about it here
conlusion
Default to <stdint.h> for all your data definitions. Only use types from <sys/types.h> when you are calling an OS/POSIX function that requires them.
normal struct? use stdint.h
interacting with os APIs, such read(), return pid, etc. use <sys/types.h>
another types wars
uint_least8_tvsuint8_t, imagine, you on very old board, where 8 bit int is not available, thisuint_least8_twill be taken as 16 bit int. meanwhile,uint8_tgive you exactly 8 bit wide variable.
bits data models
this section will talk about data models.

that footage, show us what __ILP32__ is, also what is ILP32?
There has some nice websites
- https://duetorun.com/blog/20211008/data-model/#concept
- https://gcc.gnu.org/onlinedocs/gccint/Effective-Target-Keywords.html#Data-type-sizes

for example, most linux system uses LP64, which long int, and pointer are 64 bit wide. the other example is ILP32, which used by arm64ilp32, but its deprecated https://gcc.gnu.org/pipermail/gcc-patches/2025-January/673207.html
LP64 and ILP32 refer to the data model used by the language. "I" is an abbreviation that represents int type, "L" represents long type, and "P" represents the pointer type. 64 and 32 refer to the size of the data types. When the ILP32 option is used, int, long and pointers are 32-bit in size. When LP64 is used, long and pointer are 64-bit in size; int remains 32-bit. The addressing mode used by LP64 is AMODE 64, and by ILP32 is AMODE 31. In the latter case, only 31 bits within the pointer are taken to form the address. For the sake of conciseness, the terms 31-bit mode and ILP32, will be used interchangeably in this document when there is no ambiguity. The same applies to 64-bit mode and LP64. see here
Common data models
| Model | int | long | pointer | Common in |
|---|---|---|---|---|
| ILP32 | 32-bit | 32-bit | 32-bit | x86 (32-bit), ARM32, MIPS32 |
| LP64 | 32-bit | 64-bit | 64-bit | x86_64 (Linux, macOS), AArch64 |
| LLP64 | 32-bit | 32-bit | 64-bit | Windows x64 (MSVC), long long is 64 bit |
| ILP64 | 64-bit | 64-bit | 64-bit | Rare: Cray supercomputers, some HPC |
| SILP64 | 16-bit | 64-bit | 64-bit | Very rare, some historic systems |
| LP32 | 16-bit | 32-bit | 32-bit | Some embedded systems |
check
#include <stdio.h>

int main() {
    printf("sizeof(int): %zu\n", sizeof(int));
    printf("sizeof(long): %zu\n", sizeof(long));
    printf("sizeof(void *): %zu\n", sizeof(void *));
}
intresting topics
- https://www.ibm.com/docs/en/zos/2.4.0?topic=options-lp64-ilp32#d41843e90
- LP64 also predefined, see https://gcc.gnu.org/onlinedocs/cpp/Common-Predefined-Macros.html
ELF struct datatype

recently, I had confusion about ELF datatype. let's look into elf.h

see it?
// 32 bit elf
typedef __u32	Elf32_Word;

// 64 bit elf
typedef __u32	Elf64_Word;
why word? even in assembly says
- 8 bit -> byte
- 16 bit -> word
- 32 bit -> dword
- 64 -> qword
why word (that is 16 bit), its uses u32 instead u16?
answer
the key is portability. lets look at elf64 and elf32
typedef __u32	Elf32_Word;
typedef __u32	Elf64_Word;
keep in mind that word (in ELF) is 32 bit int. so we use this convention
- half -> unsigned 16 bit
- word -> unsigned 32 bit
- Xword -> unsigned 64 bit
also works for
- Shalf -> signed 16 bit
- Sword -> signed 32 bit
- Sxword -> signed 64 bit
finding .shstrtab section
first, we need to look at some struct in order to find shstrtab on ELF file

this is ELF header
typedef struct
{
  unsigned char	e_ident[EI_NIDENT];	/* Magic number and other info */
  Elf64_Half	e_type;			/* Object file type */
  Elf64_Half	e_machine;		/* Architecture */
  Elf64_Word	e_version;		/* Object file version */
  Elf64_Addr	e_entry;		/* Entry point virtual address */
  Elf64_Off	e_phoff;		/* Program header table file offset */
  Elf64_Off	e_shoff;		/* Section header table file offset */
  Elf64_Word	e_flags;		/* Processor-specific flags */
  Elf64_Half	e_ehsize;		/* ELF header size in bytes */
  Elf64_Half	e_phentsize;		/* Program header table entry size */
  Elf64_Half	e_phnum;		/* Program header table entry count */
  Elf64_Half	e_shentsize;		/* Section header table entry size */
  Elf64_Half	e_shnum;		/* Section header table entry count */
  Elf64_Half	e_shstrndx;		/* Section header string table index */
} Elf64_Ehdr;
this is section header
typedef struct
{
  Elf64_Word	sh_name;		/* Section name (string tbl index) */
  Elf64_Word	sh_type;		/* Section type */
  Elf64_Xword	sh_flags;		/* Section flags */
  Elf64_Addr	sh_addr;		/* Section virtual addr at execution */
  Elf64_Off	sh_offset;		/* Section file offset */
  Elf64_Xword	sh_size;		/* Section size in bytes */
  Elf64_Word	sh_link;		/* Link to another section */
  Elf64_Word	sh_info;		/* Additional section information */
  Elf64_Xword	sh_addralign;		/* Section alignment */
  Elf64_Xword	sh_entsize;		/* Entry size if section holds table */
} Elf64_Shdr;
finding it
first, we need obtain how much we need to walk, to enter the start of section header, this is can be done by

keep your mind in "Start of section headers"
access the array
because this is just start, so its started on index 0, luckly the ELF header tell me, what index .shstrtab is located, look at "Section header string table index". its 36
in C you may doing
Elf64_Shdr data = /* any data */;
dump(data[36]);
but in binary level, which what you should do is calculating how far away we need to walk from start to index of 36, which can be done by 36 * sizeof(Elf64_Shdr), in this case, this is same as 36 * ehdr->e_shentsize, then add it with initial offset where Shdr start off.
final formula
ehdr->e_shoff + (shstrtab_idx * ehdr->e_shentsize)
tests
this is how shdr at index 36 look like (at binary view)

lets map it into C code for better readibility

we know that, in current section header array, .shstrtab located on 67577 far away from 0, that is location of actual .shstrtab, the Shdr only create a "list of section table, what section in this binary".
also, 374 is the size, how many memory you need to spend for this a bunch of string.
lets jump to 67577
xxd stuff

found!
future
you just need to map Elf64_Shdr on section sh_name which this data. sh_name is a offset how much we walk from 67577 until we found \0
print binary using shift and masking
8 bit int
lets play with small number first, imagine we want print 200 into binary, which is 0b11001000, this is how I do
step 0
identify how many bits we need? say, char has 1 byte, int has 4 byte, long long has 8 byte. just multiply it with 8. you'll get the bit.
- 1 * 8 = 8 bit
- 4 * 8 = 32 bit
- 8 * 8 = 64 bit
step 1
mask, lets see this pattern
0b11001000
0b10000000
---------- &
0b10000000
see? 0b10000000, which is 0x80, what about 0x8? its 0x1000. find that? by shift left the bit, we turn 0x8 into 0x80
lets follow this pattern
- 0x8 << 0 = 0x8 (4 bit)
- 0x8 << 4 = 0x80 (8 bit) <--- this is mask
- 0x8 << 8 = 0x800 (12 bit)
- 0x8 << 12 = 0x8000 (16 bit) <--- this is mask
- 0x8 << 16 = 0x80000 (20 bit)
when I want mask 8 bit int? the mask is 0x80 because its perfectly fit 0b10000000, if I want mask 16 bit int? the mask is 0x8000, because its fit 0b1000000000000000 16 bit int, can filter the MSB
conlusion: the mask that we will use, is
0x8 << BIT_SIZE - 4
SAY, BIT_SIZE is 8 (eight bit int), 8 - 4 is 4, 0x8 << 4 = 0x80
same thing with
BIT_SIZE is 16, then 16 - 4 = 12, 0x8 << 12 = 0x8000
okay, the mask has been clearly explained
step 3, shifting
say, I have 8 bit int. 0b11100011, when I mask it
n = 1
0b11100011
0b10000000
---------- &
0b10000000
lets continue shift to left
n = 2
0b11000110
0b10000000
---------- &
0b10000000
n = 3
0b10001100
0b10000000
---------- &
0b10000000
n = 4
0b00011000
0b10000000
---------- &
0b0000000
n = 5
0b00110000
0b10000000
---------- &
0b00000000
n = 6
0b01100000
0b10000000
---------- &
0b00000000
n = 7
0b11000000
0b10000000
---------- &
0b10000000
n = 8
0b10000000
0b10000000
---------- &
0b10000000
obtaining result
lets see this pattern
0b10000000 0b10000000 0b10000000 0b0000000 0b00000000 0b00000000 0b10000000 0b10000000
if we use if else, to match whatever one byte is same as 0b10000000 or not, we will get result
1110 0011
YES, we successfully turn int 8 bit into binary presentation
example
#include <stddef.h>
#include <stdio.h>

int main() {
        long long x = 3;

        size_t BIT_SIZE = sizeof(x) * 8;
        printf("size: %zu bit\n", BIT_SIZE);

        long long big_mask = (0x8ULL << (BIT_SIZE - 4));

        int counter = 0;
        for (int i = 0; i < BIT_SIZE; i++) {
                if (i % 4 == 0 && i != 0) {
                        printf("  ");
                }

                if (i % 16 == 0 && i != 0) {
                        printf("\n");
                }


                long int y = x & big_mask;
                printf("%d ", y == big_mask ? 1 : 0);
                x = x << 1;
        }

}

all about ASan & debug symbol
prerequisites
if you use clang infrastructure
- llvm-symbolizer: without this, asan offset at debug output will be binary offset, not actual source code. I will demonstrate it
- clang
if you use GCC
- addr2line (usually preinstalled)
- gcc
the tools
- gdb (optional)
- address sanitizer
testing
very simple memory buggy program
#include <stdlib.h>
#include <stdio.h>

int main() {
        char* data = malloc(1024);
        printf("%s", data);
        return 0;
}
gcc ./leak.c -o leak -g -fsanitize=address
here buggy result

lets compile it with clang
clang ./leak.c -o leak -g -fsanitize=address

after llvm-symbolizer installed

asm volatile
ref: https://gcc.gnu.org/onlinedocs/gcc/Extended-Asm.html
formal syntax:
asm asm-qualifiers ( AssemblerTemplate
                 : OutputOperands
                 [ : InputOperands
                 [ : Clobbers ] ])

asm asm-qualifiers ( AssemblerTemplate
                      : OutputOperands
                      : InputOperands
                      : Clobbers
                      : GotoLabels)
amd64 endianness
I'll show you, the little endian (that used in most x86-64 linux systems), let go deeper
I have very simple program, the program
#include <stdio.h>

typedef unsigned char byte_ptr;

void show_bytes(byte_ptr *data, size_t n) {
        int i = 0;
        for(; i < n; i++) {
                printf("%p -> %.2x\n",  &data[i], data[i]);
        }

        printf("\n");
}

int main() {
        unsigned long da = 0x5894F93;
        show_bytes((unsigned char*)&da, 8);
}
as you can see, this is what we write
hexadecimal	: 0x05 0x89 0x4F 0x93
dummy addr  : 0    1    2    3
the result
0x7fff0fe80d10 -> 93
0x7fff0fe80d11 -> 4f
0x7fff0fe80d12 -> 89
0x7fff0fe80d13 -> 05
0x7fff0fe80d14 -> 00
0x7fff0fe80d15 -> 00
0x7fff0fe80d16 -> 00
0x7fff0fe80d17 -> 00
wow, it reversed!, because
hexcode      : 0x93 0x4f 0x89 0x05 0x00 0x00 0x00 0x00
dummy addr   : 0    1    2    3    4    5    6    7
               ^~~ MSB                            ^~~ LSB
(read it first from right, to left, as you read binary code)
WOW, its least endian first, so the machine is little-endian
you can also check out my lscpu result


rust
result

big endian
because most of machine is little-endian, even RP2040 ARM chip, I'll demontrate it (with some stuff)
first, I'll use miri
miri
this unique tool can emulate big endian

linker --wrap symbol
konsep wrap linker compiler ini sebenernya berguna ketika kita ingin menimpa suatu fungsi, ke fungsi yang kita map sendiri. contoh misal saya ada
printf()
ketika saya compile dengan gcc, printf akan dipanggil sebagai
__wrap_printf()
nah, dengan trick ini, kita bisa mengubah behavior dari printf nya itu sendiri, misal
- kirim ke uart
- kirim ke swdclk
PoC
#include <stdlib.h>
#include <stdio.h>

void* __real_malloc(size_t __size) {
        // return malloc(__size);
        printf("do?\n");
}

void* __wrap_malloc(size_t __size) {
        printf("wrap malloc called\n");
        return __real_malloc(__size);
}

int main() {
        char* x = malloc(1);

        // free(x);
}
lalu compile dengan gcc -Wl,--wrap=malloc wrap_malloc.c -o p -g
hasil hexdump main
0000000000001180 <main>:
    1180:       55                      push   %rbp
    1181:       48 89 e5                mov    %rsp,%rbp
    1184:       48 83 ec 10             sub    $0x10,%rsp
    1188:       bf 01 00 00 00          mov    $0x1,%edi
    118d:       e8 c5 ff ff ff          call   1157 <__wrap_malloc>
    1192:       48 89 45 f8             mov    %rax,-0x8(%rbp)
    1196:       b8 00 00 00 00          mov    $0x0,%eax
    119b:       c9                      leave
    119c:       c3                      ret
GNU Debugger notes
Bare-metal programming
there has some intresting post if you want do this all stuff locally
Rasberry PI bare metal kernel lab setup
today is 17 august, 2025 lets make small kernel that only can doing addition.
assembly
        .text
start:
        mov r0, #5
        mov r1, #4
        add r2, r1, r0

stop:   b stop
compile it with
arm-none-eabi-as -mcpu=cortex-a7 -o prog.o hello_aarch64.Sarm-none-eabi-ld -Ttext=0x8000 -o prog.elf prog.oarm-none-eabi-objcopy -O binary prog.elf prog.bin
run it
qemu-system-arm -M raspi2b -kernel prog.bin -serial /dev/null -nographic
here the R2

RP2040 boot
first, lets look at this docs

I'll prove this
- 1st, please look at this cmake, they says
bootrom_rt0.S, which is https://github.com/raspberrypi/pico-bootrom-rp2040/blob/ef22cd8ede5bc007f81d7f2416b48db90f313434/CMakeLists.txt#L39 - 2nd, the contents

the strange header
in bootrom_rt0.S contains a strange header like this
#include "hardware/regs/addressmap.h"
#include "hardware/regs/pads_bank0.h"
#include "hardware/regs/resets.h"
#include "hardware/regs/sio.h"
#include "hardware/regs/watchdog.h"
#include "hardware/regs/syscfg.h"
#include "hardware/regs/clocks.h"
#include "hardware/regs/vreg_and_chip_reset.h"
#include "hardware/regs/m0plus.h"
#include "git_info.h"
warn: this is just my speculation, the real location is in https://github.com/raspberrypi/pico-sdk/tree/master/src/rp2040/hardware_regs/include/hardware/regs, but the theory IDK. i just matching the file
please inform me if you find something intresting in https://github.com/raspberrypi/pico-sdk/blob/master/src/CMakeLists.txt
boot sequence
this is the most important stuff
- 1st, please look at this cmake, they says
bootrom_rt0.S, which is https://github.com/raspberrypi/pico-bootrom-rp2040/blob/ef22cd8ede5bc007f81d7f2416b48db90f313434/CMakeLists.txt#L39 - 2nd, the
bootrom_rt0.S, this is important https://github.com/raspberrypi/pico-bootrom-rp2040/blob/ef22cd8ede5bc007f81d7f2416b48db90f313434/bootrom/bootrom_rt0.S#L40-L43 - 3st,
bootrom_rt0.Sjump intomain(), https://github.com/raspberrypi/pico-bootrom-rp2040/blob/ef22cd8ede5bc007f81d7f2416b48db90f313434/bootrom/bootrom_rt0.S#L303 - the boot
main()Cmake, https://github.com/raspberrypi/pico-bootrom-rp2040/blob/ef22cd8ede5bc007f81d7f2416b48db90f313434/CMakeLists.txt#L41 main()func, https://github.com/raspberrypi/pico-bootrom-rp2040/blob/ef22cd8ede5bc007f81d7f2416b48db90f313434/bootrom/bootrom_main.c#L226- busy loop with ring-oscillator? https://github.com/raspberrypi/pico-bootrom-rp2040/blob/ef22cd8ede5bc007f81d7f2416b48db90f313434/bootrom/bootrom_main.c#L246

- jump into
_flash_boot(), https://github.com/raspberrypi/pico-bootrom-rp2040/blob/ef22cd8ede5bc007f81d7f2416b48db90f313434/bootrom/bootrom_main.c#L251 - crc32 checking, https://github.com/raspberrypi/pico-bootrom-rp2040/blob/ef22cd8ede5bc007f81d7f2416b48db90f313434/bootrom/bootrom_main.c#L75-L77
- intresting stuff, this is calculating the time taken? https://github.com/raspberrypi/pico-bootrom-rp2040/blob/ef22cd8ede5bc007f81d7f2416b48db90f313434/bootrom/bootrom_main.c#L67-L72
- execute boot2 stage: https://github.com/raspberrypi/pico-bootrom-rp2040/blob/ef22cd8ede5bc007f81d7f2416b48db90f313434/bootrom/bootrom_main.c#L95
- this variable hold pointer into boot2 stage location, which is
boot2_load boot2_loadhttps://github.com/raspberrypi/pico-bootrom-rp2040/blob/ef22cd8ede5bc007f81d7f2416b48db90f313434/bootrom/bootrom_main.c#L44- boot2 offset calculation, https://github.com/raspberrypi/pico-bootrom-rp2040/blob/ef22cd8ede5bc007f81d7f2416b48db90f313434/bootrom/bootrom_main.c#L41
- this define need a triage, because
SRAM_ENDis 0x20042000, which at end of static ram. is really boot2 stage is lives before the sram ended?
boot2
runtime_init?, in crt0.S, like what https://vanhunteradams.com/Pico/Bootloader/Boot_sequence.html mention?

first, we look at this file memmap_default.ld
- here, we know that, they call
pico_flash_region.ld, which located on src/rp2_common/pico_standard_link/pico_flash_region.template.ld - the cmake then convert
pico_flash_region.template.ldintopico_flash_region.ldusing cmake
this code idk what its used for, also where the variable coming-off
boot2 revision
this is the actual boot2 is located
- https://github.com/raspberrypi/pico-sdk/tree/master/src/rp2040/boot_stage2
- inside will have many files, all of them is bootloader, but with different hardware. in my case I USE w25q080, THIS is how I know it

note: how I find it? its manually set program counter register to 0x20041f00, from somewhere after ctrl + c is fired. we cant stop at 0x20041f00 because at that time. the second boot rom is not loaded yet.
another way, if you was find your "flash hardware driver", let's add breakpoint here, example

this will stop execution without hassle of hardware breakpoint, or watching program counter value.
if you curious how I find magic number 0x20041f00, please look at this file

linker script
there has various linker scripts
- boot_stage2
- memmap_default.ld
- pico_flash_region, this is included on
memmap_default.ld
if we merge both memmap_default.ld and pico_flash_region.ld, we will got this
MEMORY
{
    FLASH(rx) : ORIGIN = 0x10000000, LENGTH = ${PICO_FLASH_SIZE_BYTES_STRING}
    RAM(rwx) : ORIGIN =  0x20000000, LENGTH = 256k
    SCRATCH_X(rwx) : ORIGIN = 0x20040000, LENGTH = 4k
    SCRATCH_Y(rwx) : ORIGIN = 0x20041000, LENGTH = 4k
}
see missing part? yes, that is PICO_FLASH_SIZE_BYTES_STRING, lets find out in our *.elf.map


that is 2048K
Issue that I find
I think arm-none-eabi-objdump is mistaken arm-thumb-1 instruction as full 32 bit arm, so they just say .word 0xdeadbeef
picotool build
os setup
sudo pacman -S cmake arm-none-eabi-gcc arm-none-eabi-newlib
setup picosdk
git clone https://github.com/raspberrypi/pico-sdk.git
cd pico-sdk
git submodule update --init
export PICO_SDK_PATH=$PWD
build picotool
git clone https://github.com/raspberrypi/picotool.git
cd picotool
mkdir build
cd build
cmake ..
make
if you get cmake error minimum etc..., use cmake .. -DCMAKE_POLICY_VERSION_MINIMUM=3.5 instead
debug pico with another pico
first, we need a patch this stuff https://review.openocd.org/c/openocd/+/8223/3/src/flash/nor/spi.c#187
optional dry run
pacman -S mingw-w64-x86_64-toolchain git make libtool pkg-config autoconf automake texinfo mingw-w64-x86_64-libusb
then run
git clone https://github.com/raspberrypi/openocd.git --branch picoprobe --depth=1
cd openocd
nvim /src/flash/nor/spi.c
then add patch
after that
build
./bootstrap
./configure --enable-picoprobe --disable-werror
make -j4
sudo make install
flash ELF
sudo openocd -f interface/cmsis-dap.cfg -f target/rp2040.cfg -c "adapter speed 5000" -c "program blink.elf verify reset exit"
just debugging
sudo openocd -f interface/cmsis-dap.cfg -f target/rp2040.cfg -c "adapter speed 5000"

```sh
arm-none-eabi-gdb blink.elf
> target remote localhost:3333
> monitor reset init
> continue
wiring position: 

PICO SDK install & cmake template
install step is very easy,
git clone https://github.com/raspberrypi/pico-sdk.git
cd pico-sdk
git submodule update --init
CMAKE Template
this is my own standard of pico rp2040 chip cmake build template
cmake_minimum_required(VERSION 3.13)
set(CMAKE_EXPORT_COMPILE_COMMANDS ON)

include(/home/fadhil_riyanto/git_clone/pico-sdk/pico_sdk_init.cmake)

pico_sdk_init()

project(hello_usb C CXX ASM)
set(CMAKE_C_STANDARD 11)
set(CMAKE_CXX_STANDARD 17)


add_executable(hello_usb hello_usb.c)
target_link_libraries(hello_usb pico_stdlib)

# # enable usb output, disable uart output
# pico_enable_stdio_usb(hello_usb 1)
# pico_enable_stdio_uart(hello_usb 0)

pico_add_extra_outputs(hello_usb)
if you ask about
what uses of
pico_sdk_init, orpico_enable_stdio_usb, please read it yourself on https://github.com/raspberrypi/pico-sdk/blob/9a4113fbbae65ee82d8cd6537963bc3d3b14bcca/pico_sdk_init.cmake#L44-L49, thats is a macro!
feel free to change include(/home/fadhil_riyanto/git_clone/pico-sdk/pico_sdk_init.cmake) with your own SDK Path


vscode autocomplete settings
create file named .vscode/c_cpp_properties.json
fill with
{
  "configurations": [
    {
      "name": "Linux",
      "compileCommands": "${workspaceFolder}/build/compile_commands.json",
      "intelliSenseMode": "linux-gcc-x64",
      "compilerPath": "/usr/bin/g++",
      "cStandard": "c11",
      "cppStandard": "c++17"
    }
  ],
  "version": 4
}
arm-none-eabi-gdb debugging with openocd
the simplest thing to debug your RP2040 chip is using secondary pico as picoprobe, then running openocd. I assume you're was ready with your pico debugprobe
identify your TTY
check with sudo dmesg, the run a command like this sudo chmod 666 /dev/ttyACM0
openocd
openocd -f interface/cmsis-dap.cfg -f target/rp2040.cfg -c "adapter speed 5000"
cmake
make sure your ELF was build with cmake -DCMAKE_BUILD_TYPE=Debug -DPICO_BOARD=pico ..
flashing
openocd -f interface/cmsis-dap.cfg -f target/rp2040.cfg -c "adapter speed 5000" -c "program hello_usb.elf verify reset exit"
without sudo
analysis how printf rp2040 work under low level stuff
in order to know how printf works in rp2040 uart bridge, lets compile simple program, compile as debug, then run GDB
consider this very simple hello world
#include <pico/printf.h>
#include <pico/time.h>

int main() {
    int n = 0;
    stdio_init_all();
    while (true) {
        printf("Hello, world! %d\n", n);
        sleep_ms(1000);
        n = n + 1;
    }
}
analysis

see?
=> 0x100002b4 <+12>: bl 0x10003a64 <__wrap_printf>
its call __wrap_printf which mean, the backend call -Wl,--wrap=printf internally, but if we reffer to /home/fadhil_riyanto/git_clone/pico-sdk/src/rp2_common/pico_stdio/stdio.c:347

the signature is different, this function has signature
int __printflike(1, 0) PRIMARY_STDIO_FUNC(printf)(const char* format, ...)
so, what exactly happen?
result
lets look at stdio.c line 289

when the macro PICO_STDIO_SHORT_CIRCUIT_CLIB_FUNCS is active, we replace the function name by WRAPPER_FUNC(x), not stdio_printf
after that, lets jump into https://github.com/raspberrypi/pico-sdk/blob/9a4113fbbae65ee82d8cd6537963bc3d3b14bcca/src/rp2_common/pico_platform_compiler/include/pico/platform/compiler.h#L185, very clear definition
so, basically. this function

call __wrap_printf
make sense?
RP2040 chip memory layout
pembagian nya ada di sini:

ROM
Kode untuk rom ini immutable (belum dicoba), dimulai dari 0x00000000 sampai sejauh 16 kB (0x00004000)
total sram di chip RP2040 ada 264kB (TOTALNYA saja), tapi perlu diketahu bahwa itu semua aslinya dibagi bagi per-area address nya
jika di docs, sram ini dimulai dari 0x20000000 (summary), tapi secara fisik, dibagi menjadi 6 bank
dimana
word addr 0
- bank 0: 0x20000000
- bank 1: 0x20000004
- bank 2: 0x20000008
- bank 3: 0x2000000c
word addr 1
- bank 0: 0x20000010
- bank 1: 0x20000014
- bank 2: 0x20000018
- bank 3: 0x2000001c
word addr 2
- bank 0: 0x20000020
- bank 1: 0x20000024
- bank 2: 0x20000028
- bank 3: 0x2000002c
dst
stdio_init_all() analysis
first, lets debug this with real hardware & openocd
do not forget to add breakpoint in this func

the sequence of execution:
/home/fadhil_riyanto/git_clone/pico-sdk/src/rp2_common/pico_stdio/stdio.c:200-> stdio_init_all()/home/fadhil_riyanto/git_clone/pico-sdk/src/rp2_common/pico_stdio_uart/stdio_uart.c:37-> stdio_uart_init()/home/fadhil_riyanto/git_clone/pico-sdk/src/rp2_common/pico_stdio_uart/stdio_uart.c:93-> stdio_uart_init_full()/home/fadhil_riyanto/git_clone/pico-sdk/src/rp2_common/hardware_gpio/gpio.c:38-> gpio_set_function()/home/fadhil_riyanto/git_clone/pico-sdk/src/rp2_common/hardware_uart/uart.c:42-> uart_init()
WIP (SOON)
pico_default_asm_volatile
after a long time, I discover this macro from this screenshoot

and I found it
#define pico_default_asm_volatile(...) __asm volatile (".syntax unified\n" __VA_ARGS__)
and the explanation why use __VA_ARGS__: https://gcc.gnu.org/onlinedocs/cpp/Variadic-Macros.html
here the example


RP2040 sram layout
the static ram is contains 6 section of ram, which is two 4KB and four 64 KB ram
RAM start at address 0x20000000
0x20040000 and 0x20041000 is a start address of 4KB area wide
and, this is section about 64KB wide ram
0x20000000 - 0x20010000 (64 kb)
0x20010000 - 0x20020000 (64 kb)
0x20020000 - 0x20030000 (64 kb)
0x20030000 - 0x20040000 (64 kb)
this is MIRROR of 64 kb region (stripped) 0x21000000 0x21010000 0x21020000 0x21030000
mapping all pico-sdk CmakeLists.txt
SOON
dump firmware for from 0x0 ~ 0x4000
this is how you can dump first 16Kbytes
based on this docs, its feel intresting look inside about rom

let's dump it
openocd
this tutorial uses secondary pico, which connected with other pico's
openocd -f interface/cmsis-dap.cfg -f target/rp2040.cfg -c "adapter speed 5000"
after it
telnet localhost 4444
> halt
> dump_image pico_first_16kb_bootloader.bin 0x0 0x4000
show the binary
arm-none-eabi-objdump -D -b binary -marm -Mforce-thumb ./pico_first_16kb_bootloader.bin

another way
let's use GDB stuff, first download this, run as regular gdb debug mode + openocd. then dump

here the intresting part

which part of https://github.com/raspberrypi/pico-bootrom-rp2040/blob/ef22cd8ede5bc007f81d7f2416b48db90f313434/bootrom/bootrom_rt0.S#L48
pico bootrom linker script
here you can access it, link
MEMORY {
    ROM(rx) : ORIGIN = 0x00000000, LENGTH = 16K
    SRAM(rwx) : ORIGIN = 0x20000000, LENGTH = 264K
    USBRAM(rw) : ORIGIN = 0x50100400, LENGTH = 3K
}

SECTIONS {
    . = ORIGIN(ROM);
    .text : {
        KEEP(*(.vectors))
        *(.text*)
        KEEP(*(.rodata.keep*))
        *(.rodata*)
        this_is_the_end_my_only_friend_the_end = .;
        . = ALIGN(LENGTH(ROM));
    } >ROM =0x00be

    .data : {
        *(.data*)
    } >USBRAM

    .bss : {
        *(.bss*)
    } >USBRAM

    ASSERT(__irq5_vector == __vectors + 0x40 + 5 * 4, "too much data in middle of vector table")
    ASSERT(SIZEOF(.data) == 0,
        "ERROR: do not use static memory in bootrom! (.data)")

     /* Leave room above the stack for stage 2 load, so that stage 2
       can image SRAM from its beginning */
    _stacktop = ORIGIN(SRAM) + LENGTH(SRAM) - 256;
}
ARM
Thumb, Thumb-2, ARM, AArch64 introduction
Thumb
Apa itu thumb instruction?
mengutip dari dokumentasi https://developer.arm.com/documentation/ddi0210/c/CACBCAAE
The Thumb instruction set is a subset of the most commonly used 32-bit ARM instructions. Thumb instructions are each 16 bits long, and have a corresponding 32-bit ARM instruction that has the same effect on the processor model. Thumb instructions operate with the standard ARM register configuration, allowing excellent interoperability between ARM and Thumb states.
On execution, 16-bit Thumb instructions are transparently decompressed to full 32-bit ARM instructions in real time, without performance loss.
Thumb has all the advantages of a 32-bit core:
- 32-bit address space
- 32-bit registers
- 32-bit shifter, and Arithmetic Logic Unit (ALU)
- 32-bit memory transfer.
tambahan: Thumb juga disebut A32/T32
thumb ISA adalah versi lite dari full arm instruction, tapi di encoded ke versi kecil, 16 bit format, dimana format ini tidak akan menghabiskan banyak space program.
tapi ada caveat disini, processor tidak mengeksekusi 16 bit instruction langsung, tapi ia mendekompresi nya dahulu, baru masuk stage final execution
dan juga, kata "transparent" yang juga berati, arm-nya hanya mengesekusi standard 32 bit instrution, kita sebagai programmer tidak perlu bingung & mengurus conversion antara 16 bit ke 32 bit. ini murni "fitur hw"
"...in real time, without performance loss."
itu berarti, instruction nya dijalankan secara langsung, dari 16 bit instruction di interpretkan sebagai instruksi 32 bit (tanpa ada loss peformance)
16-bit, halfword-aligned Thumb instructions are executed in this state.
contoh
- ARM7TDMI:
thumb-2
sama seperti thumb 1, hanya saja ia bisa memuat either 32 bit, atau 16 bit instruction
ARM
normal instruksi ARM yang berjalan di android, selayaknya normal CPU
AArch64
versi 64 bit dari ARM, yang biasanya dipakai di rasberry PI 5, server, dsb
Biasa disebut ARMv8-A,
keluarga ARM
ARMv6-M
arm ini support thumb 1 ISA, dan merupakan versi paling lite dari ARM, bisa dibaca di https://www.st.com/content/st_com/en/arm-32-bit-microcontrollers/arm-cortex-m0.html#:~:text=Arm%C2%AE%2032%2Dbit%20Microcontrollers,Arm%20Cortex%2DM3
ARM M0+ registers
nice read: https://blog.smittytone.net/2022/06/19/get-started-with-arm-assembly-on-the-pi-pico/
secara formal, arm M0 punya register2 berikut
* r0
* r1
* r2
* r3
* r4
* r5
* r6
* r7
* r8
* r9
* r10
* r11
* r12
* sp (aka r13)
* lr (aka r14)
* pc (aka r15)
* xPSR
* msp
* psp
official docs: https://developer.arm.com/documentation/ddi0484/c/Programmers-Model/Processor-core-registers-summary

intinya
- register r0 sampai r12 itu adalah GP register
- r13 dibagi jadi 2, ada Main Stack Pointer (MSP) dan Process Stack Pointer (PSP)
- r14 adalah link register
- pc (r15), program counter
ARM AArch32 ABI Convention
link: https://github.com/ARM-software/abi-aa/blob/main/aapcs32/aapcs32.rst

Registers R0-3 are also, by convention, used to hold parameter values to be passed to a subroutine or function. Functions with more than four parameters typically use one or more of those parameter registers to hold addresses pointing to data structures in memory.
ASM gnu-as direction collection
-
.equhttps://sourceware.org/binutils/docs-2.24/as/Equ.html#Equ
this is equalivalent of
#define FOO 6in cexample:
.equ LED_PIN, 25 .equ GPIO_DIR_IN, 0 .equ GPIO_DIR_OUT, 1 .equ PIN_HIGH, 1 .equ PIN_LOW, 0 -
.syntaxhttps://sourceware.org/binutils/docs/as.html#Instruction-Set-Syntax https://www.sourceware.org/binutils/docs/as/ARM-Directives.html#index-_002esyntax-directive_002c-ARM
this is either
unifiedordividedexample:
empty?
this is just template
- ``
link here
small explanation
example:
branch exchange (BX)
consider this simple code
int main() {
        /* nop */
        return 10;
}
produces this:

It's almost always returning from a function, like ret in some other ISAs like AArch64.
nice read:
- https://developer.arm.com/documentation/dui0379/e/arm-and-thumb-instructions/bx
- https://developer.arm.com/documentation/dui0231/b/arm-instruction-reference/arm-branch-instructions/b-and-bl
why?
calling a main function
disini, ku akan memperlihatkan "kenapa" init function di rp2040 bisa bernama main, dan bagaimana steps nya
pertama2, saya mencoba flash kode asm yang isinya hanya jump dan exit, seperti yang terlihat dibawah

lalu saya jalankan, terlihat saya kasih dia breakpoint di main kan?

sebenernya sudah benar bagian
(gdb) disass
Dump of assembler code for function main:
=> 0x100002a8 <+0>:	b.n	0x100002aa <jump_here>
lalu next, jump ke jump_here
(gdb) disass
Dump of assembler code for function jump_here:
=> 0x100002aa <+0>:	movs	r0, #0
   0x100002ac <+2>:	bx	lr
   0x100002ae <+4>:	movs	r0, r0
End of assembler dump.
terlihat sudah sampai di movs r0, #0 kan? sama seperti assembly kita diatas, tapi ada beberapa yang strange (need triage)
tiba tiba muncul
movs r0, r0
jika kita lihat juga, setelah jump jump_here dieksekusi, ia pindah ke /home/fadhil_riyanto/git_clone/pico-sdk/src/rp2_common/pico_crt0/crt0.S:456
dan akhirnya, tidak sengaja menemukan asm yang memanggil si main

ARM MRS instruction
MRS: Move to Register from Special Register moves the value from the selected special-purpose register into a general-purpose register.
difference between thumb-1 (T16) and normal ARM
hi, today I will show you what difference between thumb-1 and normal arm
what is thumb-1
thumb-1 is lite version of full arm instruction, the instruction has 16 bit wide. and because if its "lite", the binary size is should be smaller compared than normal arm
normal arm has instruction wide 32 bit (idk about aarch64)
start
tool:
- arm-none-eabi-gcc
- arm-none-eabi-objdump
first, lets compile this very simple program
#define A       0xA

int _sbrk() {

}

int _write() {

}

int _read() {

}

int _lseek() {

}

int _close() {

}

int _exit() {

}

int main() {
        int a = 9;
        int b = 2;

        int c = a * b;
}
compile it for normal arm, the output binary I call it as a.out
arm-none-eabi-gcc test_asm.c
objdump it
arm-none-eabi-objdump -d a.out --disassemble=main

thumb-1
the instruction should be 16 bit wide
arm-none-eabi-gcc test_asm.c -mthumb -mcpu=cortex-m0plus -o a-thumb.out
arm-none-eabi-objdump -d a-thumb.out --disassemble=main

see?
Rust stuff
Welcome in this rust stuff section.
Rust cursor, How it works
Cursor in rust basically just a in-memory implementation of Seek. see fseek() here
Imagine, we have a file. and this is representation of contents
abcde
seek start from 1, is bcde, start from 2 is cde and so-on, this is also happen when we use seek from end, for example, seek end -1 is mean e, -2 is de, etc.
From code perspective
this is signature of cursor
pub struct Cursor<T> {
    inner: T,
    pos: u64,
}
and also, this struct implement Write and Seek
so, in order to understanding this concept, let code first in C
#include <string.h>
#include <stdlib.h>
#include <stdio.h>

struct seekfd {
    FILE                *file;
};

int start_open(struct seekfd *seekfd) {
    seekfd->file = fopen("a.txt", "r");

    if (seekfd->file == NULL) {
        fprintf(stderr, "%s", "error");
        return -1;
    }
}

int do_op(struct seekfd *seekfd) {
    char allocated_buf[2048];
    memset(allocated_buf, 0, 2048);

    fseek(seekfd->file, 1, SEEK_SET);
    int ret = fread(allocated_buf, 1, 3, seekfd->file);

    printf("%s", allocated_buf);
}

int main() {
    struct seekfd seekfd;

    int ret = start_open(&seekfd);
    if (ret < 0) {
        return -9;
    }

    ret = do_op(&seekfd);
    if (ret < 0) {
        return ret;
    }
}
compile with
clang fseek.c -o p -g
next step, create dummy files named a.txt with content abcdefghijklmnopqr
first run with fseek(seekfd->file, 0, SEEK_SET); = abc
second run with fseek(seekfd->file, 1, SEEK_SET); = bcd
etc...
this concept is basically same in Rust
Rust context
this is small example show Seek works (in-memory) instead utilize real file
use std::io::prelude::*;
use std::io::{self, SeekFrom};
use std::io::Cursor;

fn write_bytes<W: Write + Seek>(mut w: W) -> io::Result<()> {
    w.seek(SeekFrom::Start(5))?;

    for i in 1..6 {
        w.write(&[i])?;
    }

    Ok(())
}


fn main() {
    let mut buf = Cursor::new(vec![0; 20]);
    write_bytes(&mut buf).unwrap();
    println!("{:?}", &buf.get_ref()); // print vector
}
this is the output
[0, 0, 0, 0, 0, 1, 2, 3, 4, 5, 0, 0, 0, 0, 0, 0, 0, 0, 0, 0]
instead, we change SeekFrom::Start(5) with SeekFrom::Start(10), the write will started at offset 10. this is the output
[0, 0, 0, 0, 0, 0, 0, 0, 0, 0, 1, 2, 3, 4, 5, 0, 0, 0, 0, 0]
Rust bytes has_remaining() method
this function return whatever any best left on buffer. example, let make simple tcp/ip
impl Connection {
    pub fn new(stream: TcpStream) -> Connection {
        Connection {
            stream: BufWriter::new(stream),
            buffer: BytesMut::with_capacity(4096)
        }

    }

    pub async fn read(&mut self)
        -> std::result::Result<Option<Frame>, Box<dyn std::error::Error + Send + Sync>> {

        let _ = self.stream.read_buf(&mut self.buffer).await;
        println!("hasremaining: {}", self.buffer.has_remaining());

        while self.buffer.has_remaining() {
            let bytes = self.buffer.get_u8();
            println!("{} -> {}", bytes as char, self.buffer.has_remaining());
        }

        println!("{}", self.buffer.has_remaining());
        // Frame::check(&mut self.buffer);

        Ok(Some(Frame::Null))
    }
}
let's see the server result using ncat
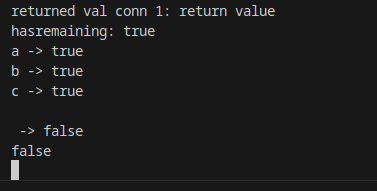
which the input is something look like this
[22:55:41] fadhil_riyanto@integral2 /home/fadhil_riyanto [SIGINT]
> ncat 127.0.0.1 6380
abc
from this output, we know
hasremaining: true <--- this is initial, didn't mean anything
a -> true <--- a already read, but next char is b, why this is true
b -> true <--- next is c, also true
c -> true <--- next is \n char, also true

 -> false <--- this is false because no next chars
false <--- confirm
Also, get_u8 returns the first byte in the buffer. Each time it's called, it advances the position, so subsequent calls return the next bytes.
How Rust into() Box + Error analysis
suppose, we have function return signature like this
std::result::Result<Option<Frame>, Box<dyn std::error::Error + Send + Sync>>and then, we return something like this from our function
return Err("connection reset".into())how the into() works?
analysis
look at this snippet
#[cfg(not(no_global_oom_handling))]
#[stable(feature = "rust1", since = "1.0.0")]
impl<'a> From<&str> for Box<dyn Error + Send + Sync + 'a> {
    /// Converts a [`str`] into a box of dyn [`Error`] + [`Send`] + [`Sync`].
    ///
    /// [`str`]: prim@str
    ///
    /// # Examples
    ///
    /// ```
    /// use std::error::Error;
    /// use std::mem;
    ///
    /// let a_str_error = "a str error";
    /// let a_boxed_error = Box::<dyn Error + Send + Sync>::from(a_str_error);
    /// assert!(
    ///     mem::size_of::<Box<dyn Error + Send + Sync>>() == mem::size_of_val(&a_boxed_error))
    /// ```
    #[inline]
    fn from(err: &str) -> Box<dyn Error + Send + Sync + 'a> {
        From::from(String::from(err))
    }
}
if we go deeper into From::from, we found this
#[inline]
    fn from(err: String) -> Box<dyn Error + Send + Sync + 'a> {
        struct StringError(String);

        impl Error for StringError {
            #[allow(deprecated)]
            fn description(&self) -> &str {
                &self.0
            }
        }

        impl fmt::Display for StringError {
            fn fmt(&self, f: &mut fmt::Formatter<'_>) -> fmt::Result {
                fmt::Display::fmt(&self.0, f)
            }
        }

        // Purposefully skip printing "StringError(..)"
        impl fmt::Debug for StringError {
            fn fmt(&self, f: &mut fmt::Formatter<'_>) -> fmt::Result {
                fmt::Debug::fmt(&self.0, f)
            }
        }

        Box::new(StringError(err))
    }
nb: actually StringError is string aliases. then, we see in this section. we created a heap-allocated using Box::new(StringError(err)).
Rust buffer advance
this simple article show how buffer advance works
use bytes::Buf;

fn main() {
    let mut buf = &b"hello world"[..];

    println!("{}", String::from_utf8_lossy(buf.chunk()));

    buf.advance(6);
    println!("{}", String::from_utf8_lossy(buf.chunk()));
}
and the result
hello world
world
Rust RESP get_line analysis
if we look at simple tokio redis example (mini redis), we can see how the data is parsed. look at this
the resp is generally read something like this `+abc\r\n'
this is the code that actually crop down the buffer
fn get_line<'a>(src: &mut Cursor<&'a [u8]>) -> Result<&'a [u8], Error> {
    // Scan the bytes directly
    let start = src.position() as usize;
    // Scan to the second to last byte
    let end = src.get_ref().len() - 1;

    for i in start..end {
        if src.get_ref()[i] == b'\r' && src.get_ref()[i + 1] == b'\n' {
            // We found a line, update the position to be *after* the \n
            src.set_position((i + 2) as u64);

            // Return the line
            return Ok(&src.get_ref()[start..i]);
        }
    }

    Err(Error::Incomplete)
}
and I will show you how they works (algorithm)
variables setup
we have start and end, which consist of
let start = src.position() as usize;
let end = src.get_ref().len() - 1;
the src.position() always return 0, also depending on the context. src.get_ref().len() return the length of the buffer, for example, +rand\n\n has length 7.
because we wan't to read two chars at the end, which is \r and \n
so we substract length with 1, this is avoid buffer overflow
suppose this situation:
buf: +rand\n\n
when we add everything with 1, we got this
idx: 012345 6 7, it is idx[7]is found? no, so we need to sub with 1, the idx is something like this
idx: 012345 6, no overflow
then we check the i and i + 1, make sure there is \r\n
set position
now, we set the cursor to the next incoming buffer. which after \r\n
src.set_position((i + 2) as u64);suppose:
+rand\r\n+randomsomething\r\n
012345 6 ^
^^   ^   this is i + 2, indicates next buffer
ii+1 orig i
postgresql - get() generic function signature
In someday, i found
#[track_caller]
    pub fn get<'a, I, T>(&'a self, idx: I) -> T
    where
        I: RowIndex + fmt::Display,
        T: FromSql<'a>,
    {
        match self.get_inner(&idx) {
            Ok(ok) => ok,
            Err(err) => panic!("error retrieving column {}: {}", idx, err),
        }
    }
some sort of notes:
- https://doc.rust-lang.org/rust-by-example/generics.html
- https://serokell.io/blog/rust-generics
how to call it
let data2 = data_actual[0].get::<_, i32>(0);Rust build logging
rust build usually don't show any output if you try to println!() in build.rs, in order to force this, use
println!("cargo:warning=start build!");result
warning: ourcrate-rs@0.1.0: Something went wrong!
all docs: https://doc.rust-lang.org/cargo/reference/build-scripts.html
Rust tonic gRPC server build process
topik ini khusus membahas gRPC di rust,
build
contoh template build rs:
use std::{env, path::PathBuf};

fn main() -> Result<(), Box<dyn std::error::Error>> {
    // let out_dir = PathBuf::from(env::var("OUT_DIR").unwrap());
    let out_dir = PathBuf::from(
        "/home/fadhil_riyanto/BALI64/fadev-service-rs/rpc/src/pb".to_string()
    );

    println!("cargo:warning=start build!");

    tonic_build::configure()
        .build_server(true)
        .build_client(false)
        .file_descriptor_set_path(out_dir.join("random_service.bin"))
        .compile_protos(
            &["proto/random_service.proto"],
            &["proto"]
        )?;


    Ok(())
}
nb:
file_descriptor_set_path: dipakai sebagai reflection, bakal ketemu kalau pakai grpcurl.build_serverdanbuild_client: disini ada 2 mode build, untuk server atau untuk client. maka kita set server true, client falsecompile_protos: masing2 berisi 2 param yg menerima slice, param pertama berisi lokasi protobuf, param kedua berisi root foldernya.
anda bisa lihat-lihat contoh lain disini: https://github.com/hyperium/tonic/tree/master/examples
optional:
- use
.out_dir()ketimbang harus nurut dengan apa yang OUT_DIR katakan
OUT_DIR
what it is, simplenya OUT_DIR ini akan diset jika protobuf sudah di compile, dalam artian, file *.proto diubah jadi kumpulan file *.rs yang bakal di include sama macro, kemudian di compile
urutan compile adalah, macro dievaluasi dulu, baru compile, sampai sini masuk akal. ini macro signature nya
#[macro_export]
macro_rules! include_proto {
    ($package: tt) => {
        include!(concat!(env!("OUT_DIR"), concat!("/", $package, ".rs")));
    };
}
tambahan info bisa baca2 sendiri disini: https://doc.rust-lang.org/cargo/reference/environment-variables.html#environment-variables-cargo-sets-for-build-scripts, dan jg biasanya ini akan diinclude ke sebuah file handler. kira kira seperti itu
Rust tokio-postgres connection config example
first, this is example from the documentation
let (client, conn_ctx) = tokio_postgres::connect("host=localhost user=postgres", NoTls);then, we want to convert it into config like ctx. see this
use tokio_postgres::{NoTls, Error};

#[tokio::main]
async fn main() {
        let mut config = postgres::config::Config::new();
        config.host("localhost");
        config.user("fadhil_riyanto");
        config.password("1921684338");

        let client_ret = config.connect(NoTls);


}
miri rust setup
run this command
rustup install nightlyrustup +nightly component add miri- lets run cool stuff:
cargo +nightly miri run --target s390x-unknown-linux-gnu
Math
Welcome in this section.
Set operations formula
Union of Two Sets (cardinality)
\[ |A \cup B| = |A| + |B| - |A \cap B| \]
how to read:
whole A and B add together, its make a data duplication on center of venn diagram, we remove that duplication using \( |A \cap B| \)
Intersection (steps)
its flip of Union \[ |A \cup B| = |A| + |B| - |A \cap B| \] \[ |A \cap B| = |A| + |B| - |A \cup B| \]
Intersection of three sets
\[ |A \cup B \cup C| = |A| + |B| + |C| - |A \cap B| - |A \cap C| - |B \cap C| + |A \cap B \cap C| \]
how it works, de remove data duplication two times on \( |A \cap B| \), \( |B \cap C| \), and \( |B \cap C| \), then fill the empty section on the center which \( |A \cap B \cap C| \)
This is proof of concept by nice guy on internet: https://www.youtube.com/watch?v=vVZwe3TCJT8.
Difference
\[ |A - B| = |A| - |A \cup B| \]
Symetric difference
1. General formula
\[ A \space \triangle \space B = (A \cup B) - (A \cap B) \] Cardinals version: \[ | A \space \triangle \space B | = |A - B| + |B - A| \] \[ | A \space \triangle \space B | = |A| + |B| - 2|A \cap B| \]
2. Symetric difference properties
-
\( A \space \triangle \space B = B \space \triangle \space A \)
-
\( (A \space \triangle \space B) \space \triangle C = A \space \triangle \space (B \space \triangle C) \)
-
\( (A \space \triangle \space \emptyset) = A \), why?
- \(A \space \triangle \space B = (A \cup B) - (B \cap A) \)
- \(A \space \triangle \space \emptyset = (A \cup \emptyset) - (\emptyset \cap A) \), but
- \( (A \cup \emptyset) = A \) and \( (\emptyset \cap A) = \emptyset \)
- \( (A - \emptyset) = A \)
-
\( (A \space \triangle \space A) = \emptyset \)
Set stuff
there is some intresting question about discrete math
why \( \mathcal{P}(\emptyset) = \lbrace \emptyset \rbrace \)
consider \( \mathcal(S) \) where \( S \) is a set, for example
- if \( S = \lbrace a \rbrace \), then \( \mathcal{P}(S) = \lbrace \emptyset, \lbrace a \rbrace \rbrace \), same as \( \mathcal{P}(a) \)
- if \( S = \lbrace a, b \rbrace \), then \( \mathcal{P}(S) = \lbrace \emptyset, \lbrace a \rbrace, \lbrace b \rbrace, \lbrace a, b \rbrace \rbrace \), same as \( \mathcal{P}(a, b) \)
- if \( S = \lbrace \emptyset \rbrace \), then \( \mathcal{P}(S) = \lbrace \emptyset, \lbrace \emptyset \rbrace \rbrace \), same as \( \mathcal{P}(\emptyset) \)
so, because \( \lbrace \rbrace \) usually hidden, \( \mathcal{P}(\emptyset) = \lbrace \emptyset \rbrace \)
let \( A = \emptyset, B = \emptyset \), how to \( A \times B \)
Consider \( A \times B = \lbrace (a,b) | a \in A, b \in B \rbrace \)
because
- A is empty, no elements can be paired
- B is also empty
conlusion: no paired element = empty
proof by cardinality \( |A| = 0, |B| = 0, \text{so, when } |A \times B| = |A| \times |B| = 0 \times 0 = 0 \)
does \( P(\emptyset) = \lbrace \lbrace \rbrace \rbrace = \lbrace \emptyset \rbrace \) ?
true, this is due \( \lbrace \emptyset \rbrace \) same as \( \lbrace \lbrace \rbrace \rbrace \), then consider example \( P(a) = \lbrace \lbrace \rbrace, \lbrace a \rbrace\rbrace \)
Suppose X and Z are independent of each other
- \( | \mathcal{P}(X \cap Z)| \)
- \( | X - Z | \)
- \( | X \oplus Z | \)
- \( | X \cap Z | \)
- \( | \mathcal{P}(X) \cup \mathcal{P}(Z)| \)
- \( | \overline{\mathcal{P}(X) \cup \mathcal{P}(Z)}| \)
nb: bagian ini belum jadi
Logika
Ringkasan ini dibuat sebagian sebagian dari Kuliah IF1220 Matematika Diskrit ITB oleh bapak Rinaldi Munir. dan berbagai sumber seperti Wikipedia, ChatGPT dsb
Proposisi
adalah pernyataan bahwa suatu dua perbandingan adalah sama besar, contoh
- \( \frac{a}{b}=\frac{c}{d} \)
- \( 4 = 2 * 2 \)
- 13 adalah bilangan ganjil
- Untuk sembarang bilangan bulat \( n >= 0 \), maka \( 2n \) adalah genap
contoh yang bukan
- Isilah gelas tersebut dengan air
- \( x + 3 = 8 \)
- \( x > 3 \)
dan, Proposisi dilambangkan dengan huruf kecil seperti \( p, q, r, ... \)
Bentuk bentuk nya
- Proposisi atomik
bentuk proposisi tunggal, contoh
- 2n selalu genap untuk n=0, 1, 2, …
- Ibukota Maluku Utara adalah Ternate
- proposisi majemuk
diantaranya:
- conjunction (and): \( \wedge \)
- disjunction (or): \( \vee \)
- negation (!n): \( ~ \)
- exclusive disjunction (xor): \( \oplus \)
Table
| p | q | r | p ∧ q | ¬q | ¬q ∧ r | (p ∧ q) ∨ (¬q ∧ r) |
|---|---|---|---|---|---|---|
| T | T | T | T | F | F | T |
| T | T | F | T | F | F | T |
| T | F | T | F | T | T | T |
| T | F | F | F | T | F | F |
| F | T | T | F | F | F | F |
| F | T | F | F | F | F | F |
| F | F | T | F | T | T | T |
| F | F | F | F | T | F | F |
nb:
- Tautologi adalah pernyataan logika yang selalu benar, tidak peduli nilai kebenaran dari komponen-komponennya. contoh
| p | q | p ∧ q | ¬(p ∧ q) | p ∨ ¬(p ∧ q) |
|---|---|---|---|---|
| T | T | T | F | T |
| T | F | F | T | T |
| F | T | F | T | T |
| F | F | F | T | T |
- Kontradiksi adalah pernyataan logika yang selalu salah, tidak peduli nilai kebenaran dari komponen-komponennya. contoh
| p | q | p ∧ q | p ∨ q | ¬(p ∨ q) | (p ∧ q) ∧ ¬(p ∨ q) |
|---|---|---|---|---|---|
| T | T | T | T | F | F |
| T | F | F | T | F | F |
| F | T | F | T | F | F |
| F | F | F | F | T | F |

| p | q | p ∧ q | ¬(p ∧ q) | ¬p | ¬q | ¬p ∨ ¬q |
|---|---|---|---|---|---|---|
| T | T | T | F | F | F | F |
| T | F | F | T | F | T | T |
| F | T | F | T | T | F | T |
| F | F | F | T | T | T | T |
Hukum hukum nya
| Bahasa Indonesia | Bahasa Inggris | Contoh |
|---|---|---|
| Hukum Identitas | Identity Law | p ∧ T ≡ p, p ∨ F ≡ p |
| Hukum Dominasi | Domination Law | p ∨ T ≡ T, p ∧ F ≡ F |
| Hukum Idempotensi | Idempotent Law | p ∨ p ≡ p, p ∧ p ≡ p |
| Hukum Negasi | Negation Law | p ∨ ¬p ≡ T, p ∧ ¬p ≡ F |
| Hukum Komutatif | Commutative Law | p ∨ q ≡ q ∨ p, p ∧ q ≡ q ∧ p |
| Hukum Asosiatif | Associative Law | (p ∨ q) ∨ r ≡ p ∨ (q ∨ r) |
| Hukum Distributif | Distributive Law | p ∨ (q ∧ r) ≡ (p ∨ q) ∧ (p ∨ r) |
| Hukum De Morgan | De Morgan’s Laws | ¬(p ∧ q) ≡ ¬p ∨ ¬q, ¬(p ∨ q) ≡ ¬p ∧ ¬q |
| Hukum Involusi | Double Negation / Involution | ¬(¬p) ≡ p |
| Hukum Implikasi | Implication Law | p → q ≡ ¬p ∨ q |
| Hukum Biimplikasi | Biconditional Law | p ↔ q ≡ (p → q) ∧ (q → p) |
Implikasi
Disebut juga proposisi bersyarat, seperti jika x maka y, notasinya \( p \rightarrow q\). \( p \) nya adalah condition, \( q \) nya adalah conlusion
| p | q | p → q |
|---|---|---|
| T | T | T |
| T | F | F |
| F | T | T |
| F | F | T |
versi versinya jika dijadikan teks
- Jika p, maka q (if p, then q)
- Jika p, q (if p, q)
- p mengakibatkan q (p implies q)
- q jika p (q if p)
- p hanya jika q (p only if q)
- p syarat cukup untuk q (p is sufficient condition for q)
- q syarat perlu bagi p (q is necessary condition for q)
- q bilamana p (q whenever p)
- q mengikuti dari p (q follows from p)
penjelasan kenapa \( F \rightarrow F = T \)
“If I win the lottery, I’ll buy you a car.”
I didn't win the lottery → (False)

I didn't buy a car → (False)
dan juga \( P \rightarrow Q \) sebenarnya sama dengan \( \sim{P} \vee Q \)
Penjelasan kenapa \( \sim (p \rightarrow q )\) itu sama dengan \( p \space \wedge \sim{q} \)
Kita tahu bahwa \( p \rightarrow q \) itu sebenarnya sama dengan \( \sim{p} \vee p \) , maka steps yang dibutuhkan hanya
- \( \sim(p \rightarrow q) \)
- \( \sim(\sim{p} \vee q) \)
- \( p \space \wedge \sim{q} \)
tabel varian implikasi (Proporsi bersyarat)
- Konvers (kebalikan): \( q \rightarrow p \)
- Invers : \( \sim p \rightarrow \sim q \)
- Kontraposisi : \( \sim q \rightarrow \sim p \)
| p | q | ¬p | ¬q | p → q | q → p | ¬p → ¬q | ¬q → ¬p |
|---|---|---|---|---|---|---|---|
| T | T | F | F | T | T | T | T |
| T | F | F | T | F | T | T | F |
| F | T | T | F | T | F | F | T |
| F | F | T | T | T | T | T | T |
Bi-impication
Intinya, operand kanan kiri harus sama, entah sama sama true, atau sama sama false. notasinya: \( p \leftrightarrow q \)
tabel kebenaran
| p | q | p ↔ q |
|---|---|---|
| T | T | T |
| T | F | F |
| F | T | F |
| F | F | T |
contoh
| p | q | p ↔ q | p → q | q → p | (p → q) ∧ (q → p) |
|---|---|---|---|---|---|
| T | T | T | T | T | T |
| T | F | F | F | T | F |
| F | T | F | T | F | F |
| F | F | T | T | T | T |
analogi simple:
-
Jika suatu bilangan genap, maka habis dibagi 2: \( \text{true} \leftrightarrow \text{true} = \text{true} \) -
Jika suatu bilangan bukan genap, maka tidak akan habis dibagi 2: \( \text{false} \leftrightarrow \text{false} = \text{true} \)
kumpulan soal Matematika Diskrit
No. 1
Dalam sebuah survei terhadap 120 orang, diperoleh data sebagai berikut:
- 65 orang suka kopi
- 70 orang suka teh
- 50 orang suka cokelat
- 30 orang suka kopi dan teh
- 28 orang suka kopi dan cokelat
- 26 orang suka teh dan cokelat
- 15 orang suka semua minuman
- Semua orang minimal menyukai satu jenis minuman
Tentukan:
- Banyak orang yang hanya suka kopi
- Banyak orang yang suka teh dan cokelat, tapi tidak suka kopi
- Banyak orang yang suka tepat dua jenis minuman
- Banyak orang yang hanya suka satu jenis minuman
No. 2
Jika diketahui
- S = {1,2,3 …, 15},
- A = { 2,3,5,7},
- B = { 1,3,5,7,9},
- C = {2,4,6,8}
Tentukan :
- A ∪ B ∪ C
- A ∩ C
- B - A
- (A’ ∩ B) - C
- (B - C) ∩ A’
No. 3
Dalam survei terhadap 80 mahasiswa, diperoleh data:
- 45 mahasiswa suka Matematika
- 38 mahasiswa suka Fisika
- 40 mahasiswa suka Kimia
- 20 mahasiswa suka Matematika dan Fisika
- 25 mahasiswa suka Fisika dan Kimia
- 18 mahasiswa suka Matematika dan Kimia
- 10 mahasiswa suka ketiga mata kuliah
- 8 mahasiswa tidak suka semua mata kuliah
tentukan
- Banyak mahasiswa yang suka hanya Matematika
- Banyak mahasiswa yang suka tepat dua mata kuliah
- Banyak mahasiswa yang suka Matematika atau Kimia tapi tidak Fisika
- Banyak mahasiswa yang suka hanya satu mata kuliah
format latex menyusul
asal usul rumus sudut vektor
awal mula dari rumus entah berantah ini. link untuk oprek rumus: https://proofwiki.org/wiki/Cosine_Formula_for_Dot_Product
\[ \vec{A} \cdot \vec{B} = |\vec{A}| |\vec{B}| cos(\theta) \]
lalu \[ \frac{\vec{A} \cdot \vec{B}}{|\vec{A}| |\vec{B}|} = cos(\theta) \]
lalu kita bisa balik, menjadi \[ cos(\theta) = \frac{\vec{A} \cdot \vec{B}}{|\vec{A}| |\vec{B}|} \]
\[ arccos(\frac{\vec{A} \cdot \vec{B}}{|\vec{A}| |\vec{B}|}) = \theta \]
solved!
transformasi elementer
beberapa notasi aneh disini diderive dari PPT kampus.
- \( H_{ij}A \): Swap baris i dengan baris j
- \( H_i^{(k)} \): mengalikan baris i dengan konstanta k
- \( H_{ij}^{(k)} \): hitung dulu konstanta k dikali baris j, lalu hasilnya ditambah baris i, simpan jg hasilnya ke baris i
- \( H_{i \space \space \space \space \space \space \space j}^{\space \space (k) \space \space \space (z)}(A)_i \): intinya, baris ke i dikalikan dgn k, kalau udah lanjut hitung baris j dikalikan z. setelah itu hasilnya tentusaja simpan ke i hasil itung2 an tadi.
matrix invers
for 2x2
\[ A^{-1} = \frac{1}{(a \cdot d) - (b \cdot c)} \begin{bmatrix} d & -b & \newline -c & a \end{bmatrix}\]
for 3x3 \[ A^{-1} = \frac{1}{\det A} \text{adj } A \]
sequence for 3x3 matrix
- search minor matrices (tutup angka)
- then calculate cofactor (plus minus)
- matrix adjoin (transpose of cofactor matrix)
Cryptography
Alur konek ke RPC server telegram
step ini dibuat oleh seseorang dari masa lalu sekitar tahun 2020 yang akunnya telah terhapus, credit kepada Butthx
`originals written in telegram chat, but because I want to preserve it. I write it here
step 1:
Bikin koneksi ke server telegram pakai TCP yang tersedia (disini gwa pakai TCPIntermediate)
step 2:
Bikin random nonce dengan value int128
step 3:
Kirim bytes dari ReqPqMulti dengan value bytes dari nonce tadi.
step 4:
pick salah satu dari beberapa publick fingerprints yang diberikan dari results step3.
step 5:
Lakuin faktor bilangan pq yang diberikan dari results step3, dapetin lagi hasil pembagian dari pq tadi dengan hasil faktor, terus urutkan dari yang terkecil. untuk yang kecil di kasih nama p dan yang besar kasih nama g.
step 6:
bikin nonce baru (jangan ubah nonce yang lama) dengan value random int256.
step 7:
bikin hash (sha1) dari bytes PQInnerData ke telegram: bytes[pq,bytes p,bytes q,nonce,nonce baru,server nonce (dapet dari step3)]
step 8:
bikin padding dengan random bytes dengan panjang -(length bytes PQInnerData + length sha1) mod 255
step 9:
encrypt bytes[sha,bytes PQInnerData,padding] dengan RSA (pakai publik fingerprints tadi)
step 10:
kirim bytes ReqDhParams: bytes[nonce,server nonce, bytes p, bytes q, encrypted data (step9) ,fingerprint]
step 11:
bikin temporary aes key: bytes[sha1[bytes nonce baru, bytes server nonce],sha1[bytes server nonce, bytes nonce baru] slice 0 – 12]
step 12:
bikin temporary aes initial vector (IV): bytes[sha1[bytes server nonce, bytes nonce baru] slice 12 – end, sha1[bytes nonce baru,bytes nonce baru], bytes[nonce baru] slice 0 – 4 ]
step 13:
decrypt encryptedAnswer (dapet dari step 10) menggunakan AES-256-IGE pakai key sama iv tadi.
step 14:
parse decrypted answer tadi ke TLSchema/TLObject
step 15:
bikin random int(panjang 256 bytes, bukan int256 ygy) kita beri nama b
step 16:
dapetin g_b dengan (g ** b) mod dh_prime
- g, dh_prime → dapet dari step 14
step 17:
bikin hash sha1 dari bytes[ClientDhInnerData[nonce, server nonce, 0,unsigned big bytes g_b length 256]]
step 18:
bikin padding dengan length -(length bytes ClientDhInnerData + length sha1) mod 16
step 19:
encrypt bytes[bytes step 17,bytes ClientDhInnerData, padding ] dengan AES-256-IGE, key sama iv masih menggunakan yang step 11.
step 20:
kirim bytes[SetClientDhParams[nonce, server nonce, bytes step 19]]
step 21:
Bikin auth key dengan big-unsigned-bytes[big-u-int(g_a) ** b mod dhPrime] length 256
step 22:
Lakuin security check..
notes: Untuk format pengiriman bytes:
bytes[sessionId,messageId,length content,content]
karena belum ada authkey, jadi sessionId  = Buffer.alloc(8)
untuk dapetin real data dari telegram, slice bytes yang di terima dari 20 – end
pengiriman content selalu bentuk bytes, jadi semua parameter jadiin bytes :)
/**
 * tgsnake - Telegram MTProto framework for nodejs.
 * Copyright (C) 2022 butthx <https://github.com/butthx>
 *
 * THIS FILE IS PART OF TGSNAKE
 *
 * tgsnake is a free software : you can redistribute it and/or modify
 * it under the terms of the MIT License as published.
 */

export const DCTest = {
  1: '149.154.175.10',
  2: '149.154.167.40',
  3: '149.154.175.117',
};
export const DCProd = {
  1: '149.154.175.53',
  2: '149.154.167.51',
  3: '149.154.175.100',
  4: '149.154.167.91',
  5: '91.108.56.130',
};
export const DCProdMedia = {
  2: '149.154.167.151',
  4: '149.154.164.250',
};
export const DCTestIPV6 = {
  1: '2001:b28:f23d:f001::e',
  2: '2001:67c:4e8:f002::e',
  3: '2001:b28:f23d:f003::e',
};
export const DCProdIPV6 = {
  1: '2001:b28:f23d:f001::a',
  2: '2001:67c:4e8:f002::a',
  3: '2001:b28:f23d:f003::a',
  4: '2001:67c:4e8:f004::a',
  5: '2001:b28:f23f:f005::a',
};
export const DCProdMediaIPV6 = {
  2: '2001:067c:04e8:f002:0000:0000:0000:000b',
  4: '2001:067c:04e8:f004:0000:0000:0000:000b',
};
export function DataCenter(
  dcId: number,
  testMode: boolean,
  ipv6: boolean,
  media: boolean
): [ip: string, port: number] {
  if (testMode) {
    return [ipv6 ? DCTestIPV6[dcId] : DCTest[dcId], 80];
  } else {
    if (media) {
      return [ipv6 ? DCProdMediaIPV6[dcId] : DCProdMedia[dcId], 443];
    } else {
      return [ipv6 ? DCProdIPV6[dcId] : DCProd[dcId], 443];
    }
  }
}
ca-certificates
draft: mengoprek kriptografi dibalik HTTPS & konsep public private key pair dan juga peran CA authority, kenapa mereka harus dimasukkan ke package ???
dan juga kenapa MITM (Man in the Middle) bisa melogging jaringan, ketika certificate telah dipasang. kenapa hanya dengan certificate mitm bisa mendecode data yang lewat.
PAP, CHAP, EAP
PAP
Authentikasi yang sangat tidak aman. schema nya
- client send password/username (in unencrypted way)
- server receive it
- and check
- user logged in
CHAP
versi upgrade dari PAP, schemanya
Self signed cert
preface, this answer will make you understanding
- .csr - This is a Certificate Signing Request. Some applications can generate these for submission to certificate-authorities. The actual format is PKCS10 which is defined in RFC 2986. It includes some/all of the key details of the requested certificate such as subject, organization, state, whatnot, as well as the public key of the certificate to get signed. These get signed by the CA and a certificate is returned. The returned certificate is the public certificate (which includes the public key but not the private key), which itself can be in a couple of formats.
openssl todo
here what I want to learn about cryptography
- Symmetric encryption (AES, DES)
- Asymmetric encryption (RSA, ECC)
- Hashing (SHA, MD5)
- Digital signatures
- Certificates & PKI (Public Key Infrastructure)
footnote:
generating RSA public key from private key
- https://docs.openssl.org/3.2/man1/openssl-format-options/#format-options
- https://knowledge.digicert.com/general-information/openssl-quick-reference-guide
- https://developers.yubico.com/PIV/Guides/Generating_keys_using_OpenSSL.html
generating private key
openssl genrsa -out private.key 8192
this command will generate private key with length
let's extract public key from newly generated private key
openssl rsa -pubout -in ./private.key -outform PEM -out public.key

# or, whatever

openssl rsa -outform PEM -in ./private.key -pubout -out public.pem
symmetric block chiper
- https://en.wikipedia.org/wiki/Symmetric-key_algorithm in simply terms, symmetric block chiper is a way where encryption and decryption is uses same key. for example

credit: wikipedia.org
CLUE: just like zip file
this is example of symmetric key algorithm
- AES-128
- AES-192
- AES-256
- ARIA-128
- ARIA-192
- ARIA-256
- CAMELLIA-128
- CAMELLIA-192
- CAMELLIA-256
- DES
- DES3
example
AES
salt
what is salt? salt is sodium chloride (damn)
in cryptography
salt is a "extra entropy" that breaks precalculated hash. the simple way to do is concat password with salt and hash them, let's see this scenario
php > echo hash("sha256", "a-password");
e9fad6b0fee5a53813e888b6a3c63a843395ab112b51495a30c1b00a0e5f89e0
withou salt, if attacker has precomputed hash, it might found that e9fad6b0fee5a53813e888b6a3c63a843395ab112b51495a30c1b00a0e5f89e0 is correlated with a-password, let's add salt
php > $a = new Random\Engine\Secure();
php > $salt = $a->generate();
php > echo bin2hex($salt) . "::" . hash("sha256", $salt . "a-password");
39fa561b306cc437::46ac00f5ca786405fd91205d377a83e4e35ed954b7bd6a9078d24215b8135d78
and, the 39fa561b306cc437::46ac00f5ca786405fd91205d377a83e4e35ed954b7bd6a9078d24215b8135d78 you can store in your db table.
we generate a CSPRNG (Cryptographically Secure Pseudorandom Number Generator), Then concat them as a salt. this is not protect a password from attacking, but make a attacker harder because its need to be re-compute the value (which is heavy, e.g bruteforcing)
HMAC-SHA256
Server
Cgit setup
Ku mau share pengalaman bikin self hosting git server, pakai cgit, biar engga kalah aja sama git.kernel.org dan kernel.dk wkwk
step satu, include dir nya sites-available spt biasa, contoh config nya https://gist.github.com/fadhil-riyanto/328f2cc0607eb58b713cdeaa473d08ee, lalu config untuk sites-available nya https://gist.github.com/fadhil-riyanto/c2e26de30c97600e4ee9342aefbd6ece
nb: install fcgiwrap dulu
lalu edit /etc/cgitrc, contoh config: https://gist.github.com/fadhil-riyanto/4033e6ce59a35568c31dbd5e5a1d29bd
harusnya sampai sini, cgit dah bisa diakses, cuman empty repository aja.
ok, lalu kita ke permission2 nya, pertama2 pakai akun root, tldr
cd /root
mkdir git
cd git
mkdir user1, misal aja mkdir fadhil_riyanto
cd fadhil_riyanto
clone git apapun disini, misal
git clone https://github.com/fadhil-riyanto/reponame.git --bare (harus pakai bare)
posisi dir ini di /root/git/fadhil-riyanto/reponame.git
ok, balik ke parent dir, posisi di /root/git
lakukan chown -R fadhil_riyanto fadhil-riyanto, jika engga nanti error "git submodule update" failed with 'fatal: detected dubious ownership in repository at...' etc...
ok, saatnya push
git remote add cgit fadhil_riyanto@123.123.111.222:/root/git/fadhil-riyanto/reponame.git
config HTTPS nginx
Cara config HTTPS di server pakai certbot (NGINX)
- apt install certbot python3-certbot-nginx
- verify config na pakai nginx -t
- generate cert na pakai certbot --nginx -d namasite.com
ganti namasite.com dengan embel2 di /etc/nginx/sites-enabled/somefile.conf
didalamnya kan ada server_name, nah diganti dgn itu
Setup virtual network interface
cara setup virtual ethernet + assign ip nya
sudo ip link add veth0 type dummy
bisa dicek pakai ip addr
[11:11:35] fadhil_riyanto@integral2 /etc/systemd/network
> ip addr
1: lo: <LOOPBACK,UP,LOWER_UP> mtu 65536 qdisc noqueue state UNKNOWN group default qlen 1000
    link/loopback 00:00:00:00:00:00 brd 00:00:00:00:00:00
    inet 127.0.0.1/8 scope host lo
       valid_lft forever preferred_lft forever
    inet6 ::1/128 scope host noprefixroute
       valid_lft forever preferred_lft forever
2: enp2s0: <NO-CARRIER,BROADCAST,MULTICAST,UP> mtu 1500 qdisc fq_codel state DOWN group default qlen 1000
    link/ether 2c:4d:54:c6:f2:0c brd ff:ff:ff:ff:ff:ff
    altname enx2c4d54c6f20c
3: wlan0: <BROADCAST,MULTICAST,UP,LOWER_UP> mtu 1500 qdisc noqueue state UP group default qlen 1000
    link/ether f0:03:8c:66:9c:21 brd ff:ff:ff:ff:ff:ff
    inet 192.168.5.44/24 brd 192.168.5.255 scope global dynamic noprefixroute wlan0
       valid_lft 581sec preferred_lft 581sec
    inet 192.168.5.197/24 metric 1024 brd 192.168.5.255 scope global secondary dynamic wlan0
       valid_lft 582sec preferred_lft 582sec
    inet6 fe80::5574:5771:be47:2f7b/64 scope link noprefixroute
       valid_lft forever preferred_lft forever
    inet6 fe80::f203:8cff:fe66:9c21/64 scope link proto kernel_ll
       valid_lft forever preferred_lft forever
4: veth0: <BROADCAST,NOARP,UP,LOWER_UP> mtu 1500 qdisc noqueue state UNKNOWN group default qlen 1000
    link/ether 76:4d:3f:3d:11:7f brd ff:ff:ff:ff:ff:ff
    inet6 fe80::744d:3fff:fe3d:117f/64 scope link proto kernel_ll
       valid_lft forever preferred_lft forever
lalu assign ip nya
sudo ip addr add 192.168.100.10/24 dev veth0sudo ip link set veth0 up
dan bisa diping juga

untuk remove interface nya bisa pakai
sudo ip link delete vnet0
some sorts of equalivalent command
- Create bridge:
brctl addbr br0ip link add br0 type bridge - Delete bridge:
brctl delbr br0ip link delete br0 - Add interface to bridge:
brctl addif br0 eth0ip link set eth0 master br0 - Remove interface from bridge:
brctl delif br0 eth0ip link set eth0 nomaster - Show bridge info:
brctl showorbrctl show br0bridge link showorip link show master br0 - Enable/disable STP:
brctl stp br0 on/offbridge link set dev eth0 guard off/on(note: STP enable/disable logic is reversed)
ip aliasing
satu interface bisa punya lebih dari 1 IP dinamai sebagai IP aliasing. contoh
eth0 bisa punya 2 ip dengan cara
ip addr add 192.168.1.100/24 dev eth0ip addr add 192.168.1.101/24 dev eth0
atau bisa juga ada 2 interface, katakanlah eth0 dengan eth1, masing2 punya ip nya sendiri2 dengan cara
ip addr add 192.168.1.10/24 dev eth0
ip addr add 10.0.0.5/24 dev eth1
tambahan
untuk ngeremove salah satu ip nya, bisa dengan ip addr del <IP NYA>/<CIDR> dev <IFACE>
Setup bridge enp0s16u1
- setup dulu bridgenya pakai
ip link add br0 type bridge - buat enp0s16u1 sebagai master dari br0, pakai
ip link set enp0s16u1 master br0- catatan, wlan0 tidak bisa di add. https://bbs.archlinux.org/viewtopic.php?id=264651, https://wiki.archlinux.org/title/Network_bridge#Wireless_interface_on_a_bridge
- lalu enable semua interface nya
sudo ip link set dev enp0s16u1 upsudo ip link set dev br0 up
- set dhcp
sudo dhclient br0- nb, ditahap ini, harusnya sudah dapat ip dan bisa ping keluar.
- hapus ip bawaan enp0s16u1 dan pakai br0 sebagai default interface pakai
sudo ip addr flush dev enp0s16u1
bisa di test dengan
- hapus dahulu ip yang tadi diberikan ke br0 pakai
sudo dhclient -r br0, pastikan ip nya kosong - lalu hapus ip milik enp0s16u1
- test ping
- lalu lakukan lagi
sudo dhclient br0

reverse command
Pakai ini untuk in-case ada kesalahan
hapus ip br0
ip addr show br0sudo ip addr del 192.168.1.10/24 dev br0
tambahan, kadang tidak bener2 kehapus karna mungkin NetworkManager, systemd-networkd, dhclient aktif.

nb: untuk dhcp kadang NetworkManager sama systemd-networkd bertabrakan, solusinya stop dahulu pakai
sudo systemctl stop systemd-networkd.socketsudo systemctl stop systemd-networkd
next, buat bridge ke VM. topologi
   [Internet]
       |
     Router
       |
     eth0 (on host) → br0 (bridge)
                      |
    +--------+--------+--------+
    |        |        |        |
  VM1      VM2      VM3      etc.
  ↳ 192.168.12.101   192.168.12.102   ...
mulai dari sini akan utak atik veth
setup veth manual
sudo ip link add veth0 type veth peer name veth0-peersudo ip link set veth0 master br0sudo ip link set veth0 upsudo ip link set veth0-peer upsudo dhclient veth0-peer
topologinya kira2 seperti ini
                +---------------------------+
                |        Linux Host         |
                |                           |
                |   +-------------------+   |
                |   |       br0         |   |  ← bridge acting as a virtual switch
                |   +--------+----------+   |
                |            |              |
                |         veth0            ... ← more veths for other containers/VMs
                |            |
                +------------+--------------+
                             |
                             | (virtual cable)
                             |
                         veth0-peer
                             |
                    +------------------+
                    |   Container/VM   |  ← gets its own IP
                    +------------------+
lanjut assign veth-peer ke qemu (pakai tap device)
topology:
            Linux Host
       +------------------+
       |      br0         |  ← acts as switch
       +--+-----------+---+
          |           |
        eth0         tap0  ← tap device for QEMU VM
                        |
                   QEMU VM
attach
sudo ip tuntap add dev tap0 mode tap
sudo ip link set tap0 up
sudo ip link set tap0 master br0
qemu
sudo qemu-system-x86_64 \
  -enable-kvm \
  -m 2048 \
  -hda ubuntu.qcow2 \
  -netdev tap,id=net0,ifname=tap0,script=no,downscript=no \
  -device virtio-net-pci,netdev=net0
test qemu mikrotik
qemu-system-x86_64 \
                -enable-kvm \
                -boot order=d \
                -drive file=chr.qcow2,format=qcow2 \
                -m 4G \
                -smp 4 \
                -net user,hostfwd=tcp::10022-:22,hostfwd=tcp::8080-:8080 \
                -netdev tap,id=net0,ifname=tap0,script=no,downscript=no \
                -device virtio-net-pci,netdev=net0
untuk test nya, bisa dengan
- cek ip mikrotik pakai
/ip address print - lalu
ip netns exec namespace_satu ping <IP NYA> - Bisa juga pakai dummy http server php, caranya
sudo ip netns exec namespace_satu php -S 192.168.12.82:1234(cek dahulu ip namespace pakai ip addr)
contoh setup pakai namespace
- create dulu pakai
sudo ip netns add namespace_satu - set
sudo ip link set veth0-peer netns namespace_satu - cek dahulu, pastikan didalamnnya masih kosong ip nya, pakai
sudo ip netns exec namespace_satu ip addr
- lalu kita nyalakan veth0-peer nya
sudo ip netns exec namespace_satu ip link set dev veth0-peer up, tapi tetap saja masih belum dapat ip. maka next kita exec dhclient pakaisudo ip netns exec namespace_satu dhclient veth0-peer
- test ping keluar

Setup shadowsocks proxy server
shadowsocks-libev is available in the official repository for Debian 9("Stretch"), unstable, Ubuntu 16.10 and later derivatives:
sudo apt update
sudo apt install shadowsocks-libev
then, create a file config on /etc/shadowsocks-libev/config.json which has contents something like this
{
    "server":["::1", "10.1.1.4"],
    "mode":"tcp_and_udp",
    "server_port":8388,
    "local_port":1080,
    "password":"1u21wW3E0bwu",
    "timeout":86400,
    "method":"chacha20-ietf-poly1305"
}
in this case, I use 10.1.1.4 as local ip, then forwarded through firewall to the public addr.
then, sudo systemctl start shadowsocks-libev
ref: https://shadowsocks.org/doc/configs.html
connect
Alpine htop install on live QEMU
create disk first
qemu-img create -f qcow2 alpine-1.qcow2 1G
start qemu
download iso here https://dl-cdn.alpinelinux.org/alpine/v3.21/releases/x86_64/alpine-virt-3.21.3-x86_64.iso
qemu-system-x86_64 \
      -enable-kvm \
      -m 256 \
      -smp 4 \
      -cpu host \
      -drive file=pc-1.qcow2,format=qcow2 \
      -cdrom alpine-virt-3.21.3-x86_64.iso \
      -boot d \
      -net nic \
      -net user -nographic
default username is root, password left blank, just enter
set eth0 up & DHCP
ip link set dev eth0 upudhcpc -i eth0ping 1.1.1.1(testing)
for /etc/resolv.conf, change to nameserver 1.1.1.1
patch apk configuration
cp /etc/apk/repositories /etc/apk/repositories-old
--- repositories-old
+++ repositories
@@ -1 +1,2 @@
-/media/cdrom/apks
+http://dl-cdn.alpinelinux.org/alpine/v3.21/main
+http://dl-cdn.alpinelinux.org/alpine/v3.21/community
update
apk updateapk cache downloadapk cache -v sync
setup partition
set it with your needs, I use entire disk in this docs
make sure first your ext4 kernel module is installed & loaded by typing
lsmod | grep ext4: checkmodprobe ext4lsmod | grep ext4: recheck again
the output is should be something like this

then we can move forward to ext4 partition generation
partitioning
install parted first using apk add parted, check your disk first using fdisk -l, for example there is /dev/sda
parted section
run parted /dev/sda, inside of parted is
unit smklabel [gpt/msdos]: I use msdos anywayprint: identify disk size by see on section something like Disk /dev/sda: 2097152s, there has 2097152s sector, so I use 2097152 - (2948 * 2), which is 2093056smkpartprimaryext42048s2093056sq
resulted partition:

setup diskless install
warn: you need to enable ext4 kernel module or you'll get mount: mounting /dev/sda1 on /media/sda1 failed: Invalid argument when mounting
modprobe ext4apk add e2fsprogsformkfs.ext4commandmkfs.ext4 /dev/sda1mount /dev/sda1 /media/sda1: mount location should be located on/media, not/mnt
then, you can do normal setup-alpine, except for this thing
- Which disk(s) would you like to use? (or '?' for help or 'none') [none] none
- Enter where to store configs ('floppy', 'sda1', 'usb' or 'none') [sda1] sda1
- Enter apk cache directory (or '?' or 'none') [/media/sda1/cache] /media/sda1/cache
LBU
run lbu commit
Run router-OS on qemu
on normal interface
qemu-system-x86_64 \
          -enable-kvm \
          -boot order=d \
          -cdrom chr-6.49.18.img \
          -drive file=chr.qcow2,format=qcow2 \
          -m 4G \
          -smp 4 \
          -net user,hostfwd=tcp::10022-:22,hostfwd=tcp::8291-:8291 \
          -net nic
setup linux bridge between RouterOS & Alpine linux hosts
this docs is second part of this
first thing that we need to do is create a copy of qcow2 alpine, so we do not need to re-install again. do not forget to change the hostname & password for easy identification
setup bridge
sudo ip link add br0-lan type bridgesudo ip link add br1-lan type bridge
setup TAP
tap0 & tap1 connected to br0-lan tap2 & tap3 connected to br1-lan
sudo ip tuntap add dev tap0 mode tapsudo ip tuntap add dev tap1 mode tapsudo ip tuntap add dev tap2 mode tapsudo ip tuntap add dev tap3 mode tapsudo ip link set tap0 master br0-lansudo ip link set tap1 master br0-lansudo ip link set tap2 master br1-lansudo ip link set tap3 master br1-lansudo ip link set tap0 upsudo ip link set tap1 upsudo ip link set tap2 upsudo ip link set tap3 up
launch mikrotik ISO
qemu-system-x86_64 \
      -enable-kvm \
      -boot order=d \
      -drive file=chr.qcow2,format=qcow2 \
      -m 256M \
      -smp 4 \
      -netdev tap,id=net0,ifname=tap0,script=no,downscript=no \
      -device virtio-net-pci,netdev=net0,mac=02:11:2a:3b:ff:c3  \
      -netdev tap,id=net1,ifname=tap2,script=no,downscript=no \
      -device virtio-net-pci,netdev=net1,mac=02:1a:f2:f1:21:b5  \
      -nographic \
      -net user,hostfwd=tcp::10022-:22,hostfwd=tcp::8291-:8291 \
      -net nic

based on topology, we know that
02:11:2a:3b:ff:c3used by tap0 (in routerOS, bridge 0)02:1a:f2:f1:21:b5used by tap2 (in routerOS, bridge 1)tap1&tap3used by alpine virtual machine
now run alpine iso
alpine (as pc-1)
qemu-system-x86_64 \
            -enable-kvm \
            -m 256 \
            -smp 4 \
            -cpu host \
            -drive file=pc-1.qcow2,format=qcow2 \
            -cdrom alpine-virt-3.21.3-x86_64.iso \
            -boot d \
            -nographic \
            -netdev tap,id=net0,ifname=tap1,script=no,downscript=no \
            -device virtio-net-pci,netdev=net0
alpine (as pc-3)
qemu-system-x86_64 \
            -enable-kvm \
            -m 256 \
            -smp 4 \
            -cpu host \
            -drive file=pc-2.qcow2,format=qcow2 \
            -cdrom alpine-virt-3.21.3-x86_64.iso \
            -boot d \
            -nographic \
            -netdev tap,id=net0,ifname=tap3,script=no,downscript=no \
            -device virtio-net-pci,netdev=net0
WinBox config
first, we need to see the configuration & which etherX by looking to spesific mac-addr, we find out that
[admin@MikroTik] > /interface print
Flags: D - dynamic, X - disabled, R - running, S - slave
 #     NAME                                TYPE       ACTUAL-MTU L2MTU  MAX-L2MTU MAC-ADDRESS
 0  R  ;;; wan
       ether1                              ether            1500                  52:54:00:12:34:56
 1  R  ether4                              ether            1500                  02:11:2A:3B:FF:C3
 2  R  ether5                              ether            1500                  02:1A:F2:F1:21:B5
[admin@MikroTik] >
next thing, lets configure our ip using winbox, this is ip configuration

DHCP server section

now, try run udhcpc -i eth0 on each vm
result on pc-1

result on pc-2

Linux iptables preview (try making a nat)
for example, iptables -t nat the t option from manpage is
          filter:
              This  is  the  default  table  (if  no -t option is passed). It contains the built-in
              chains INPUT (for packets destined to local  sockets),  FORWARD  (for  packets  being
              routed through the box), and OUTPUT (for locally-generated packets).

          nat:
              This  table  is consulted when a packet that creates a new connection is encountered.
              It consists of four built-ins: PREROUTING (for altering packets as soon as they  come
              in),  INPUT  (for  altering packets destined for local sockets), OUTPUT (for altering
              locally-generated packets before routing), and POSTROUTING (for altering  packets  as
              they are about to go out).  IPv6 NAT support is available since kernel 3.7.

          mangle:
              This table is used for specialized packet alteration.  Until kernel 2.4.17 it had two
              built-in chains: PREROUTING (for altering incoming packets before routing) and OUTPUT
              (for  altering locally-generated packets before routing).  Since kernel 2.4.18, three
              other built-in chains are also supported: INPUT (for packets coming into the box  it‐
              self),  FORWARD  (for altering packets being routed through the box), and POSTROUTING
              (for altering packets as they are about to go out).

          raw:
              This table is used mainly for configuring exemptions from connection tracking in com‐
              bination with the NOTRACK target.  It registers at the netfilter  hooks  with  higher
              priority and is thus called before ip_conntrack, or any other IP tables.  It provides
              the  following  built-in chains: PREROUTING (for packets arriving via any network in‐
              terface) and OUTPUT (for packets generated by local processes).

          security:
              This table is used for Mandatory Access Control (MAC) networking rules, such as those
              enabled by the SECMARK and CONNSECMARK targets.  Mandatory Access Control  is  imple‐
              mented by Linux Security Modules such as SELinux.  The security table is called after
              the filter table, allowing any Discretionary Access Control (DAC) rules in the filter
              table  to  take  effect before MAC rules.  This table provides the following built-in
              chains: INPUT (for packets coming into the box itself), OUTPUT (for altering locally-
              generated packets before routing), and FORWARD (for  altering  packets  being  routed
              through the box).
What kind of tables in iptables
according from archlinux wiki
iptables contains five tables:
- raw is used only for configuring packets so that they are exempt from connection tracking.
- filter is the default table, and is where all the actions typically associated with a firewall take place.
- nat is used for network address translation (e.g. port forwarding).
- mangle is used for specialized packet alterations.
- security is used for Mandatory Access Control networking rules (e.g. SELinux -- see this article for more details).
In most common use cases, you will only use two of these: filter and nat. The other tables are aimed at complex configurations involving multiple routers and routing decisions and are in any case beyond the scope of these introductory remarks.
Tables & chain details
all iptables chain information can be gathered by this command
sudo iptables -t filter -L
sudo iptables -t nat -L
sudo iptables -t mangle -L
sudo iptables -t raw -L
sudo iptables -t security -L
this is list of all chain by corresponding table
table raw
- PREROUTING
- OUTPUT
table nat
- PREROUTING
- INPUT
- OUTPUT
- POSTROUTING
table mangle
- PREROUTING
- INPUT
- FORWARD
- OUTPUT
- POSTROUTING
table filter
- INPUT
- FORWARD
- OUTPUT
table security
- INPUT
- FORWARD
- OUTPUT
we will focus on NAT section.
machine session
In iptables, packet often categorized as 4 different state, such
- NEW
- ESTABLISHED
- RELATED
- INVALID
this connection tracking is done by a special framework within the kernel called conntrack
command lists
this is some special iptables command collection
iptables --list-rules: show all ip rulesiptables --table nat --list --line-numbers: will useful if you want to delete spesific rule, i.e, duplicated rulesudo iptables --table nat -D POSTROUTING 2example: delete rule 2
create your own chain
iptables -N chain_name: eq:--new-chainiptables -A chain_name -p icmp -j accept(example)
make changes permanent
sudo iptables-save > /etc/iptables/rules.v4
tables explanation
> sudo iptables --table nat --list
Chain PREROUTING (policy ACCEPT)
target     prot opt source               destination

Chain INPUT (policy ACCEPT)
target     prot opt source               destination

Chain OUTPUT (policy ACCEPT)
target     prot opt source               destination

Chain POSTROUTING (policy ACCEPT)
target     prot opt source               destination
MASQUERADE  all  --  anywhere             anywhere
MASQUERADE  all  --  anywhere             anywhere
MASQUERADE  all  --  anywhere             anywhere
MASQUERADE  all  --  anywhere             anywhere
target: what to do with packet.
prot: abbr of protocol
opt: abbr of options (AI says rarely used)
source: its anywhere or explicit ip such 192.168.1.0/24
destination: same as source, can be network
show rules from X table
for example, there has
nattable, which containsPREROUTING,INPUT,OUTPUT,POSTROUTINGfiltertable contains main chain that used by iptables for packet filtering, which containsINPUT,FORWARD,OUTPUT
MORE deeper on X table
| Table | Purpose | Chains it uses |
|---|---|---|
filter | Default, handles packet filtering | INPUT, OUTPUT, FORWARD |
nat | Network Address Translation | PREROUTING, POSTROUTING, OUTPUT |
mangle | Packet modification (TTL, TOS, etc.) | All chains |
raw | Pre-connection tracking processing | PREROUTING, OUTPUT |
security | SELinux/LSM-based packet filtering | INPUT, OUTPUT, FORWARD |
Linux QEMU network address translation
first all, set setup our interface
sudo ip tuntap add tap0 mode tapsudo ip tuntap add tap1 mode tap(optional, if there has any more vm)sudo ip link add br0-lan type bridge(our switch)sudo ip addr add 192.168.12.1/24 dev br0-lansudo ip link set br0-lan upsudo ip link set tap0 up, also with tap1 if needed
Run alpine guest hosts
qemu-system-x86_64 \
            -enable-kvm \
            -m 256 \
            -smp 4 \
            -cpu host \
            -drive file=pc-2.qcow2,format=qcow2 \
            -cdrom alpine-virt-3.21.3-x86_64.iso \
            -boot d \
            -nographic \
            -netdev tap,id=net0,ifname=tap0,script=no,downscript=no \
            -device virtio-net-pci,netdev=net0
Inside of guest VM
Your ip addr output might something like this
1: lo: <LOOPBACK,UP,LOWER_UP> mtu 65536 qdisc noqueue state UNKNOWN qlen 1000
    link/loopback 00:00:00:00:00:00 brd 00:00:00:00:00:00
    inet 127.0.0.1/8 scope host lo
       valid_lft forever preferred_lft forever
    inet6 ::1/128 scope host
       valid_lft forever preferred_lft forever
2: eth0: <BROADCAST,MULTICAST,UP,LOWER_UP> mtu 1500 qdisc pfifo_fast state DOWN qlen 1000
    link/ether 52:54:00:12:34:56 brd ff:ff:ff:ff:ff:ff
    inet6 fe80::5054:ff:fe12:3456/64 scope link
       valid_lft forever preferred_lft forever
now set eth0 up by typing
ip link set eth0 upip addr add 192.168.12.2/24 dev eth0(I manually setting up IP)
check ip route
pc-2:~# ip r
192.168.12.0/24 dev eth0 scope link  src 192.168.12.2
there is no route, run ip route add default via 192.168.12.1, check again with ip route
pc-2:~# ip r
default via 192.168.12.1 dev eth0
192.168.12.0/24 dev eth0 scope link  src 192.168.12.2
setting up firewall
we want everyting from br0-lan is forwarded into wlan0, vice versa. in order to do that, we need NAT (network address translation)
here
check your nat table first
sudo iptables --table nat --list -v, make sure there is no
2151 499K MASQUERADE all -- any wlan0 anywhere anywhere
now run
sudo iptables --table nat --append POSTROUTING --out-interface wlan0 -j MASQUERADEsudo iptables -t filter -A FORWARD -i wlan0 -o br0-lan -m state --state RELATED,ESTABLISHED -j ACCEPTsudo iptables -t filter -A FORWARD -i br0-lan -o wlan0 -j ACCEPT
QEMU block 8.8.8.8 from host
after this
I want this rule
- allow other ICMP (i.e 1.1.1.1)
- deny ICMP 8.8.8.8
iptables rule
suppose, vm ip is 192.168.12.2, so the iptables command is
sudo iptables -t filter -A FORWARD -s 192.168.12.2 -d 8.8.8.8 -p icmp -j DROP
note:
- t: explicit table
- a: table FORWARD
- s: source from 192.168.12.2 (OUR VM)
- d: destination: 8.8.8.8
- p: protocol (which is ICMP)
- j: jump
the problem
you may see ping 8.8.8.8 still success, let check iptables rule
sudo iptables -t filter -L FORWARD -n --line-numbers -v
the output
Chain FORWARD (policy ACCEPT)
num  target     prot opt source               destination
1    ACCEPT     all  --  0.0.0.0/0            0.0.0.0/0            state RELATED,ESTABLISHED
2    ACCEPT     all  --  0.0.0.0/0            0.0.0.0/0
3    DROP       icmp --  192.168.12.2         8.8.8.8
see? when ping to 8.8.8.8, its stop at rule 2, which abort 3st rule, in order to fix it, we need re-order this
remote all rule
sudo iptables -t filter -F FORWARD
re-add
sudo iptables -t filter -A FORWARD -m state --state RELATED,ESTABLISHED -j ACCEPT
sudo iptables -t filter -A FORWARD -s 192.168.12.2 -d 8.8.8.8 -p icmp -j DROP
sudo iptables -t filter -A FORWARD -s 192.168.12.2/24 -j ACCEPT
Try re-run sudo iptables -t filter -L FORWARD -n --line-numbers
the order should be fixed
Chain FORWARD (policy ACCEPT)
num  target     prot opt source               destination
1               all  --  0.0.0.0/0            0.0.0.0/0            state RELATED,ESTABLISHED
2    DROP       icmp --  192.168.12.2         8.8.8.8
3    ACCEPT     all  --  0.0.0.0/0            0.0.0.0/0

logic netfilter linux kernel
Logic NAT
misalkan kita ada virtual interface br0, dengan anggotanya tap0, tap1 lalu ingin forward semua traffic ke wlan0 (karna memang wlan0 tidak bisa di jadikan master dari x y z)
maka solusinya iptables
sudo iptables -t nat -A POSTROUTING -o wlan0 -j MASQUERADE
logic nya
- fill dulu tabel nat
- append ke postrouting, jadi setelah packet di routing oleh linux kernel, ada 2 field, source addr (katakanlah ip tap0) lalu destination addr (misal 8.8.8.8)
- nah, semisal tidak di apa apakan, packet sent ke 8.8.8.8, tapi 8.8.8.8 tidak bisa mengirim back packetnya karna source addr nya invalid (di stage ini, source ip nya adalah IP LAN)
- maka, setelah linux kernel meng-routingkan packet nya, seketika setelah itu (postrouting), kita ganti source addrnya dengan source ip PUBLIK milik firewall, jadi 8.8.8.8 bisa tahu kemana packet harus dikirim kembali
- didalam firewall, packet yang tadi diterima, direverse balik oleh nat, dan dikirim balik ke perangkat aslinya.
- pakai MASQUERADE
logic forward data dari br0 ke wlan
sudo iptables -A FORWARD -i br0 -o wlan0 -j ACCEPT
important notes:
- chain FORWARD: This chain is only used for packets that are not destined for the local machine, but are routed through it (i.e., from one interface to another).
- In this case: a device connected to br0 (e.g., a VM or container) wants to access the internet via wlan0.
analoginya
[Device 192.168.100.2] ──> [br0 (Linux bridge)] ──> Linux router ──> [wlan0] ──> Internet
bisa juga -j diganti drop, maka aliran data akan terputus
logic forward dari wlan0 ke br0 (sebaliknya)
sudo iptables -A FORWARD -i wlan0 -o br0 -m state --state RELATED,ESTABLISHED -j ACCEPT
logic:
- misal vm tap0 buat koneksi keluar, misal ke 8.8.8.8
- dari tap0 -> br0 -> wlan0 di allow oleh rule
sudo iptables -A FORWARD -i br0 -o wlan0 -j ACCEPT - ketika server mengirim respon balik, maka alurnya dari wlan0 ke br0, nah ini fungsi dari
sudo iptables -A FORWARD -i wlan0 -o br0 -j ACCEPT
KENAPA harus pakai --state RELATED,ESTABLISHED
karna kita butuh packet yg sudah estab duluan yg boleh lewat. ini akan menghindari jaringan luar (wlan0) mengakses br0 -> tap0 & tap1
resep nginx oleh pak hanif
cuplikan config nginx di server, cc @hansputera
server {
        listen 80; # tanpa server_default
        listen [::]:80;

        root /var/www/html/blablabla.fadev.org;

        index index.php index.html index.htm index.nginx-debian.html;

        server_name blablabla.fadev.org;

        location ~ \.php$ {
                include snippets/fastcgi-php.conf;

                fastcgi_pass unix:/run/php/php-fpm.sock;
        }
}
ip command
ip addr
ip addr is used to display and manage IP addresses assigned to network interfaces.
example:
ip addrip addr showsudo ip addr add 192.168.1.100/24 dev eth0sudo ip addr del 192.168.1.100/24 dev eth0
anything about ip assigment
ip link
ip link is used to display and manage network interfaces (links), focusing on layer 2 (Ethernet, loopback, etc.), not IP addresses.
example:
ip linksudo ip link set dev eth0 upsudo ip link set dev eth0 downsudo ip link set dev eth0 mtu 1400
anyting about interface
ip tuntap
ip tuntap manages TUN/TAP virtual network interfaces, which provide a way for user-space programs to interact with network packets as if they were network devices.
- TUN: Simulates a point-to-point device (layer 3), used for routing IP packets (e.g., VPN tunnels).
- TAP: Simulates an Ethernet device (layer 2), used for bridging Ethernet frames (e.g., virtual switches, VMs).
example:
sudo ip tuntap add mode tap dev tap0sudo ip tuntap add mode tun dev tun0sudo ip tuntap del mode tap dev tap0
ip route
IP routing is the process by which data packets are directed from their source to their destination across interconnected networks using Internet Protocol (IP). This process is fundamental to the operation of the Internet and all IP-based networks.
- https://www.link11.com/en/glossar/ip-routing/
- https://www.cloudflare.com/learning/network-layer/what-is-routing/
- https://info.support.huawei.com/info-finder/encyclopedia/en/IP+routing.html
View routing table:
ip route
add route
ip route add <destination> via <gateway> dev <interface>
example:
pc-1:~# ip route add default via 192.168.15.1 dev eth0
pc-1:~# ip route
default via 192.168.15.1 dev eth0
192.168.15.0/24 dev eth0 scope link  src 192.168.15.2
delete route
sudo ip route del <destination> [via <gateway>] [dev <interface>]
example:
pc-1:~# ip route delete default via 192.168.15.1 dev eth0
pc-1:~# ip r
192.168.15.0/24 dev eth0 scope link  src 192.168.15.2
pc-1:~#
qemu default network
The default gateway in QEMU when using the default user-mode networking (SLIRP) is typically 10.0.2.2 on the network 10.0.2.0/24. QEMU creates a virtual NAT network where the guest is assigned an IP like 10.0.2.15 by DHCP, and the gateway for the guest to reach outside networks is 10.0.2.2. This gateway is implemented inside QEMU and handles routing and NAT for the guest's traffic.
- Default network: 10.0.2.0/24
- Default gateway: 10.0.2.2
- Default guest IP (DHCP assigned): 10.0.2.15
- Default DNS server in guest: 10.0.2.3
This setup requires no special host configuration or root privileges and is the default networking mode for QEMU user mode networking.
additional
- https://docs.zephyrproject.org/latest/connectivity/networking/qemu_user_setup.html
- https://darnassus.sceen.net/~hurd-web/hurd/running/qemu/networking/
- https://wiki.qemu.org/Documentation/Networking

mikrotik firewall
each firewall module (called as table in iptables) has its own predefined chain
-
raw: dipakai sebelum data dilihat oleh conntrack, NAT, masuk routing, dll. intinya di sinilah proses early sebelum benar2 di proses. karna belum sampai ke conntrack, maka akan sangat fast, dipakai untuk mitigasi ddos
karna statenya ada sebelum conntrack, maka tidak ada status kayak estab, dll, tapi sangat fast + low cpu, only raw matching
Karna raw table melihat packet sebelum NAT, maka
- Destination IPs are still the original IPs from the client
- Source IPs haven't been changed by masquerade or src-nat yet
chain chain nya
- prerouting: packet yang datang dari luar just sebelum masuk conntrack
- output: packet yang digenerate oleh aplikasi, juga statenya sebelum di track oleh conntrack
contoh
/ip firewall raw add chain=prerouting src-address=8.8.8.8 action=drop
tambahan:
letak raw di packet flow
IN → RAW → MANGLE (pre) → CONNECTION TRACKING → NAT (dstnat) → FILTER (input/forward) → MANGLE (post) → NAT (srcnat) → OUT -
filter
- input
- forward
- output
-
mangle
- prerouting
- input
- forward
- output
- postrouting
-
nat
- srcnat
- dstnat
chains
RouterOS consist of a few default chains. These chains allow you to filter packets at various points:
- The PREROUTING chain: Rules in this chain apply to packets as they just arrive on the network interface. This chain is present in the nat, mangle and raw tables.
- The INPUT chain: Rules in this chain apply to packets just before they’re given to a local process. This chain is present in the mangle and filter tables.
- The OUTPUT chain: The rules here apply to packets just after they’ve been produced by a process. This chain is present in the raw, mangle, nat, and filter tables.
- The FORWARD chain: The rules here apply to any packets that are routed through the current host. This chain is only present in the mangle and filter tables.
- The POSTROUTING chain: The rules in this chain apply to packets as they just leave the network interface. This chain is present in the nat and mangle tables.
bring wlan0 connectivity to the network namespace linux & test routerOS
setup network namespace
sudo ip netns add firefoxnssudo ip netns exec firefoxns ip link add br0-lan type bridgesudo ip netns exec firefoxns ip tuntap add tap0 mode tapsudo ip netns exec firefoxns ip tuntap add tap1 mode tapsudo ip netns exec firefoxns ip tuntap add tap2 mode tapsudo ip netns exec firefoxns ip link set dev tap0 master br0-lansudo ip netns exec firefoxns ip link set dev tap1 master br0-lansudo ip netns exec firefoxns ip link set dev tap2 master br0-lan
enable the network interface (inside netns)
sudo ip netns exec firefoxns ip link set br0-lan upsudo ip netns exec firefoxns ip link set tap0 upsudo ip netns exec firefoxns ip link set tap1 upsudo ip netns exec firefoxns ip link set tap2 up
create virtual eth pair between host & netns
sudo ip link add veth0 type veth peer name veth0-peersudo ip link set veth0-peer netns firefoxns
assign ip for virtual eth & virtual eth peer
sudo ip addr add 10.200.1.1/24 dev veth0sudo ip netns exec firefoxns ip addr add 10.200.1.2/24 dev veth0-peersudo ip link set veth0 upsudo ip netns exec firefoxns ip link set veth0 up
setup routing table
sudo ip netns exec firefoxns ip route add default via 10.200.1.1
setup ip forwarding & network address translation
sudo sysctl -w net.ipv4.ip_forward=1sudo iptables -t nat -A POSTROUTING -s 10.200.1.0/24 -o wlan0 -j MASQUERADE
test
sudo ip netns exec ping 1.1.1.1
now, run routeros & alpine inside of netns
routeros
sudo ip netns exec firefoxns qemu-system-x86_64 \
            -enable-kvm \
            -m 256 \
            -smp 4 \
            -cpu host \
            -drive file=chr.qcow2,format=qcow2 \
            -boot d \
            -nographic \
            -netdev tap,id=net0,ifname=tap0,script=no,downscript=no \
            -device virtio-net-pci,netdev=net0,mac=02:aa:bb:cc:dd:ee \
            -net user,hostfwd=tcp::8291-:8291 \
            -net nic
alpine
sudo ip netns exec firefoxns qemu-system-x86_64 \
            -enable-kvm \
            -m 256 \
            -smp 4 \
            -cpu host \
            -drive file=pc-2.qcow2,format=qcow2 \
            -cdrom alpine-virt-3.21.3-x86_64.iso \
            -boot d \
            -nographic \
            -netdev tap,id=net0,ifname=tap2,script=no,downscript=no \
            -device virtio-net-pci,netdev=net0,mac=$(randommac)
network namespace + NAT notes
ip asudo ip link add veth0 type veth peer name veth0-peersudo ip addr add 10.200.1.1/24 dev veth0sudo ip netns add firefoxnssudo ip link set veth0-peer netns firefoxnssudo sysctl -w net.ipv4.ip_forward=1sudo iptables -t nat -A POSTROUTING -s 10.200.1.0/24 -o wlan0 -j MASQUERADEsudo ip netns exec firefoxns ip addr add 10.200.1.2/24 dev veth0-peersudo ip netns exec firefoxns ip addr add 127.0.0.1/8 dev losudo ip netns exec firefoxns ip link set lo upsudo ip netns exec firefoxns ip link set veth0-peer upsudo ip netns exec firefoxns ip route add default via 10.200.1.1sudo ip netns exec firefoxns ip link add br0-lan type bridgesudo ip netns exec firefoxns ip tuntap add tap0 mode tapsudo ip netns exec firefoxns ip tuntap add tap1 mode tapsudo ip netns exec firefoxns ip tuntap add tap2 mode tapsudo ip netns exec firefoxns ip link set dev tap0 master br0-lansudo ip netns exec firefoxns ip link set dev tap1 master br0-lansudo ip netns exec firefoxns ip link set dev tap2 master br0-lansudo ip netns exec firefoxns ip link set dev tap0 upsudo ip netns exec firefoxns ip link set dev tap1 upsudo ip netns exec firefoxns ip link set dev tap2 upsudo ip netns exec firefoxns ip link set dev br0-lan upsudo ip netns exec firefoxns qemu-system-x86_64 -enable-kvm -m 256 -smp 4 -cpu host -drive file=chr.qcow2,format=qcow2 -boot d -nographic -netdev tap,id=net0,ifname=tap0,script=no,downscript=no -device virtio-net-pci,netdev=net0,mac=02:aa:bb:cc:dd:ee -net user,hostfwd=tcp::8291-:8291 -net nicsudo ip netns exec firefoxns qemu-system-x86_64 -enable-kvm -m 256 -smp 4 -cpu host -drive file=pc-1.qcow2,format=qcow2 -cdrom alpine-virt-3.21.3-x86_64.iso -boot d -nographic -netdev tap,id=net0,ifname=tap1,script=no,downscript=no -device virtio-net-pci,netdev=net0,mac=$(randommac)
randommac source code
use rand::Rng;

fn main() {
    let mut rng = rand::thread_rng();
    let mac = format!(
        "52:54:00:{:02x}:{:02x}:{:02x}",
        rng.gen::<u8>(),
        rng.gen::<u8>(),
        rng.gen::<u8>()
    );
    println!("{}", mac);
}
deploy Docmost on server
please read this doc first, https://docmost.com/docs/installation
docker compose config
version: "3"

services:
  docmost:
    image: docmost/docmost:latest
    depends_on:
      - db
      - redis
    environment:
      APP_URL: "http://localhost:3000"
      APP_SECRET: "REPLACE_WITH_LONG_SECRET"
      DATABASE_URL: "postgresql://docmost:STRONG_DB_PASSWORD@db:5432/docmost?schema=public"
      REDIS_URL: "redis://redis:6379"
    ports:
      - "3000:3000"
    restart: unless-stopped
    volumes:
      - docmost:/app/data/storage

  db:
    image: postgres:16-alpine
    environment:
      POSTGRES_DB: docmost
      POSTGRES_USER: docmost
      POSTGRES_PASSWORD: STRONG_DB_PASSWORD
    restart: unless-stopped
    volumes:
      - db_data:/var/lib/postgresql/data

  redis:
    image: redis:7.2-alpine
    restart: unless-stopped
    volumes:
      - redis_data:/data

volumes:
  docmost:
  db_data:
  redis_data:
replace your STRONG_DB_PASSWORD with openssl rand -hex 10, and REPLACE_WITH_LONG_SECRET with openssl rand -hex 32, and APP_URL, for example, in my case is https://docmost.fadev.org
run docker compose run
setup reverse proxy (nginx)
go to /etc/nginx/sites-enabled, and create a clone with cp default docmost.fadev.org
fill it like this
server_name docmost.fadev.org;

location / {
	# First attempt to serve request as file, then
	# as directory, then fall back to displaying a 404.
	#try_files $uri $uri/ =404;

	proxy_pass http://127.0.0.1:3000;
}

location /socket.io/ {
	proxy_pass http://127.0.0.1:3000;
	proxy_http_version 1.1;
	proxy_set_header Upgrade $http_upgrade;
	proxy_set_header Connection "upgrade";
	proxy_set_header Host $host;
}

location /collab {
	proxy_pass http://127.0.0.1:3000;
	proxy_http_version 1.1;
	proxy_set_header Upgrade $http_upgrade;
	proxy_set_header Connection "upgrade";
	proxy_set_header Host $host;
}
HTTPS
run
sudo apt install certbot python3-certbot-nginxsudo certbot --nginx -d docmost.fadev.org
Firewall
allow port 443
fix vthxxxxxxxx is not connected to docker0
consider
> ip  a
1: lo: <LOOPBACK,UP,LOWER_UP> mtu 65536 qdisc noqueue state UNKNOWN group default qlen 1000
    link/loopback 00:00:00:00:00:00 brd 00:00:00:00:00:00
    inet 127.0.0.1/8 scope host lo
       valid_lft forever preferred_lft forever
    inet6 ::1/128 scope host noprefixroute
       valid_lft forever preferred_lft forever
2: enp2s0: <NO-CARRIER,BROADCAST,MULTICAST,UP> mtu 1500 qdisc fq_codel state DOWN group default qlen 1000
    link/ether 2c:4d:54:c6:f2:0c brd ff:ff:ff:ff:ff:ff
    altname enx2c4d54c6f20c
3: wlan0: <BROADCAST,MULTICAST,UP,LOWER_UP> mtu 1500 qdisc noqueue state UP group default qlen 1000
    link/ether f0:03:8c:66:9c:21 brd ff:ff:ff:ff:ff:ff
    inet 192.168.105.162/24 metric 1024 brd 192.168.105.255 scope global dynamic wlan0
       valid_lft 2920sec preferred_lft 2920sec
    inet 192.168.105.163/24 brd 192.168.105.255 scope global secondary dynamic noprefixroute wlan0
       valid_lft 2921sec preferred_lft 2921sec
    inet6 fe80::ee67:75f9:fa9c:2561/64 scope link noprefixroute
       valid_lft forever preferred_lft forever
4: docker0: <NO-CARRIER,BROADCAST,MULTICAST,UP> mtu 1500 qdisc noqueue state DOWN group default
    link/ether 86:1e:e0:72:f4:8d brd ff:ff:ff:ff:ff:ff
    inet 172.17.0.1/16 brd 172.17.255.255 scope global docker0
       valid_lft forever preferred_lft forever
    inet6 fe80::841e:e0ff:fe72:f48d/64 scope link proto kernel_ll
       valid_lft forever preferred_lft forever
17: veth914db4f@if2: <BROADCAST,MULTICAST,UP,LOWER_UP> mtu 1500 qdisc noqueue state UP group default
    link/ether d2:02:61:f4:12:d0 brd ff:ff:ff:ff:ff:ff link-netnsid 0
    inet6 fe80::d002:61ff:fef4:12d0/64 scope link proto kernel_ll
       valid_lft forever preferred_lft forever
you can see, veth914db4f is not connected to br0. let's try hard
- run image (explicitly) as bridge network:
docker run --network bridge -it --rm -p 127.0.0.1:8000:4000 php-test-server(this is nothing happen) - force connect:
docker network connect bridge 2cf520235e6a(this is show Error response from daemon: endpoint with name mystifying_yonath already exists in network bridge, butip asays vethxxxx is not master to anyone). you can trydisconnect&connectagain
also
docker inspect -f '{{json .NetworkSettings.Networks}}' 2cf520235e6a | jq
{
  "bridge": {
    "IPAMConfig": null,
    "Links": null,
    "Aliases": null,
    "MacAddress": "5a:2d:5d:7c:c1:86",
    "DriverOpts": null,
    "GwPriority": 0,
    "NetworkID": "08f151565c95ba052f682c7560e55199e2d75f3d2348af8f98a9711e9294b3fd",
    "EndpointID": "0522c15ad18fbae05071a7d5e09944b7777deaafd3490082cac237fdfcd14f0c",
    "Gateway": "172.17.0.1",
    "IPAddress": "172.17.0.2",
    "IPPrefixLen": 16,
    "IPv6Gateway": "",
    "GlobalIPv6Address": "",
    "GlobalIPv6PrefixLen": 0,
    "DNSNames": null
  }
}
the medicine: https://forums.docker.com/t/no-connection-to-the-bridge-by-default/134619/8
sudo systemctl stop systemd-networkd.service
sudo systemctl disable systemd-networkd.service
sudo systemctl stop systemd-networkd.socket
sudo systemctl disable systemd-networkd.socket
sudo systemctl start NetworkManager
sudo systemctl enable NetworkManager
php-fpm config
file ini biasanya ada di
/usr/local/etc/php-fpm.d/www.conf(di docker php-fpm)/etc/php/8.3/fpm/pool.d/www.conf(di debian bullseye)
intinya, tidak pasti haha.
config structure
general structure nya seperti ini kalau ';' dihilangkan
[www]
user = www-data
group = www-data
listen = /run/php/php8.3-fpm.sock
listen.owner = www-data
listen.group = www-data
pm = dynamic
pm.max_children = 5
pm.start_servers = 2
pm.min_spare_servers = 1
pm.max_spare_servers = 3
config global (WIP)
lokasi config ini ada di
/etc/php/php-fpm.conf
config untuk pool (each)
best read https://www.php.net/manual/en/install.fpm.configuration.php
- [pool_name] intinya ini unique, tidak ada yang sama
- user / group
user: dimana child process akan di run (as user?)group: liat /etc/passwd
- listen
-
listen: dimana daemon akan listen yg nanti akan di reverse proxy oleh nginx, nilai defaultnya biasanya/run/php/php8.3-fpm.sockatau127.0.0.1:9000, contoh:ip.add.re.ss:port[ip:6:addr:ess]:portport- /path/to/unix/socket
-
listen.backlog: jumlah queue pending connection yang bisa di hold -
listen.owner: configure ke mana kah/run/php/php8.3-fpm.sockitu ownernya -
listen.group: same aslisten.owner -
listen.mode: nomor permission si/run/php/php8.3-fpm.socklisten -
listen.acl_users: WIP -
listen.acl_groups: WIP -
listen.allowed_clients: set dari mana FCGI boleh diakses, di kasus nginx, mostly 127.0.0.1, except docker, dia pakai br-xxxxxx yang ip nya pasti bukan 127.0.0.1 -
listen.setfib: WIP
-
systemd config template
root location: /etc/systemd/system/<YOUR_SERVICE>.service
template
[Unit]
Description=Random service
After=network.target
StartLimitIntervalSec=0

[Service]
Type=simple
Restart=always
RestartSec=1
User=root
ExecStart=/usr/bin/randomprogram -c /etc/randomprogram/other.toml

[Install]
WantedBy=multi-user.target
setting up ubuntu server with qemu + custom bridge
qemu section
# create image first
qemu-img create -f qcow2 ubuntu-server.img 10G

# run the iso
qemu-system-x86_64 \
      -enable-kvm \
      -boot order=d \
      -cdrom ubuntu-24.04.2-live-server-amd64.iso \
      -drive if=pflash,format=raw,readonly=on,file=/usr/share/edk2/x64/OVMF_CODE.4m.fd \
      -drive if=pflash,format=raw,file=OVMF_VARS_ubuntu_server_gpt.4m.fd \
      -drive file=ubuntu-server.img,format=qcow2 \
      -m 4G \
      -smp 4 \
      -net user,hostfwd=tcp::20022-:22 \
      -net nic

# run iso
qemu-system-x86_64 \
	-enable-kvm \
	-boot order=d \
	-drive if=pflash,format=raw,readonly=on,file=/usr/share/edk2/x64/OVMF_CODE.4m.fd \
	-drive if=pflash,format=raw,file=OVMF_VARS_ubuntu_server_gpt.4m.fd \
	-drive file=ubuntu-server.img,format=qcow2 \
	-m 4G \
	-smp 4 \
	-net user,hostfwd=tcp::20022-:22 \
	-net nic \
	-vga virtio
setting up routeros + ubuntu server (freeradius) + and archlinux client
first, setup virtual lan
setup configurasi ip hingga seperti ini
51: br0-lan: <NO-CARRIER,BROADCAST,MULTICAST,UP> mtu 1500 qdisc noqueue state DOWN group default qlen 1000
    link/ether 8a:b9:27:b3:c7:a5 brd ff:ff:ff:ff:ff:ff
    inet6 fe80::88b9:27ff:feb3:c7a5/64 scope link proto kernel_ll
       valid_lft forever preferred_lft forever
53: tap0: <NO-CARRIER,BROADCAST,MULTICAST,UP> mtu 1500 qdisc fq_codel master br0-lan state DOWN group default qlen 1000
    link/ether c6:33:f3:fe:d3:ba brd ff:ff:ff:ff:ff:ff
    inet6 fe80::c433:f3ff:fefe:d3ba/64 scope link proto kernel_ll
       valid_lft forever preferred_lft forever
54: tap1: <NO-CARRIER,BROADCAST,MULTICAST,UP> mtu 1500 qdisc fq_codel master br0-lan state DOWN group default qlen 1000
    link/ether a2:eb:ee:56:8a:90 brd ff:ff:ff:ff:ff:ff
    inet6 fe80::a0eb:eeff:fe56:8a90/64 scope link proto kernel_ll
       valid_lft forever preferred_lft forever
55: tap2: <BROADCAST,MULTICAST> mtu 1500 qdisc noop master br0-lan state DOWN group default qlen 1000
    link/ether c6:c7:1c:7c:67:8a brd ff:ff:ff:ff:ff:ff
untuk membuatnya, jalankan skrip command command ini:
sudo ip link add br0-lan type bridge<- buat switch virtualsudo ip tuntap add tap0 mode tap<- buat colokan virtualsudo ip tuntap add tap1 mode tapsudo ip tuntap add tap2 mode tapsudo ip link set tap0 master br0-lan<- set semua colokan punya induk ke switch br0-lan, intinya harus satu switchsudo ip link set tap1 master br0-lansudo ip link set tap2 master br0-lansudo ip link set br0-lan up<- nyalakan semua interface nyasudo ip link set tap0 upsudo ip link set tap1 upsudo ip link set tap2 up
alokasi interface
br0-lan--> switch utamatap0--> interface untuk routerOStap1--> interface untuk freeradius (running di ubuntu server)tap2--> interface test client (bisa alpineLinux, archlinux, bebas)
run routeros
download links: https://download.mikrotik.com/routeros/6.49.18/chr-6.49.18.img.zip
# convert first
qemu-img convert -f raw -O qcow2 chr-6.49.18.img chr.qcow2

# then run
qemu-system-x86_64 \
      -enable-kvm \
      -smp 4 \
      -m 256M \
      -drive file=chr.qcow2,format=qcow2 \
      -boot order=d \
      -net user,hostfwd=tcp::8291-:8291 \
      -net nic \
      -nographic \
      -netdev tap,id=net0,ifname=tap0,script=no,downscript=no \
      -device virtio-net-pci,netdev=net0,mac=02:11:2a:3b:ff:c3
 setidaknya, mac-addr nya sama. yaitu ether3
run ubuntu server
command ini hanya dirun run sekali (ketika instalasi)
# copy firmware uefi vars
cp /usr/share/edk2/x64/OVMF_VARS.4m.fd .
mv OVMF_VARS.4m.fd OVMF_VARS_ubuntu_server_gpt.4m.fd

# run qemu
qemu-system-x86_64 \
    -enable-kvm \
    -boot order=d \
    -cdrom ubuntu-24.04.2-live-server-amd64.iso \
    -drive if=pflash,format=raw,readonly=on,file=/usr/share/edk2/x64/OVMF_CODE.4m.fd \
    -drive if=pflash,format=raw,file=OVMF_VARS_ubuntu_server_gpt.4m.fd \
    -drive file=ubuntu-server.img,format=qcow2 \
    -m 4G \
    -smp 4 \
    -net user,hostfwd=tcp::20022-:22 \
    -net nic
proses instalasi ubuntu server cari di internet xixi.
setelah installed, kita install beberapa base package dahulu. base package yg akan diinstall adalah
sudo apt-get update && \
sudo apt-get upgrade && \
sudo apt-get install \
    openssh-server freeradius isc-dhcp-client
lalu setelah installed, kita tidak butuh iso lagi, kita bisa buang saja parameter -cdrom ubuntu-24.04.2-live-server-amd64.iso karna unused. dan untuk konfigurasi tambahan, saya buat pakai vga virtio (agar text nya smooth), dan juga netdev untuk colokan tap1 yang nyambung ke bridge
qemu-system-x86_64 \
    -enable-kvm \
    -boot order=d \
    -drive if=pflash,format=raw,readonly=on,file=/usr/share/edk2/x64/OVMF_CODE.4m.fd \
    -drive if=pflash,format=raw,file=OVMF_VARS_ubuntu_server_gpt.4m.fd \
    -drive file=ubuntu-server.img,format=qcow2 \
    -m 4G \
    -smp 4 \
    -netdev user,id=net0,hostfwd=tcp::20022-:22 \
    -device e1000,netdev=net0 \
    -netdev tap,id=net1,ifname=tap1,script=no,downscript=no \
    -device virtio-net-pci,netdev=net1,mac=02:11:2a:3b:aa:c4 \
    -vga virtio
nb: jangan lupa sudo apt-get update && sudo apt-get upgrade && sudo apt-get install openssh-server, karna di vm tidak bisa copy paste (mau dari dalam ataupun keluar), dan juga tidak bisa scroll atas bawah. maka proses me-config nya akan pakai ssh saja

intinya biarkan vm nya jalan begitu saja, bisa di minimize atau dipindah ke tab lain yang tidak menganggu. selanjutnya remote vm nya pakai
ssh -o StrictHostKeyChecking=no -o UserKnownHostsFile=/dev/null fadhil_riyanto@127.0.0.1 -p 20022
nb: ganti fadhil_riyanto dengan username yang sudah diset tadi

setidaknya seperti itu remote-an nya
freeradius
jalankan sudo apt-get install freeradius, lalu test dengan sudo freeradius -X

pastikan ada tulisan ready to process request
winbox
karna winbox pakai port 8291 untuk merepote mikrotik, maka kita konek dengan host 127.0.0.1:8291, password sesuai config awal mikrotik ketika awal tadi
winbox localhost

setup mikrotik dhcp server
ip -> address

ip -> dhcp server


dns server kita biarkan dahulu

pembuktian:
jalankan sudo dhclient enp4 (karna interface tun1 dia dibaca sebagai enp4 di ubuntu server)

ping ke router

router ke ubuntu server

setting up Archlinux (GUI)
download dahulu bahan nya di https://sourceforge.net/projects/arch-linux-gui/, pakai xfce (paling ringan)
run archlinux gui sebagai tap2
qemu-system-x86_64 \
    -enable-kvm \
    -boot order=d \
    -cdrom archlinux-gui-xfce-2022.07-x86_64.iso \
    -m 4G \
    -smp 4 \
    -netdev tap,id=net1,ifname=tap2,script=no,downscript=no \
    -device virtio-net-pci,netdev=net1,mac=02:11:5c:1b:aa:c9 \
    -vga virtio
catatan: macnya dikarang lagi, agar tidak sama. jika sama ternyata bakal dapat ip yang sama


nb: archlinux makan 2 ip karna NetworkManager dan systemd-resolved bentrok (bawaannta sepertinya). tapi harusnya no problem at all
setup hotspot winbox
ip -> hotspot

next next saja, kecuali dns nanti diisi 1.1.1.1, dan dns-name diisi nama domain untuk captive portalnya

test

karna 192.168.1.254 ip freeradius
maka kita ignore pakai

ip binding
static ip versions
sudo ip addr add 192.168.1.2/24 dev ens4sudo ip link set dev ens4 upsudo ip route append default via 192.168.1.1
freeradius
ubah /etc/freeradius/3.0/clients.conf, tambah
client private-network-1 {
    ipaddr      = 192.192.1.1/24
    secret      = testing123
}
lalu /etc/freeradius/3.0/users
bob Cleartext-Password := "password"
winbox

system -> AAA

SQL authentication freeradius server
first, desclaimer. I use Ubuntu 24.04.2 LTS that running on Archlinux qemu host. so this is not host machine. big thanks for linux netdev that makes local networking possible.
first, lets configure postgresql server
root@integral2:/home/fadhil_riyanto# su postgres
postgres@integral2:/home/fadhil_riyanto$ psql
psql (16.9 (Ubuntu 16.9-0ubuntu0.24.04.1))
Type "help" for help.

postgres=#
database setup
get it inside. then run


do not forget to allow CRUD option on all tables by running
\c radius
GRANT ALL PRIVILEGES ON ALL TABLES IN SCHEMA public TO radius;
radius server configuration
the sequence of config file
/etc/freeradius/3.0/clients.conf<-- specify 'who' can connect, we need define it in this file/etc/freeradius/3.0/users<-- [manual authentication, using file]/etc/freeradius/3.0/radiusd.conf:986<-- this file enable sql module./etc/freeradius/3.0/mods-available/sql<-- this file is where we configure user/pass for sql module/etc/freeradius/3.0/sites-available/default<-- sequence layer of login,- first, we filter-out all args
- then go to preprocess
- send to log
- chap & mschap
- check whatever has digest
- check whatever user@domain format
- eap
- files
- lookup to sql <-- uncomment this
as root
/etc/freeradius/3.0/mods-enabledln -s ../mods-available/sql ./sql- uncomment this line in radiusd.conf

- change this line to postgresql (mods-enabled/sql)

also

- fill the pgsql server credentials (/etc/freeradius/3.0/mods-config/sql/main/postgresql/queries.conf) (aka raddb/sql/database/dialup.conf in rhel)

when connection failed

when connection succeed

populating
best read: https://wiki.freeradius.org/guide/SQL-HOWTO#populating-sql
big thanks for freeradius developer, the sql file is located at /etc/freeradius/3.0/mods-config/sql/main/postgresql/schema.sql
import it with:
psql -U radius -d radius -f /etc/freeradius/3.0/mods-config/sql/main/postgresql/schema.sql
configuration
lets look at sites-available/default

this configuration only allow authorize users that come from NAS-Port-Type == "Wireless-802.11", this is the difference
footage 1: from winbox request

this one come from captive portal

Linux netplan
ref: https://documentation.ubuntu.com/server/explanation/networking/configuring-networks/
example
network:
  version: 2
  ethernets:
    ens3:
      dhcp4: true
    ens4:
      addresses:
        - 192.168.1.2/24
      routes:
        - to: default
          via: 192.168.1.1
location: /etc/netplan
note: execution is ordered by file name
then run sudo netplan generate
sshfs
the setup is very easy
- in your home, run
mkdir mount mkdir vm_001_ubuntuor whatever- mount it
sshfs root@127.0.0.1:/ -p 20022 ./vm_001_ubuntu - verify with
findmnt
enjoy
TLDR qemu
buat file namanya setup-network.sh, lalu isi dengan
sudo ip link add br0-lan type bridge
sudo ip tuntap add tap0 mode tap
sudo ip tuntap add tap1 mode tap
sudo ip tuntap add tap2 mode tap

sudo ip link set tap0 master br0-lan
sudo ip link set tap1 master br0-lan
sudo ip link set tap2 master br0-lan

sudo ip link set br0-lan up
sudo ip link set tap0 up
sudo ip link set tap1 up
sudo ip link set tap2 up

sudo ip a
lalu lakukan ini agar bisa di exec via terminal
sudo chmod 666 setup-network.shsh ./setup-network.sh
running qemu
run routerOS
# download dahulu chr-7.19.1.img dari web resminya
qemu-img convert -f raw -O qcow2 chr-7.19.1.img chr7.qcow2

# run chr
# port yang dipakai
# - 8291: untuk winbox
# - 30022: untuk keperluan sftp, utak atik file hotspot nya
qemu-system-x86_64 \
	-enable-kvm \
	-smp 4 \
	-m 256M \
	-drive file=chr7.qcow2,format=qcow2 \
	-boot order=d \
	-net user,hostfwd=tcp::8291-:8291,hostfwd=tcp::30022-:22 \
	-net nic \
	-nographic \
	-netdev tap,id=net0,ifname=tap0,script=no,downscript=no \
	-device virtio-net-pci,netdev=net0,mac=02:11:2a:3b:ff:c3
ubuntu server
buat image (HDD virtual untuk os kita nanti)
qemu-img create -f qcow2 ubuntu-server.img 15G
run iso (saat install)
qemu-system-x86_64 \
	-enable-kvm \
	-boot order=d \
	-cdrom GANTI_NAMA_ISO_UBUNTU.iso \
	-drive file=ubuntu-server.img,format=qcow2 \
	-m 4G \
	-smp 4 \
	-netdev user,id=net0,hostfwd=tcp::20022-:22,hostfwd=tcp::10000-:5432 \
	-device e1000,netdev=net0 \
	-netdev tap,id=net1,ifname=tap1,script=no,downscript=no \
	-device virtio-net-pci,netdev=net1,mac=02:11:2a:3b:aa:c4 \
	-vga virtio
lalu run hasil image (Default no graphic, jadi ntar kita ssh pakai ssh -p 20022 root@127.0.0.1 biar bisa copas)
dan juga kita optimalisasi dengan cara pakai nographic, tanpa cdrom, map port yang dibutuhkan saja
port yg di forward:
- 20022: untuk remote
- 10302: untuk keperluan ngoding laravel
- 10000: untuk keperluan postgresql, siapa tahu mau di remote via adminer, pgadmin dari local, atau cuman psql dll
qemu-system-x86_64 \
	-enable-kvm \
	-boot order=d \
	-drive file=ubuntu-server.img,format=qcow2 \
	-m 4G \
	-smp 4 \
	-netdev user,id=net0,hostfwd=tcp::20022-:22,hostfwd=tcp::10302-:10302,hostfwd=tcp::10000-:5432 \
	-device e1000,netdev=net0 \
	-netdev tap,id=net1,ifname=tap1,script=no,downscript=no \
	-device virtio-net-pci,netdev=net1,mac=02:11:2a:3b:aa:c4 \
	-vga virtio \
	-nographic
VPS KVM siap jadi bahan ujicoba, langsung test saja ke ssh -p 20022 root@127.0.0.1
experimental (jangan dipakai / do not use)
untuk catatan pribadi bahan experimental UEFI, KVM, sama custom machine q35
experimental 1 (safest)
qemu-system-x86_64 \
    -name guest=ubuntu22.04,debug-threads=on \
    -machine type=pc,accel=kvm \
    -cpu host \
    -enable-kvm \
    -boot order=d \
    -drive if=pflash,format=raw,readonly=on,file=/usr/share/edk2/x64/OVMF_CODE.4m.fd \
    -drive if=pflash,format=raw,file=OVMF_VARS_ubuntu_server_gpt.4m.fd \
    -drive file=ubuntu-server.img,format=qcow2 \
    -m 4G \
    -smp 4 \
    -netdev user,id=net0,hostfwd=tcp::20022-:22,hostfwd=tcp::10000-:5432 \
    -device virtio-net-pci,netdev=net0 \
    -netdev tap,id=net1,ifname=tap1,script=no,downscript=no \
    -device virtio-net-pci,netdev=net1,mac=02:11:2a:3b:aa:c4
dgn iso
qemu-system-x86_64 \
	-name guest=ubuntu22.04,debug-threads=on \
	-machine type=pc,accel=kvm \
	-cpu host \
	-enable-kvm \
	-boot order=d \
	-cdrom a.iso \
	-drive if=pflash,format=raw,readonly=on,file=/usr/share/edk2/x64/OVMF_CODE.4m.fd \
	-drive if=pflash,format=raw,file=OVMF_VARS_ubuntu_server_gpt.4m.fd \
	-drive file=ubuntu-server.img,format=qcow2 \
	-m 4G \
	-smp 4 \
	-netdev user,id=net0,hostfwd=tcp::20022-:22,hostfwd=tcp::10302-:10302,hostfwd=tcp::10000-:5432 \
	-device e1000,netdev=net0 \
	-netdev tap,id=net1,ifname=tap1,script=no,downscript=no \
	-device virtio-net-pci,netdev=net1,mac=02:11:2a:3b:aa:c4 \
	-vga virtio
custom machine chipset PC, KVM, UEFI headless
qemu-system-x86_64 \
	-name guest=ubuntu22.04,debug-threads=on \
	-machine type=pc,accel=kvm \
	-cpu host \
	-enable-kvm \
	-boot order=d \
	-drive if=pflash,format=raw,readonly=on,file=/usr/share/edk2/x64/OVMF_CODE.4m.fd \
	-drive if=pflash,format=raw,file=OVMF_VARS_ubuntu_server_gpt.4m.fd \
	-drive file=ubuntu-server.img,format=qcow2 \
	-m 4G \
	-smp 4 \
	-netdev user,id=net0,hostfwd=tcp::20022-:22,hostfwd=tcp::10302-:10302,hostfwd=tcp::10000-:5432 \
	-device e1000,netdev=net0 \
	-netdev tap,id=net1,ifname=tap1,script=no,downscript=no \
	-device virtio-net-pci,netdev=net1,mac=02:11:2a:3b:aa:c4 \
	-vga virtio \
	-nographic
working (part 2)
qemu-system-x86_64 \
          -enable-kvm \
          -boot order=d \
          -drive if=pflash,format=raw,readonly=on,file=/usr/share/edk2/x64/OVMF_CODE.4m.fd \
          -drive if=pflash,format=raw,file=OVMF_VARS_ubuntu_server_gpt.4m.fd \
          -drive file=ubuntu-server.img,format=qcow2 \
          -m 4G \
          -smp 4 \
          -netdev user,id=net0,hostfwd=tcp::20022-:22,hostfwd=tcp::10000-:5432 \
          -device e1000,netdev=net0 \
          -netdev tap,id=net1,ifname=tap1,script=no,downscript=no \
          -device virtio-net-pci,netdev=net1,mac=02:11:2a:3b:aa:c4 \
          -vga virtio
no iso (headless)
qemu-system-x86_64 \
	-name guest=ubuntu22.04,debug-threads=on \
	-machine type=q35,accel=kvm \
	-cpu host \
	-enable-kvm \
	-boot order=d \
	-drive if=pflash,format=raw,readonly=on,file=/usr/share/edk2/x64/OVMF_CODE.4m.fd \
	-drive if=pflash,format=raw,file=OVMF_VARS_ubuntu_server_gpt.4m.fd \
	-drive file=ubuntu-server.img,format=qcow2 \
	-m 4G \
	-smp 4 \
	-netdev user,id=net0,hostfwd=tcp::20022-:22,hostfwd=tcp::10000-:5432 \
	-device e1000,netdev=net0 \
	-netdev tap,id=net1,ifname=tap1,script=no,downscript=no \
	-device virtio-net-pci,netdev=net1,mac=02:11:2a:3b:aa:c4
qemu q35 vs i440fx
q35
this is lspci output from ubuntu server

i440fx

http://wiki.qemu.org/images/4/4e/Q35.pdf
http://wiki.qemu.org/images/f/f6/PCIvsPCIe.pdf
http://git.qemu.org/?p=qemu.git;a=blob;f=docs/pcie.txt
qemu & dedicated nic + macvtap
docs ini memahas solusi agar bisa akses tap (dari vm) tetapi hw yang diakses adalah nic asli, diusahakan tanpa bridge dan NAT NAT
ADA 2 strategi
- add iface fisik ke bridge, lalu attach bridge tersebut ke vm.
- pakai macvtap, dengan cara meredirect packet yang datang, ke arah tap device menggunakan fd (file descriptor). kita akan (ab)use option
-nettap di qemu
strategi lain (tidak direkomendasikan, diluar topik macvtap)
- membuat virtual eth pair, redirect pakai iptables
- pakai -netdev user (somewhat slow, need triage)
normal
bagian ini tanpa macvtap ataupun hal hal lain dahulu, pure qemu bridging
configuration
- eth1: mostly WAN
- eth2: tap
qemu-system-x86_64 \
    -enable-kvm \
    -smp 4 -m 256M \
    -drive file=chr7.qcow2,format=qcow2 \
    -boot order=d \
    -net user,hostfwd=tcp::8291-:8291,hostfwd=tcp::10022-:22 \
    -net nic \
    -netdev tap,id=net0,ifname=tap0,script=no,downscript=no \
    -device virtio-net-pci,netdev=net0,mac=02:11:2a:3b:ff:c3 \
    -nographic
qemu-system-x86_64 \
	-name guest=ubuntu22.04 \
	-machine type=pc,accel=kvm \
	-cpu host -m 4G -smp 4 \
	-enable-kvm \
	-boot order=d \
	-drive if=pflash,format=raw,readonly=on,file=/usr/share/edk2/x64/OVMF_CODE.4m.fd \
	-drive if=pflash,format=raw,file=OVMF_VARS_ubuntu_server_gpt.4m.fd \
	-drive file=ubuntu-server.img,format=qcow2 \
	-netdev user,id=net0,hostfwd=tcp::20022-:22,hostfwd=tcp::10000-:5432,hostfwd=tcp::10302-:10302 \
	-device virtio-net-pci,netdev=net0 \
	-netdev tap,id=net1,ifname=tap1,script=no,downscript=no \
	-device virtio-net-pci,netdev=net1,mac=02:11:2a:3b:aa:c4 \
	-nographic
network stack note:
- ens3: come from qemu bridge (for ssh purpose)
- ens4: come from tap1 (connected to bridge, internal lan)
netplan configuration
network:
  version: 2
  ethernets:
    ens4:
      addresses:
        - 192.168.1.2/24
      routes:
        - to: default
          via: 192.168.1.1
    ens3:
      dhcp4: true
// ip a

2: ens3: <BROADCAST,MULTICAST,UP,LOWER_UP> mtu 1500 qdisc fq_codel state UP group default qlen 1000
    link/ether 52:54:00:12:34:56 brd ff:ff:ff:ff:ff:ff
    altname enp0s3
    inet 10.0.2.15/24 metric 100 brd 10.0.2.255 scope global dynamic ens3
       valid_lft 86314sec preferred_lft 86314sec
    inet6 fec0::5054:ff:fe12:3456/64 scope site dynamic mngtmpaddr noprefixroute
       valid_lft 86317sec preferred_lft 14317sec
    inet6 fe80::5054:ff:fe12:3456/64 scope link
       valid_lft forever preferred_lft forever
3: ens4: <BROADCAST,MULTICAST,UP,LOWER_UP> mtu 1500 qdisc fq_codel state UP group default qlen 1000
    link/ether 02:11:2a:3b:aa:c4 brd ff:ff:ff:ff:ff:ff
    altname enp0s4
    inet 192.168.1.2/24 brd 192.168.1.255 scope global ens4
       valid_lft forever preferred_lft forever
    inet6 fe80::11:2aff:fe3b:aac4/64 scope link
       valid_lft forever preferred_lft forever
alpine install SSH + firefox lite qemu
create image
qemu-img create -f qcow2 alpine-client.qcow2 2G
RUN
THIS is dry run
qemu-system-x86_64 \
	-enable-kvm \
	-m 1G -smp 4 -cpu host \
	-boot d \
	-drive file=alpine-client.qcow2,format=qcow2 \
	-cdrom ./iso/alpine-virt-3.21.3-x86_64.iso \
	-netdev user,id=net0,hostfwd=tcp::30022-:22 \
	-device virtio-net-pci,netdev=net0 \
	-vga virtio
resizing qemu image
lets add 10 GiB
qemu-img resize ubuntu-server.img +10G
then

nice work!
fixing
if your ubuntu use LVM2, Use this command

then, run
sudo lvextend -l +100%FREE /dev/ubuntu-vg/ubuntu-lv
sudo e2fsck -f /dev/ubuntu-vg/ubuntu-lv
sudo resize2fs /dev/ubuntu-vg/ubuntu-lv
docker snippets
docker run
this command will run as daemon, from image freeradius/freeradius-server
docker run --name my-radius -d freeradius/freeradius-server
no daemon involved
docker run --name my-radius freeradius/freeradius-server
logging running container
docker logs my-radius2
install routerOS.iso (not chr) on qemu
please download this https://download.mikrotik.com/routeros/7.19.3/mikrotik-7.19.3.iso, https://mikrotik.com/download
select x86
after that, run this command (dry run)
qemu-img create -f qcow2 mikrotik-7.qcow2 4G
install
qemu-system-x86_64 \
      -enable-kvm \
      -smp 4 -m 256M \
      -drive file=mikrotik-7.qcow2,format=qcow2 \
      -boot order=d \
      -cdrom ./iso/mikrotik-7.19.3.iso \
      -net user,hostfwd=tcp::8291-:8291,hostfwd=tcp::10022-:22 \
      -net nic
select wireless, and system
after that, run this
wget https://gist.githubusercontent.com/fadhil-riyanto/d370c3551426ced874f7c0e0e6f62800/raw/9ef4886bcb5c49137b47a2ce60f49a840751e753/setup-network.sh && chmod 777 setup-network.sh && sudo sh setup-network.sh
now, we have virtual lan that uses tun-tap network. now run chr on tap0
qemu-system-x86_64 \
      -enable-kvm \
      -smp 4 -m 256M \
      -drive file=mikrotik-7.qcow2,format=qcow2 \
      -boot order=d \
      -netdev user,id=net0,hostfwd=tcp::8291-:8291,hostfwd=tcp::10022-:22 \
      -device virtio-net-pci,netdev=net0 \
      -netdev tap,id=net1,ifname=tap1,script=no,downscript=no \
      -device virtio-net-pci,netdev=net1,mac=02:11:2a:3b:aa:c4 \
      -nographic
post install
do not forget to enable DHCP in order to get internet from qemu internal routes
change default postgresql data dir
- first, you need root account
- identify your service file. by running
systemctl status postgresql

in my case, /usr/lib/systemd/system/postgresql.service is the service file
- editing
mkdir /home/postgreschown -R postgres:postgres /home/postgres- edit
Environment=PGROOT=/home/postgresandProtectHome=false - run
systemctl daemon-reload && sudo systemctl restart postgresql && sudo systemctl status postgresql
umask
    Permission | Binary | Octal  | User  | Group | Other |
    ======================================================
      r        |  100   |   4    |       |       |       |
      w        |  010   |   2    |       |       |       |
      x        |  001   |   1    |       |       |       |
    =======================================================
for example
- the owner of file has read, write, and execute
- file group only read and execute
- the other only can read
the permission is like this
u   g   o
rwx r-x  r--
aka, because rwx has total point of 4 + 2 + 1, so the permission for user is 7 because group only have 4 & 1, so the permission is 5 and last. other only read, which is 4
the equalivalent command is chmod 754
wireguard setup
Peer A
wg genkey > peer_A.key
wg pubkey < peer_A.key > peer_A.pub
sudo ip link add dev wg0 type wireguard
sudo ip addr add 10.0.0.1/24 dev wg0
sudo wg
sudo wg set wg0 private-key ./peer_A.key
sudo wg set wg0 peer wkUbsVDVx4ljxY0lhf6PKE0r8yDD3QWZZSCz2NB9Bmw= allowed-ips 10.0.0.2/32 endpoint 103.246.107.2:43358
Peer B
wg genkey > peer_B.key
wg pubkey < peer_B.key > peer_b.pub
sudo ip link add dev wg0 type wireguard
sudo ip addr add 10.0.0.2/24 dev wg0
sudo wg
sudo wg set wg0 private-key ./peer_B.key
wg set wg0 peer mCTr2nPVOAghT5QlxeXUJel9Bm4lGATlxWSzchrjIg4= allowed-ips 10.0.0.1/32 endpoint 20.2.200.57:49503
proof of concept (context: CG-NAT)

Networking
Huge IP addr in firewall mikrotik
this is the technique to add huge ip addr into firewall without making it 100% cpu usage
lets create address list


doing this with routeros_api python
removing
list_queues = api.get_resource('/ip/firewall/address-list');
prev_ips = list_queues.get(list='__cp_wg_allow')

# print(prev_ips)
for prev_ips_i in prev_ips:
    print(f"[removing] {prev_ips_i['address']}")
    list_queues.remove(id=prev_ips_i['id'])
adding
for x in data:
print(f"[adding] {x}")
api.get_resource("/ip/firewall/address-list").call("add",
                    {"list": "__cp_wg_allow", "address": x},
).done_message
add to walled garden
print("installing walled garden ip lists")
api.get_resource("/ip/hotspot/walled-garden/ip").call("add", {
    "comment": "__cp_wg_allow__fw_list",
    "dst-address-list": "__cp_wg_allow",
},).done_message
Database
psql command
General
\bind[PARAM]... set query parameters\copyrightshow PostgreSQL usage and distribution terms\crosstabview[COLUMNS] execute query and display result in crosstab\errverboseshow most recent error message at maximum verbosity\g[(OPTIONS)] [FILE] execute query (and send result to file or |pipe);\gwith no arguments is equivalent to a semicolon\gdescdescribe result of query, without executing it\gexecexecute query, then execute each value in its result\gset[PREFIX] execute query and store result in psql variables\gx[(OPTIONS)] [FILE] as\g, but forces expanded output mode\qquit psql\watch[[i=]SEC] [c=N] [m=MIN] execute query every SEC seconds, up to N times, stop if less than MIN rows are returned
Help
\?[commands] show help on backslash commands\?options show help on psql command-line options\?variables show help on special variables\h[NAME] help on syntax of SQL commands, * for all commands
Query Buffer
\e[FILE] [LINE] edit the query buffer (or file) with external editor\ef[FUNCNAME [LINE]] edit function definition with external editor\ev[VIEWNAME [LINE]] edit view definition with external editor\pshow the contents of the query buffer\rreset (clear) the query buffer\s[FILE] display history or save it to file\wFILE write query buffer to file
Input/Output
\copy... perform SQL COPY with data stream to the client host\echo[-n] [STRING] write string to standard output (-n for no newline)\iFILE execute commands from file\irFILE as \i, but relative to location of current script\o[FILE] send all query results to file or |pipe\qecho[-n] [STRING] write string to \o output stream (-n for no newline)\warn[-n] [STRING] write string to standard error (-n for no newline)
Conditional
\ifEXPR begin conditional block\elifEXPR alternative within current conditional block\elsefinal alternative within current conditional block\endifend conditional block
Informational
(options: S = show system objects, + = additional detail)
- \d[S+] list tables, views, and sequences
- \d[S+] NAME describe table, view, sequence, or index
- \da[S] [PATTERN] list aggregates
- \dA[+] [PATTERN] list access methods
- \dAc[+] [AMPTRN [TYPEPTRN]] list operator classes
- \dAf[+] [AMPTRN [TYPEPTRN]] list operator families
- \dAo[+] [AMPTRN [OPFPTRN]] list operators of operator families
- \dAp[+] [AMPTRN [OPFPTRN]] list support functions of operator families
- \db[+] [PATTERN] list tablespaces
- \dc[S+] [PATTERN] list conversions
- \dconfig[+] [PATTERN] list configuration parameters
- \dC[+] [PATTERN] list casts
- \dd[S] [PATTERN] show object descriptions not displayed elsewhere
- \dD[S+] [PATTERN] list domains
- \ddp [PATTERN] list default privileges
- \dE[S+] [PATTERN] list foreign tables
- \des[+] [PATTERN] list foreign servers
- \det[+] [PATTERN] list foreign tables
- \deu[+] [PATTERN] list user mappings
- \dew[+] [PATTERN] list foreign-data wrappers
- \df[anptw][S+] [FUNCPTRN [TYPEPTRN ...]] list [only agg/normal/procedure/trigger/window] functions
- \dF[+] [PATTERN] list text search configurations
- \dFd[+] [PATTERN] list text search dictionaries
- \dFp[+] [PATTERN] list text search parsers
- \dFt[+] [PATTERN] list text search templates
- \dg[S+] [PATTERN] list roles
- \di[S+] [PATTERN] list indexes
- \dl[+] list large objects, same as \lo_list
- \dL[S+] [PATTERN] list procedural languages
- \dm[S+] [PATTERN] list materialized views
- \dn[S+] [PATTERN] list schemas
- \do[S+] [OPPTRN [TYPEPTRN [TYPEPTRN]]] list operators
- \dO[S+] [PATTERN] list collations
- \dp[S] [PATTERN] list table, view, and sequence access privileges
- \dP[itn+] [PATTERN] list [only index/table] partitioned relations [n=nested]
- \drds [ROLEPTRN [DBPTRN]] list per-database role settings
- \drg[S] [PATTERN] list role grants
- \dRp[+] [PATTERN] list replication publications
- \dRs[+] [PATTERN] list replication subscriptions
- \ds[S+] [PATTERN] list sequences
- \dt[S+] [PATTERN] list tables
- \dT[S+] [PATTERN] list data types
- \du[S+] [PATTERN] list roles
- \dv[S+] [PATTERN] list views
- \dx[+] [PATTERN] list extensions
- \dX [PATTERN] list extended statistics
- \dy[+] [PATTERN] list event triggers
- \l[+] [PATTERN] list databases
- \sf[+] FUNCNAME show a function's definition
- \sv[+] VIEWNAME show a view's definition
- \z[S] [PATTERN] same as \dp
Large Objects
- \lo_export LOBOID FILE write large object to file
- \lo_import FILE [COMMENT] read large object from file
- \lo_list[+] list large objects
- \lo_unlink LOBOID delete a large object
Formatting
- \a toggle between unaligned and aligned output mode
- \C [STRING] set table title, or unset if none
- \f [STRING] show or set field separator for unaligned query output
- \H toggle HTML output mode (currently off)
- \pset [NAME [VALUE]] set table output option (border|columns|csv_fieldsep|expanded|fieldsep| fieldsep_zero|footer|format|linestyle|null| numericlocale|pager|pager_min_lines|recordsep| recordsep_zero|tableattr|title|tuples_only| unicode_border_linestyle|unicode_column_linestyle| unicode_header_linestyle|xheader_width)
- \t [on|off] show only rows (currently off)
- \T [STRING] set HTML
tag attributes, or unset if none
- \x [on|off|auto] toggle expanded output (currently off)
Connection
- \c[onnect] {[DBNAME|- USER|- HOST|- PORT|-] | conninfo} connect to new database (currently "fadev_infra")
- \conninfo display information about current connection
- \encoding [ENCODING] show or set client encoding
- \password [USERNAME] securely change the password for a user
Operating System
- \cd [DIR] change the current working directory
- \getenv PSQLVAR ENVVAR fetch environment variable
- \setenv NAME [VALUE] set or unset environment variable
- \timing [on|off] toggle timing of commands (currently off)
- ! [COMMAND] execute command in shell or start interactive shell
Variables
- \prompt [TEXT] NAME prompt user to set internal variable
- \set [NAME [VALUE]] set internal variable, or list all if no parameters
- \unset NAME unset (delete) internal variable
psql snippet
psql
\df *.*Lists all relations\lLists all database
command
DROP TABLE table_name CASCADE;used when you want to remove all object depend on them.
PostgreSQL database creation flow
in order to create database (for safety, I use postgres account). I use this step.
first, we need to login as
postgresuser, use thissudo -u postgres psql, then doCREATE DATABASE EXAMPLE_DB;this is optional
CREATE USER EXAMPLE_USER WITH ENCRYPTED PASSWORD 'Sup3rS3cret';grant
GRANT ALL PRIVILEGES ON DATABASE EXAMPLE_DB TO EXAMPLE_USER;now, change the state using
\c EXAMPLE_DB postgres, execute this commandGRANT ALL ON SCHEMA public TO EXAMPLE_USER;then, change ownership
ALTER DATABASE my_database OWNER TO my_database_user;reverse
first, we change to postgres account
su postgreslist database: \l
remove:
DROP DATABASE abc;drop user, first list users first:
\du+drop:
DROP USER IF EXISTS foobar;revoking access:
REVOKE ALL PRIVILEGES ON SCHEMA public FROM foobar;

-- for tables, seq, and func
REVOKE ALL PRIVILEGES ON ALL TABLES IN SCHEMA public FROM foobar;
REVOKE ALL PRIVILEGES ON ALL SEQUENCES IN SCHEMA public FROM foobar;
REVOKE ALL PRIVILEGES ON ALL FUNCTIONS IN SCHEMA public FROM foobar;
check object ownership
SELECT
    n.nspname AS schema,
    c.relname AS object,
    c.relkind AS type
FROM
    pg_class c
JOIN
    pg_roles r ON c.relowner = r.oid
JOIN
    pg_namespace n ON n.oid = c.relnamespace
WHERE
    r.rolname = 'foobar';
or
\ddp -- in psql
granting
granting all sequences
GRANT ALL PRIVILEGES ON ALL SEQUENCES IN SCHEMA public TO radius;how to use SQLX cli tools for db migration such laravel migrations
let's meet with this crate, https://crates.io/crates/sqlx-cli, this tools allow you to use db migration such as laravel migration tools;
first, let's create env variable
export DATABASE_URL=postgres://fadhil_riyanto:<your_pass>@localhost/<target_db>then, the things that we do next is only
sqlx migrate add -r <name>running
sqlx migrate runPostgresql internal (server)
this thing explain the internal of pgsql system (not the source code I mean)
difference between catalog vs schema
key point:
-
schema is folder like, grouping table together, can be created using
CREATE SCHEMA my_catalog; CREATE TABLE my_catalog.metadata_table (...); -
catalog is system schema, can't be created manually, part of internal pgsql system
-
view is a resulted table from XYZ queries, example
CREATE VIEW active_users AS
	SELECT id, name,
	FROM
		users
	WHERE
		active = true;
then query it
SELECT * FROM active_users;
pg_catalog inside
this is some stuff inside of pg catalog, you can do that using
\dt pg_catalog.*- pg_aggregate: Stores information about aggregate functions (like
SUM,AVG, etc.). - pg_am: Lists access methods for indexes (e.g.,
btree,hash). - pg_amop: Defines operators used in access methods.
- pg_amproc: Defines support functions used in access methods.
- pg_attrdef: Stores default values for columns.
- pg_attribute: Contains column definitions for all tables.
- pg_auth_members: Shows role memberships (who is a member of what).
- pg_authid: Stores user/role definitions (superuser access required).
- pg_cast: Contains rules for casting between data types.
- pg_class: Contains all table-like objects (tables, views, indexes, sequences, etc.).
- pg_collation: Defines collations (rules for string comparison).
- pg_constraint: Stores constraints like PRIMARY KEY, UNIQUE, CHECK, and FOREIGN KEY.
- pg_conversion: Defines character set conversions.
- pg_database: Stores information about each database in the cluster.
- pg_db_role_setting: Stores per-user/per-database configuration settings (GUCs).
- pg_default_acl: Defines default privileges for newly created objects.
- pg_depend: Stores dependency relationships between database objects.
- pg_description: Stores comments/descriptions on database objects.
- pg_enum: Stores values for
ENUMdata types. - pg_event_trigger: Stores event trigger definitions (triggers on DDL commands).
- pg_extension: Tracks installed extensions (like
uuid-ossp,pgcrypto, etc.). - pg_foreign_data_wrapper: Stores definitions of foreign data wrappers (FDW).
- pg_foreign_server: Stores foreign servers used by FDWs.
- pg_foreign_table: Stores metadata for foreign tables.
- pg_index: Contains metadata about indexes (e.g., indexed columns).
- pg_inherits: Stores table inheritance relationships.
- pg_init_privs: Records original privileges on built-in objects.
- pg_language: Stores information about supported procedural languages.
- pg_largeobject: Stores the actual data of large objects (blobs).
- pg_largeobject_metadata: Stores metadata about large objects.
- pg_namespace: Lists all schemas in the database (IMPORTANT)
- pg_opclass: Stores index operator classes (how a datatype is indexed).
- pg_operator: Stores SQL operators (like
=,<,+, etc.). - pg_opfamily: Groups related operator classes.
- pg_parameter_acl: Stores access control for configuration parameters (PostgreSQL 16+).
- pg_partitioned_table: Stores metadata for partitioned tables.
- pg_policy: Stores row-level security policies.
- pg_proc: Contains all function and procedure definitions.
- pg_publication: Stores logical replication publications.
- pg_publication_namespace: Links publications to schemas.
- pg_publication_rel: Links publications to individual tables.
- pg_range: Stores definitions of range types (e.g.,
int4range). - pg_replication_origin: Tracks origins for logical replication.
- pg_rewrite: Stores query rewrite rules (used in views, rules).
- pg_seclabel: Stores security labels for database objects.
- pg_sequence: Contains metadata for sequence generators.
- pg_shdepend: Tracks dependencies involving shared objects (like roles, databases).
- pg_shdescription: Stores comments on shared objects.
- pg_shseclabel: Stores security labels on shared objects.
- pg_statistic: Stores planner statistics for columns.
- pg_statistic_ext: Stores extended planner statistics (multi-column, NDV, etc.).
- pg_statistic_ext_data: Contains actual values for extended statistics.
- pg_subscription: Defines logical replication subscriptions.
- pg_subscription_rel: Lists tables included in subscriptions.
- pg_tablespace: Lists all tablespaces (disk locations for data).
- pg_transform: Stores type transformation functions for procedural languages.
- pg_trigger: Stores triggers on tables.
- pg_ts_config: Stores full-text search configurations.
- pg_ts_config_map: Maps text search config tokens to dictionaries.
- pg_ts_dict: Stores text search dictionaries.
- pg_ts_parser: Defines tokenizers for full-text search.
- pg_ts_template: Defines templates for building text search dictionaries.
- pg_type: Stores all data types (built-in, custom, enum, composite). (IMPORTANT)
- pg_user_mapping: Maps users to foreign servers.
pg_catalog.pg_database details
this docs can be found in https://www.postgresql.org/docs/16/catalog-pg-database.html
Column Name Type Description datnamenameThe name of the database. datdbaoidThe OID of the role (user) that owns the database. Use pg_get_userbyid(datdba)to resolve it.encodingintThe character encoding of the database (e.g., UTF8 = 6). Use pg_encoding_to_char(encoding)to get the name.datlocprovidercharLocale provider used ( c= libc,i= ICU).datistemplateboolIf true, the database can be used as a template forCREATE DATABASE ... TEMPLATE.datallowconnboolIf false, connections to this database are not allowed (except by superusers).datconnlimitintThe maximum number of concurrent connections allowed (-1 = no limit). datlastsysoidoidThe last system OID used in this database at creation (mainly historical). datfrozenxidxidThe transaction ID at which all tuples are known to be frozen (related to VACUUM). datminmxidxidThe minimum multixact ID that is still considered potentially unfrozen. dattablespaceoidOID of the default tablespace for the database. Use pg_tablespaceto resolve.datcollatenameLC_COLLATE setting (how strings are sorted). datctypenameLC_CTYPE setting (how character classification works). daticulocaletextICU locale (used if datlocprovider = 'i').datcollversiontextVersion of the collation used (important for collation versioning with ICU). dataclaclitem[]Access privileges (GRANTs), stored as an array of ACL items. management script collection
- show all databases (in current user)
SELECT * FROM pg_catalog.pg_database;`:- show
pg_catalog.pg_tablesdefinitiongo back on top in order to see what actually view is
SELECT pg_get_viewdef('pg_catalog.pg_tables', true);`:- show all available pgsql datatype
SELECT * FROM pg_catalog.pg_type;- lists all schema
SELECT * FROM pg_catalog.pg_namespace;- show all dbs with owner
SELECT x.oid as object_id, x.datname as db_name, CASE WHEN pg_catalog.pg_get_userbyid(x.datdba) LIKE 'unknown (OID=%)' THEN 'UNKNOWN' ELSE pg_catalog.pg_get_userbyid(x.datdba) END as owner FROM pg_catalog.pg_database as x;cond: https://www.postgresql.org/docs/current/functions-conditional.html#FUNCTIONS-CASE
- RENAME db (as postgres user)
ALTER DATABASE xyz RENAME TO abc;Postgresql II SQL language docs summary
this is incomplete documentation summary of postgresql (SQL section), see complete docs here
5. Data Definition
5.2. Default values
When a new row is created and no values are specified for some of the columns, those columns will be filled with their respective default values. A data manipulation command can also request explicitly that a column be set to its default value, without having to know what that value is
example
CREATE TABLE state ( uid integer, enable bool DEFAULT false )5.3. Identity column
system table in pgsql (catalog)
pg_tables | docs
catalog pgsql yang isinya data ttg table (di db saat ini), contoh query nya
SELECT * FROM pg_catalog.pg_tables as x WHERE x.schemaname = 'public';pg_sequences
yg ini isinya sequence2 semua, mirip kayak serial datatype di pgsql

NOTES:
pg_sequenceadalah versi low levelnya, sedangkanpg_sequencesadalah versi view dari join-anpg_sequencedanpg_class, buktiSELECT * FROM pg_get_viewdef('pg_catalog.pg_sequences', true)hasil
SELECT n.nspname AS schemaname, c.relname AS sequencename, pg_get_userbyid(c.relowner) AS sequenceowner, s.seqtypid :: regtype AS data_type, s.seqstart AS start_value, s.seqmin AS min_value, s.seqmax AS max_value, s.seqincrement AS increment_by, s.seqcycle AS cycle, s.seqcache AS cache_size, CASE WHEN has_sequence_privilege(c.oid, 'SELECT,USAGE' :: text) THEN pg_sequence_last_value(c.oid :: regclass) ELSE NULL :: bigint END AS last_value FROM pg_sequence s JOIN pg_class c ON c.oid = s.seqrelid LEFT JOIN pg_namespace n ON n.oid = c.relnamespace WHERE NOT pg_is_other_temp_schema(n.oid) AND c.relkind = 'S' :: "char";pgsql functions()
pg_get_viewdefsee sql script for particular view, I call this as view reverser
example:
SELECT * FROM pg_get_viewdef('pg_catalog.pg_sequences', true)ref:
- https://pgpedia.info/p/pg_get_viewdef.html
- https://www.postgresql.org/docs/current/functions-info.html
akan ada kelanjutan disini.
postgresql database HBA
HBA = host-based authentication
links:
- https://www.postgresql.org/docs/current/client-authentication.html
- https://www.postgresql.org/docs/current/auth-pg-hba-conf.html
order matters
PostgreSQL grant
reference: https://www.postgresql.org/docs/current/sql-grant.html buat dokumentasi tentang ini.
Dockerfile boilerplate
this folder is a set of dockerfile boilerplate that I used to build something.
php-8.3 debian v11 (bullseye) dev-env
CREATED:
Fri Jun 6 06:32:35 PM WIB 2025FROM debian:bullseye ENV DEBIAN_FRONTEND=noninteractive # initial, refresh repo first RUN apt-get update # this install base package that need in order to download gpg key (curl, and gnupg) RUN apt-get install -y ca-certificates RUN apt-get install -y apt-transport-https RUN apt-get install -y lsb-release RUN apt-get install -y gnupg RUN apt-get install -y curl RUN apt-get install -y git RUN apt-get install -y unzip # add ondrej\PPA RUN curl -fsSL https://packages.sury.org/php/apt.gpg | gpg --dearmor -o /etc/apt/trusted.gpg.d/php.gpg RUN echo "deb https://packages.sury.org/php/ $(lsb_release -sc) main" | tee /etc/apt/sources.list.d/php.list # install actual package, php-xml & php-mbstring is needed by composer. RUN apt-get update RUN apt-get install -y nginx RUN apt-get install -y php8.3 RUN apt-get install -y php8.3-curl RUN apt-get install -y php8.3-xml RUN apt-get install -y php8.3-mbstring # download composer RUN curl -sS https://getcomposer.org/installer -o composer-setup.php \ && php composer-setup.php --install-dir=/usr/local/bin --filename=composer \ && rm composer-setup.php COPY . /app WORKDIR /app EXPOSE 4444 # install composer RUN composer install CMD [ "php", "-S", "0.0.0.0:4444", "-t", "public" ]php:8.3.20-fpm-bullseye + nginx
FROM php:8.3.20-fpm-bullseye RUN apt-get update && apt-get install -y libpq-dev RUN docker-php-ext-install pdo pdo_pgsql COPY . /app WORKDIR /app COPY ./docker/fpm/www.conf /usr/local/etc/php-fpm.d/www.conf # karna php-fpm running pakai user www-data RUN chown -R www-data:www-data /app/storage CMD [ "php-fpm" ]default.conf (nginx)
server { listen 80; server_name localhost; access_log off; root /app/public; location / { try_files $uri $uri/ /index.php?$query_string; } error_page 500 502 503 504 /50x.html; location = /50x.html { root /usr/share/nginx/html; } location ~ \.php$ { fastcgi_pass php:9000; fastcgi_param SCRIPT_FILENAME $document_root$fastcgi_script_name; fastcgi_param DOCUMENT_ROOT $document_root; include fastcgi_params; } }www.conf
[www] access.log = /dev/null user = www-data group = www-data listen = 0.0.0.0:9000 pm = dynamic pm.max_children = 5 pm.start_servers = 2 pm.min_spare_servers = 1 pm.max_spare_servers = 3php:8.3.20-bullseye dev env
this is also works for laravel
FROM php:8.3.20-bullseye RUN apt-get update && apt-get install -y \ curl \ libpq-dev \ git \ unzip RUN docker-php-ext-install pdo pdo_pgsql COPY . /app WORKDIR /app RUN curl -sS https://getcomposer.org/installer -o composer-setup.php \ && php composer-setup.php --install-dir=/usr/local/bin --filename=composer \ && rm composer-setup.php RUN composer install CMD [ "php", "-S", "0.0.0.0:10302", "-t", "public" ]compose.yml
volumes: storage: db_data: networks: veth_network: driver: bridge services: google_sso: image: php:8.3.20-bullseye build: context: . dockerfile: dev.backend.Dockerfile environment: - docker=true - DB_HOST=pgsql_db - DB_PORT=5432 - DB_USERNAME=postgres - DB_PASSWORD=<PASSWD> - DB_DATABASE=google_sso_dev - G_SSO_NAME=google-sso-login - G_SSO_CLIENT_ID=ABC - G_SSO_CLIENT_SECRET=DEF - G_SSO_REDIRECT_URI=http://localhost:10302/auth/callback ports: - "10302:10302" networks: - veth_network volumes: - .:/app - storage:/app/storage depends_on: - pgsql_db pgsql_db: image: postgres:17.5-bullseye restart: always shm_size: 128mb environment: - POSTGRES_USER=postgres - POSTGRES_PASSWORD=<PASSWD> - POSTGRES_DB=google_sso_dev networks: - veth_network volumes: - db_data:/var/lib/postgresql/data adminer: image: adminer restart: always ports: - 8080:8080 networks: - veth_network depends_on: - pgsql_dbCATATAN unik: ketika ping
pgsql_dbdari xxx container, ia otomatis resolve dns nya.PHP (web)
laravel service container
date: Sun Jun 8 11:47:02 PM WIB 2025
links
making
untuk membuat service container, katakanlah isi class ctx yang namanya Google\Client. dia mereturn $client. maka kita harus bikin
php artisan make:provider GoogleApisnama GoogleApis bebas. lalu cek di folder
./app/Providers/GoogleApis.phpharusnya ada, dan di file./bootstrap/providers.phpakan ada<?php return [ App\Providers\AppServiceProvider::class, App\Providers\GoogleApis::class, ];ada
App\Providers\GoogleApis::classmaksudnya.registering
dari service provider yang baru saja dibuat, akan ada 2 method, yaitu
public function register(): void: boot ini entry dari service, nilai ctx ctx dsb biasanya diload disinipublic function boot(): void: func ini dipanggil kalau semua service sudah jalan, misal service route di register, tapi method untuk nambahin route routenya. ada di boot
general structure nya (file
./app/Providers/AppServiceProvider.php)<?php namespace App\Providers; use Illuminate\Support\ServiceProvider; class AppServiceProvider extends ServiceProvider { /** * Register any application services. */ public function register(): void { // } /** * Bootstrap any application services. */ public function boot(): void { // } }the inside of register function
docs tentang
- binding -> https://laravel.com/docs/12.x/container#simple-bindings
- singleton -> https://laravel.com/docs/12.x/container#binding-a-singleton
perbedaanya,
bindauto buat fresh ctx tiap kali request datang, sedangkansingletonhanya buat sekali, contoh konkretsingletonadalah ctx koneksi mongodb, kita cukup pakai sekali saja, untuk semua containerini contoh googleclient
// this code is inside of register() func $this->app->singleton(Client::class, function (Application $app) { $client = new Client(); $client->setApplicationName(env("G_SSO_NAME")); $client->setClientId(env("G_SSO_CLIENT_ID")); $client->setClientSecret(env("G_SSO_CLIENT_SECRET")); $client->setRedirectUri(env("G_SSO_REDIRECT_URI")); $client->addScope([ Service\Oauth2::USERINFO_EMAIL, Service\Oauth2::USERINFO_PROFILE ]); $client->setAccessType('offline'); $client->setLoginHint('your_email@gmail.com'); return $client; });catatan:
use Illuminate\Contracts\Foundation\Applicationitu ctx bawaan laravel buat ngebind.how to use
lokasi: controller
kita tinggal panggil saja class (milik aslinya)
contoh
use Google\Client; class Randomclass extends Controller { /** * Create a new controller instance. */ public function __construct( protected Client $client, ) {} public function use_it() { $this->client->some_google_method(); // $this->client was initialized } }laravel 12 custom auth guard + tables
Mon Jun 9 05:36:39 AM WIB 2025
di sini saya coba untuk membuat Auth::attempt https://laravel.com/docs/12.x/authentication#authenticating-users, tapi bedanya, ia pakai totally different table. jadi tidak pakai table
userssetup model
untuk setup nya, kita buat model dulu seperti biasa pakai
php artisan make:model Xyz, disini saya buatnyaphp artisan make:model GuestUser. lalu cek bagian./app/Models/GuestUser.phpnormalnya class akan extends ke
Illuminate\Database\Eloquent\Model, nah ini kita extends kan keIlluminate\Foundation\Auth\User, dimana class itu kalau dirunut lagi, pasti juga nge-extends ke class Modelbukti
class User extends Model implements AuthenticatableContract, AuthorizableContract, CanResetPasswordContract { use Authenticatable, Authorizable, CanResetPassword, MustVerifyEmail; }ok, sudah. saatnya kita pindah ke model yang baru saja dibuat, isi $fillable seperti column database, jangan lupa ganti extends nya dengan
extends Authenticatablehasil akhir seperti ini kira2
<?php namespace App\Models; use Illuminate\Database\Eloquent\Model; use Illuminate\Foundation\Auth\User as Authenticatable; class GuestUser extends Authenticatable { protected $table = "guest_user"; protected $fillable = [ 'name', 'picture', 'email', 'password', 'token', 'g_auth_expires_in' ]; }registering guard
agar model kita bisa dibaca oleh
Authfacade, maka kita harus registerkan dia dahulu di./config/auth.php, isi dahulu bagianproviders. contoh/* |-------------------------------------------------------------------------- | User Providers |-------------------------------------------------------------------------- | | All authentication guards have a user provider, which defines how the | users are actually retrieved out of your database or other storage | system used by the application. Typically, Eloquent is utilized. | | If you have multiple user tables or models you may configure multiple | providers to represent the model / table. These providers may then | be assigned to any extra authentication guards you have defined. | | Supported: "database", "eloquent" | */ 'providers' => [ 'users' => [ 'driver' => 'eloquent', 'model' => env('AUTH_MODEL', App\Models\User::class), ], 'guest_users' => [ 'driver' => 'eloquent', 'model' => env('AUTH_MODEL', App\Models\GuestUser::class), ], // 'users' => [ // 'driver' => 'database', // 'table' => 'users', // ], ],make sense kan?
guest_usersprovider, ia memiliki model App\Models\GuestUser::class (note,::classakan return str),setelah itu, lihat bagian atasnya, ada guards, disini kita akan naming guardsnya dan juga memberi info provider model mana yang akan dikasih, contoh
/* |-------------------------------------------------------------------------- | Authentication Guards |-------------------------------------------------------------------------- | | Next, you may define every authentication guard for your application. | Of course, a great default configuration has been defined for you | which utilizes session storage plus the Eloquent user provider. | | All authentication guards have a user provider, which defines how the | users are actually retrieved out of your database or other storage | system used by the application. Typically, Eloquent is utilized. | | Supported: "session" | */ 'guards' => [ 'web' => [ 'driver' => 'session', 'provider' => 'users', ], 'guest' => [ 'driver' => 'session', 'provider' => 'guest_users', ], ],JFYI:
Auth::attempt()secara default pakai guardsweb, nah kita sekarang juga bisa pakai custom, seperti iniAuth::guard("guest")->attempt()secara explicit kita tell laravel untuk pakai guardguestsession
general login flow
if (Auth::guard("guest")->attempt($packed_arr)) { $retq = GuestUser::where("email", $packed_arr["email"])->first(); $retq = Auth::guard("guest")->login($retq); return redirect('/dashboard/index'); } else { dd("login failed"); }Auth::guard("guest")->attempt()return boolean, true jika auth benar.Auth::guard("guest")->login($retq);ubah state internalnya bahwa dia sudah login, lalu redirect (penting, jika tidak diredirect, nanti session akan stuck)laravel Socialite setup
Mon Jun 9 05:49:13 AM WIB 2025
setup
lihat
config/services.php, disana hanya ada slack, maka kita tambahin'google' => [ 'client_id' => env('G_SSO_CLIENT_ID'), 'client_secret' => env('G_SSO_CLIENT_SECRET'), 'redirect' => env('G_SSO_REDIRECT_URI'), 'name' => env('G_SSO_NAME'), ],usage
dapatkan link permintaan akses, pakai
return Socialite::driver('google')->redirect();ketika user sudah klik continue & accept share datanya, akan dikirimkan callback, pasang ini ke callback
$user = Socialite::driver('google')->user(); dd($user);laravel pgsql migration setup
Mon Jun 9 05:56:55 AM WIB 2025
PGSQL datatype to laravel mapping function: https://api.laravel.com/docs/12.x/Illuminate/Database/Schema/Blueprint.html
buat migrationnya dengan
php artisan make:migration create_table_abcrun
php artisan migraterollback terbaru
php artisan migrate --rollback 1JWT
laravel named routes
ref: https://laravel.com/docs/12.x/routing#named-routes
examples
Route::prefix('auth')->group(function () { Route::prefix('google')->group(function () { Route::get('/redirect', [Controllers\GoogleAuthController::class, 'redirect']) ->name("auth.google.redirect"); Route::get('/callback', [Controllers\GoogleAuthController::class, 'callback']) ->name("auth.google.callback");; }); /* .. */ });acces it (in blade)
<h1>{{ route("auth.google.callback"); }}</h1>installing tymon/jwt-auth with custom guard
now, we will install this package as is with custom guard. so we do not use
webguard.installing
read https://jwt-auth.readthedocs.io/en/develop/laravel-installation/ please
do the step until reached
php artisan jwt:secret, skip lumen Installation pleasequickstart
please read php/custom_auth_guard_w_tables.md first, then replace this
'guest' => [ 'driver' => 'jwt', 'provider' => 'guest_users', ],in your
./config/auth.phpfile, just like this
then, make sure your custom guard class is implement
Tymon\JWTAuth\Contracts\JWTSubject, you can see the location of models classexample, in
./config/auth.php
just make it like this

middleware & routing config
this section you only need to do
Route::get('/callback', [Controllers\Guest\GoogleAuthController::class, 'callback']) ->name("auth.google.callback") ->middleware("guest");change with your own routing
PoC
FIRST, we use
callbackmethod, so the inside ofcallbackmethod body should look like thispacked_arr = [ "email" => $email, "password" => "password" ]; $token = Auth::guard("guest")->attempt($packed_arr); if ($token) { return $this->respondWithToken($token); } else { return response()->json(['error' => 'Invalid credentials'], 401); }respondWithTokenmethodprotected function respondWithToken($token) { return response()->json([ 'access_token' => $token, 'token_type' => 'bearer', 'expires_in' => Auth::guard("guest")->factory()->getTTL() * 60 ]); }Laravel database schema with foreign key
when creating a foreign key for laravel, the target column must be unique
example
/* referenced table */ <?php use Illuminate\Database\Migrations\Migration; use Illuminate\Database\Schema\Blueprint; use Illuminate\Support\Facades\Schema; return new class extends Migration { /** * Run the migrations. */ public function up(): void { Schema::create('roles', function (Blueprint $table) { $table->id()->autoIncrement(); $table->integer("roles_member_role_id"); $table->foreign("roles_member_role_id") ->references('role_id') ->on('roles_member'); $table->timestamps(); }); } /** * Reverse the migrations. */ public function down(): void { Schema::dropIfExists('roles'); } };then the table (that we reference it)
<?php use Illuminate\Database\Migrations\Migration; use Illuminate\Database\Schema\Blueprint; use Illuminate\Support\Facades\Schema; return new class extends Migration { /** * Run the migrations. */ public function up(): void { Schema::create('roles_member', function (Blueprint $table) { $table->id(); $table->integer("role_id")->unique(); $table->timestamps(); }); } /** * Reverse the migrations. */ public function down(): void { Schema::dropIfExists('roles_member'); } };custom laravel helper
Other
bookmarks highly useful link
this section is derived from my original channel @xorriso
https://xenbits.xen.org/docs/4.6-testing/misc/pvh.html
"PVH is to make use of the hardware virtualization extensions present in modern x86 CPUs in order to improve performance."https://wiki.xenproject.org/wiki/Linux_PVH
Where one will select Processor type and features ---> Linux guest support --->Support for running as a PVH guesthttps://github.com/Goldside543/goldspace
https://mongoc.org/libmongoc/current/mongoc_client_new.html
kesimpulan: mongoc_client_new return null on error, but not even the string are correct no connection checked. jangan ngeharap mongoc_client_new ngeluarin nullhttps://faculty.cs.niu.edu/~hutchins/csci480/signals.htm
daftar exit code
https://git.kernel.org/pub/scm/linux/kernel/git/torvalds/linux.git/tree/arch/x86/entry/syscalls/syscall_64.tbl
list syscallhttps://www.bitsinthewind.com/about-dac/publications/unix-systems-programming
system programminghttps://lwn.net/Articles/205126/
In recent times, Al's work has resulted in a long series of patches merged into the mainline, almost all of which have been marked as "endianness annotations." These patches mostly change the declared types for various functions, variables, and structure members. The new types may be unfamiliar to many, since they are relatively new - though not that new; they were introduced in 2.6.9. These types are __le16, __le32, __le64, __be16, __be32, and __be64.https://github.com/AugustTan/documents/blob/master/UNIX%20Network%20Programming(Volume1%2C3rd).pdf
https://ics.uci.edu/~aburtsev/143A/2017fall/lectures/
Gas kuliah online tiada kata untuk tidak belajar, di topik ini Pak aburtsev membahas sistem operasi, sistem locknya, memory managemen, kernel, boot step nya, dllhttp://osblog.stephenmarz.com/index.html
https://c-ares.org/docs.html#examples
dokumentasi C-ares (async dns resolver)
https://github.com/torvalds/linux/blob/d683b96b072dc4680fc74964eca77e6a23d1fa6e/drivers/char/random.c#L55
"Computers are very predictable devices. Hence it is extremely hard to produce truly random numbers on a computer"
https://stackoverflow.com/questions/17898989/what-is-global-start-in-assembly-language
If you want to use a different entry point name other than _start (which is the default), you can specify -e parameter to ld like
ld -e my_entry_point -o output_filename object_filenameinline ASM GCC
- https://gcc.gnu.org/onlinedocs/gcc/Extended-Asm.html
- https://gcc.gnu.org/onlinedocs/gcc/Extended-Asm.html#AssemblerTemplate
- https://splichal.eu/gccsphinx-final/html/gcc/extensions-to-the-c-language-family/how-to-use-inline-assembly-language-in-c-code.html#inputoperands
http://www.ucw.cz/~hubicka/papers/amd64/node1.html
movabs is ATT-syntax for mov al/ax/eax/rax, byte/[d|q]word ptr [<64-bit absolute address>] or mov byte/[d|q]word ptr[<64-bit absolute address>], al/ax/eax/rax
tambahan: movabs is used for absolute data moves, to either load an arbitrary 64-bit constant into a register or to load data in a register from a 64-bit address.
https://electronicsreference.com/assembly-language/assembly-language-registers/
bookmark movabs
- http://www.ucw.cz/~hubicka/papers/amd64/node1.html
- https://gcc.gnu.org/bugzilla/show_bug.cgi?id=82339
- https://cs4157.github.io/www/2024-1/lect/13-x86-assembly.html
memory layout linux
this section is pure form, created when I use mdbook
getopt example
manage email using LEI
-
https://people.kernel.org/monsieuricon/lore-lei-part-1-getting-started
-
https://docs.kernel.org/maintainer/feature-and-driver-maintainers.html
intel SGX
https://docs.kernel.org/arch/x86/sgx.html
system V abi
ELF Structure types
ELF cheatsheet
- https://gist.github.com/x0nu11byt3/bcb35c3de461e5fb66173071a2379779
- https://www.uclibc.org/docs/elf-64-gen.pdf
AMD & clang
Resume alpro
flowchart
Apa itu flowchart? simplenya, flowchat itu semacam bentuk gambar atau visual dari suatu langkah langkah algoritma. dan tentunya karna ini algoritma, maka ada step step seperti jika x maka y, lalu panah panah dari atas ke bawah, lalu input, dll. contoh flowchart cara memperbiaki lampu

Class
Apa itu class? class adalah cara kita mengatur kode agar scope nya bisa dipecah, misal func a isinya ada 1000 line, nah agar mudah mendebugnya, kita bisa pecah ke method method yang sangat banyak, dan juga kita tidak perlu lagi pusing dengan banyak variabel, kita cukup memakai satu varlable, lalu gunakan di seluruh class yang dinamai "property" contoh simple, pakai property untuk nyimpan-tampilkan data,#include <string> #include <iostream> using namespace std; class abc { string nama; public: void set_nama(string nama) { this->nama = nama; } void get_nama() { cout << this->nama << endl; } }; int main() { abc abc; abc.set_nama("fadhil"); abc.get_nama(); }Enkapsulasi (encapsulation)
Trik atau cara agar kita bisa memberi aturan ke class/property apakah ia bisa terlihat (public)? atau tidak (private/protected) ke class.
Intinya, bagaimana cara kita agar method atau property, tidak bisa secara sembarang diakses oleh kode lain. misal kita ada class trigonometri, dan method hitung sin, tetapi didalam hitung sin tersebut, ada method kecil kecil lagi yang banyak, tetapi fungsinya seperti hanya untuk ngebantu fungsi sin menjalankan tugasnya, nah fungsi2 yang kecil tadi itu nanti dibuat private, sedangkan fungsi sin yg dipakai dimana mana, dibuat public.
contoh kecil
#include <string> #include <iostream> using namespace std; class abc { string nama; private: void print_perkenalan() { cout << "perkenalkan nama saya "; } public: void set_nama(string nama) { this->nama = nama; } void get_nama() { this->print_perkenalan(); cout << this->nama << endl; } }; int main() { abc abc; abc.set_nama("fadhil"); abc.get_nama(); }terlihat public, private? nah itu adalah contoh encapsulation.
nah,
print_perkenalan(hanya contoh) bertindak seolah olah dia hanya internal function dari suatu class yg besar. dan yang dipanggil dimana mana adalah get nama, dimana dibaliknya dia manggil banyak func yang lain.dan
print_perkenalantidak boleh diakses langsung. termasuk propertynamajuga tidak boleh diakses langsungSorting
Bubble Sort
Konsepnya, dengan cara melempar lempar data array, sampai dia urut, BigO nya
O(n^2). cara kerja nya yaitu dengan cara menukar-nukar posisi array sekarang dengan array didepannya, jika array saat ini > dari array didepannya, maka tukar posisinyamisal ada data simple seperti ini
2 3 1 (awal mulanya) 2 1 3 (3 ditukar karna 3 > 1) 1 2 3 (2 ditukar karna 2 > 1) 1 2 3 (selesai)Selection Sort
TL;DR, menemukan data yg lebih kecil dari nilai minimum saat ini, tunggu loopnya yang didalam selesai baru di swap.
contoh kita akan sorting 2 9 4 1 (belum diapa-apakan) 2 9 4 1 (minimum index ke 0, yaitu 2) 2 9 4 1 (bandingkan 9 dgn index ke 0 yaitu 2, 9 < 2 false) 2 9 4 1 (bandingkan 4 dgn index ke 0, yaitu 2, 4 < 2, false) 2 9 4 1 (bandingkan 1 dgn index ke 0, yaitu 2, 1 < 2, true, maka tukar) 1 9 4 2 (set minimum di index ke 1 sekarang, yaitu 9) 1 9 4 2 (bandingkan 4 dgn index ke 1, 4 < 9, true, maka kita biarkan karna loop belum selesai, tapi set minimum ke 4) 1 9 4 2 (cek apakah 2 < 4, ya, set minimum ke 2) 1 2 4 9 (tukar) 1 2 4 9 (set minimum ke index ke 3, yaitu 4, apakah 9 < 4, tidak) --end---insertion sort
Konsepnya, misal lagi menyusun kartu dari satu per satu. Jadi kamu ambil satu kartu, terus kamu bandingin ke kiri, kalau dia lebih kecil dari yang di kiri-nya, tukar posisinya. Terus begitu sampai semua kartu (data) urut
contoh
5 3 4 1 (unchanged) 3 5 4 1 (3 dimasukkan ke kiri 5 karena 3 < 5) 3 4 5 1 (4 dimasukkan, dia lebih kecil dari 5, jadi tukar) 1 3 4 5 (1 dimasukkan paling kiri, karena dia lebih kecil dari semuanya)merge sort
misal ada data, terus di bagi-bagi tumpukan data jadi kecil-kecil dulu sampai tinggal satuan, baru nanti disusun lagi sambil dibandingin dan digabungin pelan-pelan sampai jadi urut. Cara kerjanya pakai prinsip divide and conquer Jadi data dibelah-belah jadi dua terus, sampai tinggal 1-an, lalu disatukan lagi sambil diurutin.
contoh gifnya (google)

sequential search
nah, ini search paling gampang wkwkwk, intinya loop terus array nya, jika ketemu idx nya pakai if else, maka break loopnya & end
binary searching
cara mencarinya data dibagi 2 ditengah tengah, lalu setelah dibagi 2, akan ada low (pojok kiri), mid (tengah tengah), high (pojok kanan). lalu cek saja pastikan data yg dicari == mid
jika tidak, maka cek statusnya dia kurang dari mid atau lebih, jika lebih, cari bagian kanan, jika kurang, cari bagian kiri. proses ini diulang terus dan tiap2 menemukan low dan high baru, maka mid pasti berubah.
single linked list
misal, ini PSEUDOCODE
struct node { data_asli, pointer_ke_struct_node_lain_sebut_saja_n }misal, kita define struct node sebagai a, maka kita ambil addr nya, lalu define lagi b, dimana b berisi data dan juga pointer ke a, lalu misal define lagi c, isinya pointer ke b.
maka secara harfiah, c -> b -> a nah, untuk pengecekan, loop lalu deference terus saja untuk pointernya, jadi yg awalnya di c, setelah deference pointer milik b, posisi sekarang di b, lalu deference pointer next nya, alhasil kita dapat a, dan agar bisa stop. maka bagian palig akhir harus dikasih tanda, contoh disini tandanya bisa pakai nullptr.
intinya jika pas di deference isinya nullptr, maka sudah selesai
sinle linked list circular
sama saja seperti single linked list, hanya aja dibagian akhir daripada diisi nullptr, kita isi pointer balik ke awal. alhasil dia seperti memutar.
Resume alpro double linkedlists
langsung saja ini kodenya, 3 kode bebas, disini saya wrap di func saja karna agar tidak perlu buat banyak file.
penjelasan kode ADA DIBAGIAN BAWAH SNIPPET KODE ini.
#include <cstddef> #include <iostream> using namespace std; struct Node { int data; Node *prev; Node *next; }; Node *create_node(int data) { Node *newly_created_node = new Node; newly_created_node->data = data; newly_created_node->next = nullptr; newly_created_node->prev = nullptr; return newly_created_node; } void print(Node *head) { Node *current = head; cout << "Informasi tentang setiap node:" << endl; while (current != nullptr) { cout << "Alamat: " << current << endl; cout << "Nilai: " << current->data << endl; cout << "Alamat prev: " << current->prev << endl; cout << "Alamat next: " << current->next << endl << endl; current = current->next; } cout << "---------------------------------------" << endl; } void insert_last(Node *&head, int data) { Node *newly_created_node = create_node(data); if (head == nullptr) { head = newly_created_node; } else { Node *current = head; while (current->next != nullptr) { current = current->next; } current->next = newly_created_node; newly_created_node->prev = current; } } void insertFirst(Node *&head, int data) { Node *newNode = create_node(data); if (head == nullptr) { head = newNode; } else { newNode->next = head; head->prev = newNode; head = newNode; } } void delete_first(Node *&head) { if (head == nullptr) { printf("node kosong\n"); } Node *temp = head; head = head->next; if (head != nullptr) { head->prev = nullptr; } delete temp; } int main() { Node *head = nullptr; head = create_node(7); insert_last(head, 1); insert_last(head, 10); delete_first(head); insertFirst(head, 99); print(head); }func
create_nodeWalau bukan bagian dari tugas, saya sekalian jelaskan saja. intinya func ini membuat node baru, yang isinya prev dan next, diisi nullptr (alias nullpointer), dan datanya.
jadi maksud func ini, kita bikin node yang bener2 kosong tanpa terhubung ke siapapun. lalu return value nya.
func
insert_lastCara kerjanya spt ini.
- kita buat dulu node nya (node yg tidak terhubung dgn siapapun pakai create_node)
- lalu cek, misalkan head yg dari func
mainitu masih nullptr (karna emang defaultnya nullptr), maka pertanda linked listsnya masih kosong, maka kita bisa timpa saja. - jika tidak? kita simpan dulu node saat ini, anggap saja namanya current
- sudah kesimpan kan? current kita arahkan ke
current->next, alhasil dia ngakses pointer selanjutnya, lalu cek apakah dia nullptr atau bukan (sbg penanda) - misal iya, maka saatnya berhenti, lalu sambung, intinya karna dibelakang nullptr, maka untuk nyambungnya, nullptr kita ganti saja pakai address node yang barusan dibuat.
- agar bisa nyambung kebelaknng, maka prev (previus miliknya new node) kita timpa pakai current, kenapa? node yg terbaru itu prev nya masih nullptr, agar nyambung, maka kita harus isi dengan node sebelumnya yg sudah disimpan.
nb:
Node *&headartinya nge-deferensi pointer, sekaligus kalau ada perubahan data, sekalian di update, jadi misal ubah data di func delete_last, maka kalau dibaca oleh insert_first, data yg kita share tetep singkronfunc
insertFirstnah, ini func paling easy wkwk, karna head guarantee akan selalu point ke depan, maka untuk nyispin data didepan sangatlah easy.
buat node baru, lalu node baru (next nya) diisi head. untuk prev (milik nya node lama) kita addr node baru.
func
delete_firstkonsepnya mirip dengan insert first, hanya saja
- karna head selalu point ke depan, maka kita perlu simpan head (yang sekarang), lalu saatnya pindah state ke node sebelahnya (kekanan)
- lalu lanjut mark bahwa head->prev itu nullptr, artinya headnya pindah.
- ok sudah, nah, head yang tadi disimpan, bisa di hapus pakai
delete
Rumus sector disk Linux
rumus sector linux
\( x \times 512 = (n \times 1024 \times 1024 \times 1024) \)
dan untuk \( n \) sesuaikan dengan kebutuhan.
disk sector mulai dari 2048. maka misal, x adalah 3145728, command parted nya parted /dev/sda --script mkpart P1 ext4 2048s 3145728s misal ingin menambah sekitar 500 MB, maka offset terakhir ditambah 1, misal
parted /dev/sda --script mkpart P2 ext4 3145729s 4194304slink referensi
- https://wiki.archlinux.org/title/Parted#UEFI/GPT_examples
- https://ioflood.com/blog/parted-linux-command/
Regex notes
letter & digits
\D+: Matching all non digits, then grouping
match any using
.the
.match all chars, except \r or \nexample: regexp:
r".+"It will match anything as long as there is at least one character present. no empty string such ""
template workspace json vscode
{ "folders": [ { "path": "rpc" }, { "path": "scraperlib" }, { "path": "offlinelook" } ] }Protobuf
protobuf ini intinya format pertukaran data, mirip json, tapi dia pakai schema (mirip graphql), agak kaku, dan ada method2
baca spec: https://protobuf.dev/programming-guides/proto3/
ini termasuk prelude nya
syntax = "proto3"; // this is namefile package grpc.fadhil;lalu ini anggap saja seperti struct, jika di C biasanya sent data over file pakai struct.
message Message1 {} message Message2 { Message1 foo = 1; }baru kita define semacam namespace yang didalamnya hold func func yang akan dicall oleh grpc
service SearchService { rpc Search(SearchRequest) returns (SearchResponse); }Subnetting
pertama tama, range ip dahulu
-
A: 1 - 127
-
B: 128 - 191
-
C: 192 - AKHIR
-
0b00000000-> 0 (katakanlah octet ke 4, cidr 24) -
0b10000000-> 0 (cidr 25, 128 hosts) // 2 network -
0b11000000-> 0 (cidr 26, 128 + 64) // 4 network -
0b11100000-> 0 (cidr 27, 128 + 64 + 32) // 8 network -
0b11110000-> 0 (cidr 28, 128 + 64 + 32 + 16) // 16 network -
0b11111000-> 0 (cidr 29, 128 + 64 + 32 + 16 + 8) // 32 network -
0b11111100-> 0 (cidr 30, 128 + 64 + 32 + 16 + 8 + 4) // 64 network -
0b11111110-> 0 (cidr 31, 128 + 64 + 32 + 16 + 8 + 4 + 2) // 128 network -
0b11111111-> 0 (cidr 32, 128 + 64 + 32 + 16 + 8 + 4 + 2 + 1) // 256 network
seperti yg terlihat, bahwa
128 + 64 + 32 + 16 + 8 + 4 + 2 + 1=255contoh 192.168.10.0/24:
ada network 192.168.10.0/24, kita ingin bagi jadi 4 jaringan. maka 256 / 4 = 64 hosts, dan ini akan
- subnet nya: 255.255.255.192
- 64 hosts: 64 hosts usable, 1 untuk broadcast, 1 untuk network
pembagian nya
- network 1: 192.168.10.0, broadcast: 192.168.10.63, range ip yang usable: 192.168.10.1 - 192.168.10.62
- network 2: 192.168.10.64, broadcast: 192.168.10.127, range ip yang usable: 192.168.10.65 - 192.168.10.126
- network 3: 192.168.10.128, broadcast: 192.168.10.191, range ip yang usable: 192.168.10.129 - 192.168.10.190
- network 4: 192.168.10.192, broadcast: 192.168.10.255, range ip yang usable: 192.168.10.193 - 192.168.10.254
oprekan hitung2 an:
origin: pakai acuan ip kelas c
jumlah hosts, misal cidr 24, itu max nya 256 kalau 0b11111111, kenapa 0b10000000 itu 128, dan kenapa 0b11000000 itu 192
ok, lalu kenapa jika cidr /26, itu 255.255.255.192, punya 64 hosts, 4 network. semua ini didapat dari (max int case ini 8 bit) / maxint - pad network
ini start dari /24
0b00000000-> 0 (katakanlah octet ke 4, cidr 24) // 1 network0b10000000-> 0 (cidr 25, 128 hosts) // 2 network0b11000000-> 0 (cidr 26, 128 + 64) // 4 network0b11100000-> 0 (cidr 27, 128 + 64 + 32) // 8 network0b11110000-> 0 (cidr 28, 128 + 64 + 32 + 16) // 16 network0b11111000-> 0 (cidr 29, 128 + 64 + 32 + 16 + 8) // 32 network0b11111100-> 0 (cidr 30, 128 + 64 + 32 + 16 + 8 + 4) // 64 network0b11111110-> 0 (cidr 31, 128 + 64 + 32 + 16 + 8 + 4 + 2) // 128 network0b11111111-> 0 (cidr 32, 128 + 64 + 32 + 16 + 8 + 4 + 2 + 1) // 256 network
start dari /16
0b0000000000000000-> 0 (cidr 16, 65535) // 1 net, 65535 hosts0b1000000000000000-> 0 (cidr 17, 65535 + ) // 2 net, 32767 hosts0b1100000000000000-> 0 (cidr 26, 128 + 64) // 4 net0b1110000000000000-> 0 (cidr 27, 128 + 64 + 32) // 8 net0b1111000000000000-> 0 (cidr 28, 128 + 64 + 32 + 16) // 16 net0b1111100000000000-> 0 (cidr 29, 128 + 64 + 32 + 16 + 8) // 32 net0b1111110000000000-> 0 (cidr 30, 128 + 64 + 32 + 16 + 8 + 4) // 64 net0b1111111000000000-> 0 (cidr 31, 128 + 64 + 32 + 16 + 8 + 4 + 2) // 128 net0b1111111100000000-> 0 (cidr 32, 128 + 64 + 32 + 16 + 8 + 4 + 2 + 1) // 256 net
-- stagging (perhitungan ip cidr 16 keatas) max int 16 bit: 65536
- /16 :
0b0000000000000000= 0 - /17 :
0b1000000000000000= 32768, maka 65536 / 32768 = 2, alias 2 network, 32768 hosts - /18 :
0b1100000000000000= 49152, maka 65536 / (65536 - 49152) = 4 network, 16384 hosts, - /19 :
0b1110000000000000= 57344, maka 65536 / (65536 - 57344) = 8 network, 8192 hosts, - /20 :
0b1111000000000000= 61440, maka 65536 / (65536 - 61440) = 16 network, 4096 hosts, - /21 :
0b1111100000000000= 61440, maka 65536 / (65536 - 61440) = 32 network, 2048 hosts, - /22 :
0b1111110000000000= 64512, maka 65536 / (65536 - 64512) = 64 network, 1024 hosts, - /23 :
0b1111111000000000= 64512, maka 65536 / (65536 - 64512) = 128 network, 512 hosts, - /24 :
0b1111111100000000= 64512, maka 65536 / (65536 - 64512) = 256 network, 256 hosts,
-- stagging cidr 8 keatas max int int 24 bit: 16777216
-
/9 :
0b100000000000000000000000= 16777216 / (16777216 - 8388608) = 2 network, 8388608 hosts -
/10:
0b110000000000000000000000= 16777216 / (16777216 - 12582912)= 4 network, 4194304 hosts -
/11:
0b111000000000000000000000= 16777216 / (16777216 - 14680064)= 8 network, 2097152 hosts -
/12:
0b111100000000000000000000= 16777216 / (16777216 - 15728640)= 16 network, 1048576 hosts -
/13:
0b111110000000000000000000= 16777216 / (16777216 - 16252928)= 32 network, 524288 hosts -
/14:
0b111111000000000000000000= 16777216 / (16777216 - 16515072) = 64 network, 262144 hosts -
/15:
0b111111100000000000000000= 16777216 / (16777216 - 16646144) = 128 network, 131072 hosts -
/16:
0b111111110000000000000000= 16777216 / (16777216 - 16711680) = 256 network, 65536 hosts -
/17:
0b111111111000000000000000= 16777216 / (16777216 - 16744448) = 512 network, 32768 hosts -
/18:
0b111111111100000000000000= 16777216 / (16777216 - 16760832) = 1024 network, 16384 hosts -
/19:
0b111111111110000000000000= 16777216 / (16777216 - 16769024) = 2048 network, 8192 hosts -
/20:
0b111111111111000000000000= 16777216 / (16777216 - 16773120) = 4096 network, 4096 hosts -
/21:
0b111111111111100000000000= 16777216 / (16777216 - 16775168) = 8192 network, 2048 hosts -
/9 : 0b100000000000000000000000:
kumpulan rumus rumus
subnet
rumusnya: \( 2^{jumlah \space angka \space 1 \space di \space setiap \space padding \space subnet}\)
contoh
- prefix /19, pad terdekatnya /16, maka dari 16 ke 19 ada 3 angka 1 (
0b11100000), maka jumlah subnet yang akan terbentuk adalah 2^3 = 8 subnet - prefix /26, pad terdekatnya 24, maka dari 24 ke 26 ada 2 angka 1 (
0b11000000), maka jumlah subnetnya 2^2 = 4
jumlah hosts
rumusnya: \( 2^{jumlah \space angka \space 0 \space dari \space 32} \)
contoh
- prefix /19, 32 - 19 = 13 angka 0, maka \( 2^{13} = 8192 \space hosts \)
- prefix /26, 32 - 26 = 6 angka 0, maka \( 2^{6} = 64 \space hosts \)
- prefix /8, 32 - 8 = 24 angka 0, maka \( 2^{24} = 16777216 \space hosts \)
Inter-VLAN routing
how to config vlan inter-VLAN routing
topology:
- VNET1:192.168.10.0/24 (vlan 10)
- PC1: 192.168.10.2
- PC2: 192.168.10.3
- VNET2:192.168.20.0/24 (vlan 20)
- PC3: 192.168.20.2
- PC4: 192.168.20.3
- ROUTER IP (fa0/0.10): 192.168.10.1
- ROUTER IP (fa0/0.20): 192.168.20.1
SCRIPTS
management
-
show vlan brief: show all configured vlansetup vlan (tanpa setup ip dulu)
Switch>enable Switch#conf t Enter configuration commands, one per line. End with CNTL/Z. Switch(config)#vlan 10 Switch(config-vlan)#name SALES Switch(config-vlan)#ex Switch(config)#vlan 20 Switch(config-vlan)#name ITlalu setup mode
- trunk: untuk switch ke router
- access: untuk switch ke PC
setup untuk vlan 10 dan 10, masing2 dengan network 192.168.10.0/24 dan 192.168.20.0/24
script:
Switch#conf t Enter configuration commands, one per line. End with CNTL/Z. Switch(config)#int fa0/1 Switch(config-if)#switchport mode access Switch(config-if)#switchport access vlan 10 Switch(config-if)#ex Switch(config)#int fa0/2 Switch(config-if)#switchport mode access Switch(config-if)#switchport access vlan 10 Switch(config-if)#ex Switch(config)#int fa0/3 Switch(config-if)#switchport mode access Switch(config-if)#switchport access vlan 20 Switch(config-if)#ex Switch(config)#int fa0/4 Switch(config-if)#switchport mode access Switch(config-if)#switchport access vlan 20 Switch(config-if)#ex Switch(config)#alternative script
Switch(config-if)#int range fa0/1-4 Switch(config-if-range)#switchport mode accessconfig untuk port fa0/5 ke router (pakai mode trunk)
Switch(config)#int fa0/5 Switch(config-if)#switchport mode trunk Switch(config-if)#inter-VLAN routing
enable port Fa0/0 (tanpa assign ip dahulu)
Router(config)#int fa0/0 Router(config-if)#no shut Router(config-if)# %LINK-5-CHANGED: Interface FastEthernet0/0, changed state to up %LINEPROTO-5-UPDOWN: Line protocol on Interface FastEthernet0/0, changed state to upassign ip untuk masing2 vlan
Router(config)#interface FastEthernet0/0 Router(config-if)#int fa0/0.10 Router(config-subif)# %LINK-5-CHANGED: Interface FastEthernet0/0.10, changed state to up %LINEPROTO-5-UPDOWN: Line protocol on Interface FastEthernet0/0.10, changed state to up Router(config-subif)#encapsulation dot1q 10 Router(config-subif)#ip add 192.168.10.1 255.255.255.0 Router(config-subif)#ex Router(config)#int fa0/0.20 Router(config-subif)# %LINK-5-CHANGED: Interface FastEthernet0/0.20, changed state to up %LINEPROTO-5-UPDOWN: Line protocol on Interface FastEthernet0/0.20, changed state to up Router(config-subif)#encapsulation dot1q 20 Router(config-subif)#ip add 192.168.20.1 255.255.255.0 Router(config-subif)#hasil output
show vlan briefSwitch>show vlan brief VLAN Name Status Ports ---- -------------------------------- --------- ------------------------------- 1 default active Fa0/6, Fa0/7, Fa0/8, Fa0/9 Fa0/10, Fa0/11, Fa0/12, Fa0/13 Fa0/14, Fa0/15, Fa0/16, Fa0/17 Fa0/18, Fa0/19, Fa0/20, Fa0/21 Fa0/22, Fa0/23, Fa0/24, Gig0/1 Gig0/2 10 SALES active Fa0/1, Fa0/2 20 IT active Fa0/3, Fa0/4 1002 fddi-default active 1003 token-ring-default active 1004 fddinet-default active 1005 trnet-default active Switch>tambahan
- encapsulation dot1q: router on stick routing
Advanced switch cisco command
Tealinux qemu promp & testing
create image
qemu-img create -f qcow2 <NAME>.img 45G- Change 45G with your desired size
running system on BIOS mode
this will open SSH connection on port 20022
live
qemu-system-x86_64 \ -enable-kvm \ -boot order=d \ -cdrom tealinux-2025.02.16-x86_64.iso \ -drive file=tealinux.img,format=qcow2 \ -m 4G \ -enable-kvm \ -smp 4 \ -net user,hostfwd=tcp::20022-:22 \ -net nicnon-live
qemu-system-x86_64 \ -enable-kvm \ -boot order=d \ -drive file=tealinux.img,format=qcow2 \ -m 4G \ -enable-kvm \ -smp 4 \ -net user,hostfwd=tcp::20022-:22 \ -net nicrunning on UEFI mode
in order to running qemu on UEFI mode, we need edk2-ovmf
get your ovmf vars by running
cp /usr/share/edk2/x64/OVMF_VARS.4m.fd .live
qemu-system-x86_64 \ -enable-kvm \ -cdrom tealinux-2025.02.16-x86_64.iso \ -boot order=d \ -drive if=pflash,format=raw,readonly=on,file=/usr/share/edk2/x64/OVMF_CODE.4m.fd \ -drive if=pflash,format=raw,file=OVMF_VARS.4m.fd \ -drive file=tealinux.img,format=qcow2 \ -m 4G \ -enable-kvm \ -smp 4 \ -net user,hostfwd=tcp::20022-:22 \ -net nicnon-live
qemu-system-x86_64 \ -enable-kvm \ -boot order=d \ -drive if=pflash,format=raw,readonly=on,file=/usr/share/edk2/x64/OVMF_CODE.4m.fd \ -drive if=pflash,format=raw,file=OVMF_VARS.4m.fd \ -drive file=tealinux.img,format=qcow2 \ -m 4G \ -enable-kvm \ -smp 4 \ -net user,hostfwd=tcp::20022-:22 \ -net nicwindows
qemu-system-x86_64 \ -enable-kvm \ -boot order=d \ -cdrom Win10_22H2_English_x64v1.iso \ -drive file=windows-tealinux-mbr.img,format=qcow2 \ -m 4G \ -enable-kvm \ -smp 4 \ -net user,hostfwd=tcp::20022-:22 \ -net nicuefi version
qemu-system-x86_64 \ -enable-kvm \ -boot order=d \ -cdrom Win10_22H2_English_x64v1.iso \ -drive if=pflash,format=raw,readonly=on,file=/usr/share/edk2/x64/OVMF_CODE.4m.fd \ -drive if=pflash,format=raw,file=OVMF_VARS.4m.fd \ -drive file=tealinux.img,format=qcow2 \ -m 4G \ -enable-kvm \ -smp 4 \ -net user,hostfwd=tcp::20022-:22note: bug unwrap error
qemu-system-x86_64 \ -enable-kvm \ -boot order=d \ -cdrom tealinux-2025.02.16-x86_64.iso \ -drive if=pflash,format=raw,readonly=on,file=/usr/share/edk2/x64/OVMF_CODE.4m.fd \ -drive if=pflash,format=raw,file=OVMF_VARS.4m.fd \ -drive file=tealinux.img,format=qcow2 \ -m 4G \ -enable-kvm \ -smp 4 \ -net user,hostfwd=tcp::20022-:22 \ -net nicmisc
add more drive
in order add more drive, use this param
-drive file=img1.img,format=qcow2-drive file=img1.img,format=qcow2
forward more port
imagine you need to forward another port, not only ssh, the correct command is
-net user,hostfwd=tcp::10022-:22,hostfwd=tcp::8080-:8080,hostfwd=tcp::5173-:51735173 is our port.
Tealinux qemu promp & testing 2
Windows 10 section
this section show various command that windows related
running on GPT
- live
# clone uefi vars cp /usr/share/edk2/x64/OVMF_VARS.4m.fd . mv OVMF_VARS.4m.fd OVMF_VARS_windows_gpt.4m.fd # create image qemu-img create -f qcow2 windows_10_gpt_no_fb.img 50G # run iso qemu-system-x86_64 \ -enable-kvm \ -cdrom Win10_22H2_English_x64v1.iso \ -drive if=pflash,format=raw,readonly=on,file=/usr/share/edk2/x64/OVMF_CODE.4m.fd \ -drive if=pflash,format=raw,file=OVMF_VARS_windows_gpt.4m.fd \ -drive file=windows_10_gpt_no_fb.img,format=qcow2 \ -m 4G \ -smp 4- non live
# run iso qemu-system-x86_64 \ -enable-kvm \ -drive if=pflash,format=raw,readonly=on,file=/usr/share/edk2/x64/OVMF_CODE.4m.fd \ -drive if=pflash,format=raw,file=OVMF_VARS.4m.fd \ -drive file=windows_10_gpt_no_fb.img,format=qcow2 \ -m 4G \ -smp 4notes: run with vga
-vga virtio
running tealinux (alongside windows)
qemu-system-x86_64 \ -enable-kvm \ -cdrom tealinux-2025.02.16-x86_64.iso \ -drive if=pflash,format=raw,readonly=on,file=/usr/share/edk2/x64/OVMF_CODE.4m.fd \ -drive if=pflash,format=raw,file=OVMF_VARS_windows_gpt.4m.fd \ -drive file=windows_10_gpt_no_fb.img,format=qcow2 \ -m 4G \ -smp 4binary operation
catatan subnetting from scratch
origin: pakai acuan ip kelas c
jumlah hosts, misal cidr 24, itu max nya 256 kalau 0b11111111, kenapa 0b10000000 itu 128, dan kenapa 0b11000000 itu 192
ok, lalu kenapa jika cidr /26, itu 255.255.255.192, punya 64 hosts, 4 network. semua ini didapat dari (max int case ini 8 bit) / maxint - pad network
ini start dari /24
0b00000000-> 0 (katakanlah octet ke 4, cidr 24) // 1 network0b10000000-> 0 (cidr 25, 128 hosts) // 2 network0b11000000-> 0 (cidr 26, 128 + 64) // 4 network0b11100000-> 0 (cidr 27, 128 + 64 + 32) // 8 network0b11110000-> 0 (cidr 28, 128 + 64 + 32 + 16) // 16 network0b11111000-> 0 (cidr 29, 128 + 64 + 32 + 16 + 8) // 32 network0b11111100-> 0 (cidr 30, 128 + 64 + 32 + 16 + 8 + 4) // 64 network0b11111110-> 0 (cidr 31, 128 + 64 + 32 + 16 + 8 + 4 + 2) // 128 network0b11111111-> 0 (cidr 32, 128 + 64 + 32 + 16 + 8 + 4 + 2 + 1) // 256 network
start dari /16
0b0000000000000000-> 0 (cidr 16, 65535) // 1 net, 65535 hosts0b1000000000000000-> 0 (cidr 17, 65535 + ) // 2 net, 32767 hosts0b1100000000000000-> 0 (cidr 26, 128 + 64) // 4 net0b1110000000000000-> 0 (cidr 27, 128 + 64 + 32) // 8 net0b1111000000000000-> 0 (cidr 28, 128 + 64 + 32 + 16) // 16 net0b1111100000000000-> 0 (cidr 29, 128 + 64 + 32 + 16 + 8) // 32 net0b1111110000000000-> 0 (cidr 30, 128 + 64 + 32 + 16 + 8 + 4) // 64 net0b1111111000000000-> 0 (cidr 31, 128 + 64 + 32 + 16 + 8 + 4 + 2) // 128 net0b1111111100000000-> 0 (cidr 32, 128 + 64 + 32 + 16 + 8 + 4 + 2 + 1) // 256 net
-- stagging (perhitungan ip cidr 16 keatas) max int 16 bit: 65536
- /16 : 0b0000000000000000 = 0
- /17 : 0b1000000000000000 = 32768, maka 65536 / 32768 = 2, alias 2 network, 32768 hosts
- /18 : 0b1100000000000000 = 49152, maka 65536 / (65536 - 49152) = 4 network, 16384 hosts,
- /19 : 0b1110000000000000 = 57344, maka 65536 / (65536 - 57344) = 8 network, 8192 hosts,
- /20 : 0b1111000000000000 = 61440, maka 65536 / (65536 - 61440) = 16 network, 4096 hosts,
- /21 : 0b1111100000000000 = 61440, maka 65536 / (65536 - 61440) = 32 network, 2048 hosts,
- /22 : 0b1111110000000000 = 64512, maka 65536 / (65536 - 64512) = 64 network, 1024 hosts,
- /23 : 0b1111111000000000 = 64512, maka 65536 / (65536 - 64512) = 128 network, 512 hosts,
- /24 : 0b1111111100000000 = 64512, maka 65536 / (65536 - 64512) = 256 network, 256 hosts,
-- stagging cidr 8 keatas max int int 24 bit: 16777216
-
/9 : 0b100000000000000000000000 = 16777216 / (16777216 - 8388608) = 2 network, 8388608 hosts
-
/10: 0b110000000000000000000000 = 16777216 / (16777216 - 12582912)= 4 network, 4194304 hosts
-
/11: 0b111000000000000000000000 = 16777216 / (16777216 - 14680064)= 8 network, 2097152 hosts
-
/12: 0b111100000000000000000000 = 16777216 / (16777216 - 15728640)= 16 network, 1048576 hosts
-
/13: 0b111110000000000000000000 = 16777216 / (16777216 - 16252928)= 32 network, 524288 hosts
-
/14: 0b111111000000000000000000 = 16777216 / (16777216 - 16515072) = 64 network, 262144 hosts
-
/15: 0b111111100000000000000000 = 16777216 / (16777216 - 16646144) = 128 network, 131072 hosts
-
/16: 0b111111110000000000000000 = 16777216 / (16777216 - 16711680) = 256 network, 65536 hosts
-
/17: 0b111111111000000000000000 = 16777216 / (16777216 - 16744448) = 512 network, 32768 hosts
-
/18: 0b111111111100000000000000 = 16777216 / (16777216 - 16760832) = 1024 network, 16384 hosts
-
/19: 0b111111111110000000000000 = 16777216 / (16777216 - 16769024) = 2048 network, 8192 hosts
-
/20: 0b111111111111000000000000 = 16777216 / (16777216 - 16773120) = 4096 network, 4096 hosts
-
/21: 0b111111111111100000000000 = 16777216 / (16777216 - 16775168) = 8192 network, 2048 hosts
-
/9 : 0b100000000000000000000000:
set PATH fish shell
first, edit this
nvim /home/$(whoami)/.config/fish/config.fish
add this line before
if status is-interactiveset -gx PATH /new/path $PATHTree
Apa itu tree? tree adalah struktur data, dimana bentuknya menyerupai tree (perumpamaan saja), aslinya structur data ini berbentuk mirip linkedlists-double hanya saja, perumpamaan cabang kiri (diganti dgn nama prev), cabang kanan (diganti dgn nama next)
Perbedaan
- Linkedlists itu monoton, alias saling sambung menyambung dan flat.
- sedangkan tree tidak ada aturan harus saling menyambung, bisa saja linkedlists nya seperti ini
root -> next -> next -> next(dimana ini nanti akan membuat tree yang gambar visualnya bakal menjorok kekanan)jenis jenis transversal
- preorder (root, kiri, lalu ke-kanan)
- inorder (kiri, root, lalu ke-kanan)
- postorder (kiri, kanan, lalu ke-root)
nb: tranversal adalah cara mengunjungi simpul (tepat satu kali saja)
coding
sudah cukup hal non teknisnya, bagian ini akan membahas bagian koding
struct
struct untuk tree sangat mirip dgn struct untuk linked-list-double. di kasus ini struct dibawah hanya bisa hold data char saja. bisa diganti juga dgn int. dan lain lain
struct ListNode { char val; ListNode *prev; ListNode *next; ListNode(char x) : val(x), prev(nullptr), next(nullptr) {} };terlihat? selain hold data
valyang isinya char, kita ada opsi untuk hold pointer prev dan pointer next. dimana ini adalah kunci dari tree.contoh meng-isinya
ada tree seperti ini

ini contoh cara mengisinya
ListNode *head = new ListNode('A'); head->prev = new ListNode('B'); head->prev->prev = new ListNode('D'); head->prev->prev->next = new ListNode('G'); head->next = new ListNode('C'); head->next->next = new ListNode('F'); head->next->prev = new ListNode('E'); head->next->prev->prev = new ListNode('H'); head->next->prev->next = new ListNode('I');kenapa tidak pakai val? karna ketika kita
new ListNode('H');, secara otomatis kita mengisi val. val baru dipakai ketika mau diakses.contoh cara mengaksesnya
contoh singkat ada dibawah, contoh (komplit) nya silahkan klik disini
inorder
cout << "step 1: " << head->prev->prev->next->val << " " << head->prev->prev->val << " " << head->prev->val << " " << head->val << " " << head->next->prev->prev->val << " " << head->next->prev->val << " " << head->next->prev->next->val << " " << head->next->val << " " << head->next->next->val << endl;postorder
cout << "step 9: " << head->prev->prev->next->val << " " << head->prev->prev->val << " " << head->prev->val << " " << head->next->prev->prev->val << " " << head->next->prev->next->val << " " << head->next->prev->val << " " << head->next->next->val << " " << head->next->val << " " << head->val << endl;preorder
cout << "step 8: " << head->val << " " << head->prev->val << " " << head->prev->prev->val << " " << head->prev->prev->next->val << " " << head->next->val << " " << head->next->prev->val << " " << head->next->prev->prev->val << " " << head->next->prev->next->val << " " << head->next->next->val << endl;clang-format
here my clang format
IndentWidth: 8 Cpp11BracedListStyle: falsefilename:
.clang-formatGallery
july-2025
compiling arm gnu abi

old site unix man
